showman
-
Posts
2,437 -
Joined
-
Last visited
Everything posted by showman
-
Glad to mate....been a while since I was in Scotland. Thanks for your comments ^_^
-
Not fitted yet !! Need to fit perches and nest boxes in to see what space is left. I'm thinking of extractor fans in gable ends....again, more thought needed.
-
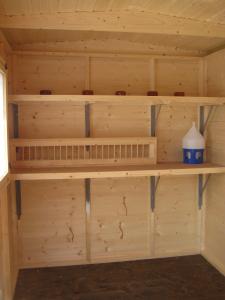
The YB loft will have perches for 24, and the OB loft will have 12 nest boxes. I'm thinking of 4 rows of 3, only a bit taller, so I can locate a 'shelf' in the box to site the 2nd nest bowl. Not sure......more thought needed !! I understand your thoughts regarding drawer type boxes and perches. Not really for me, my friend, as I prefer to have the birds standing on 'solid ground' not grilles or wire and then providing a block or similar for them to stand on. Cheers Alex, thanks for the comments, talk soon.
-
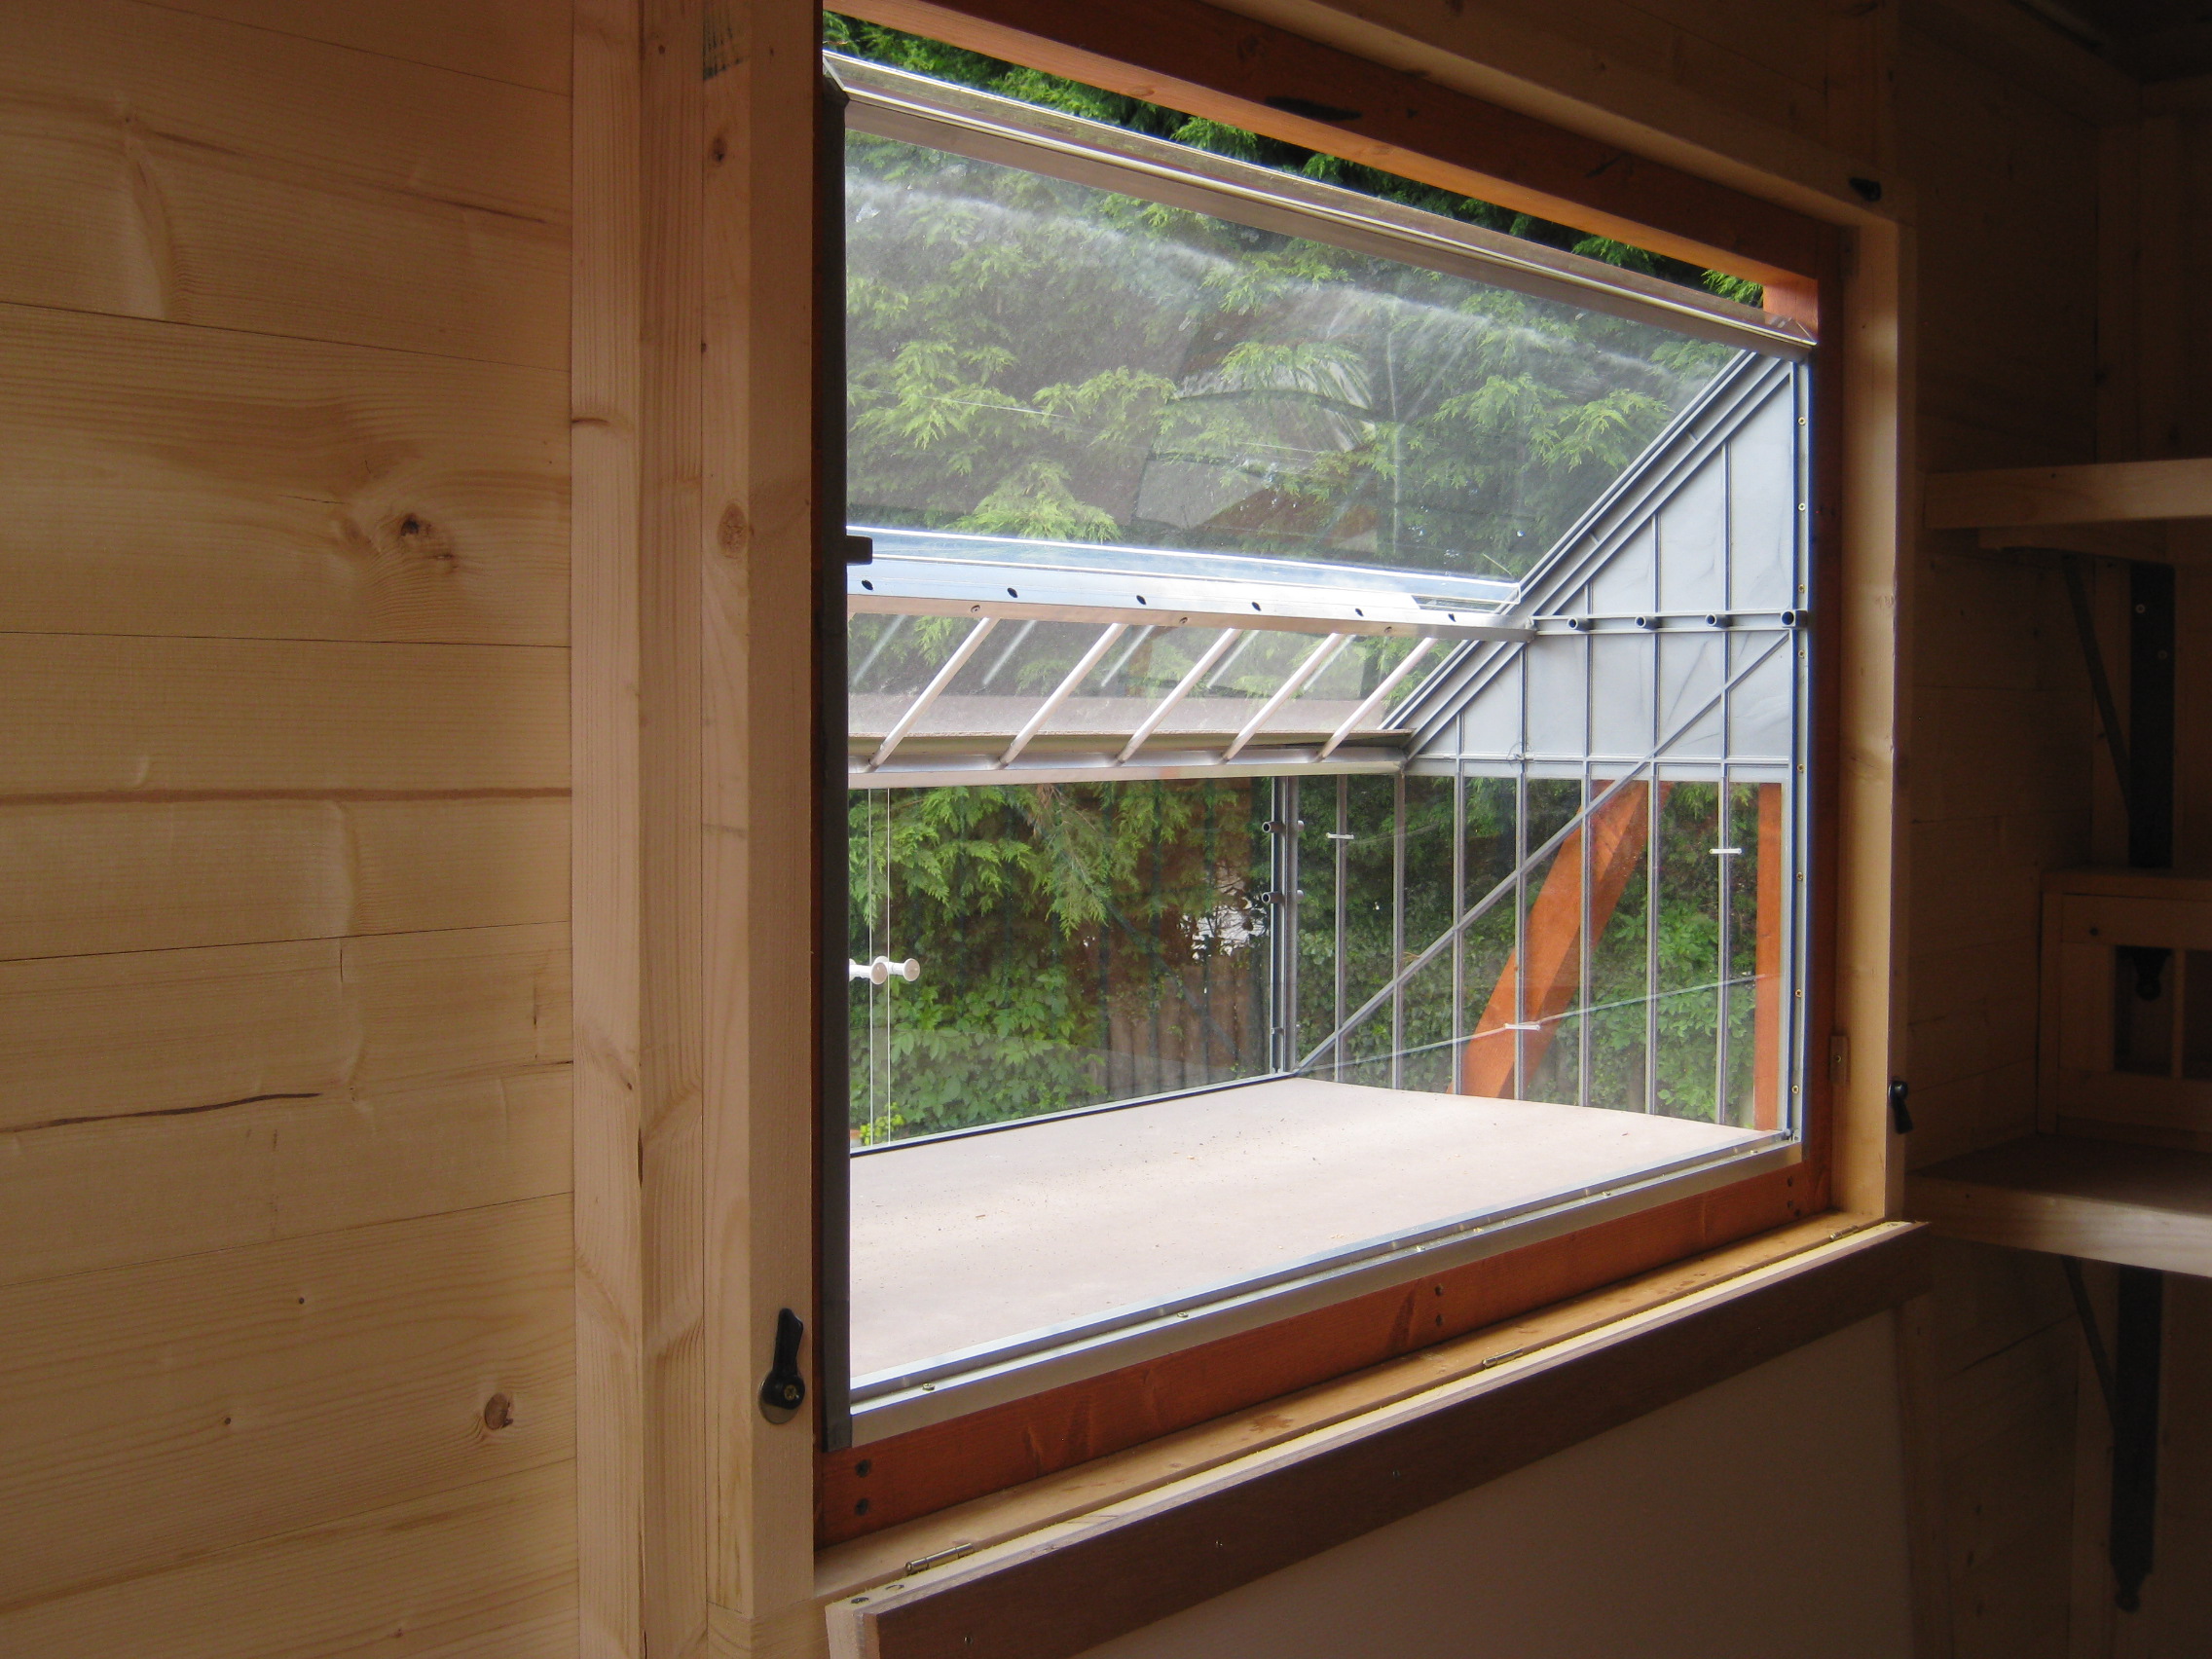
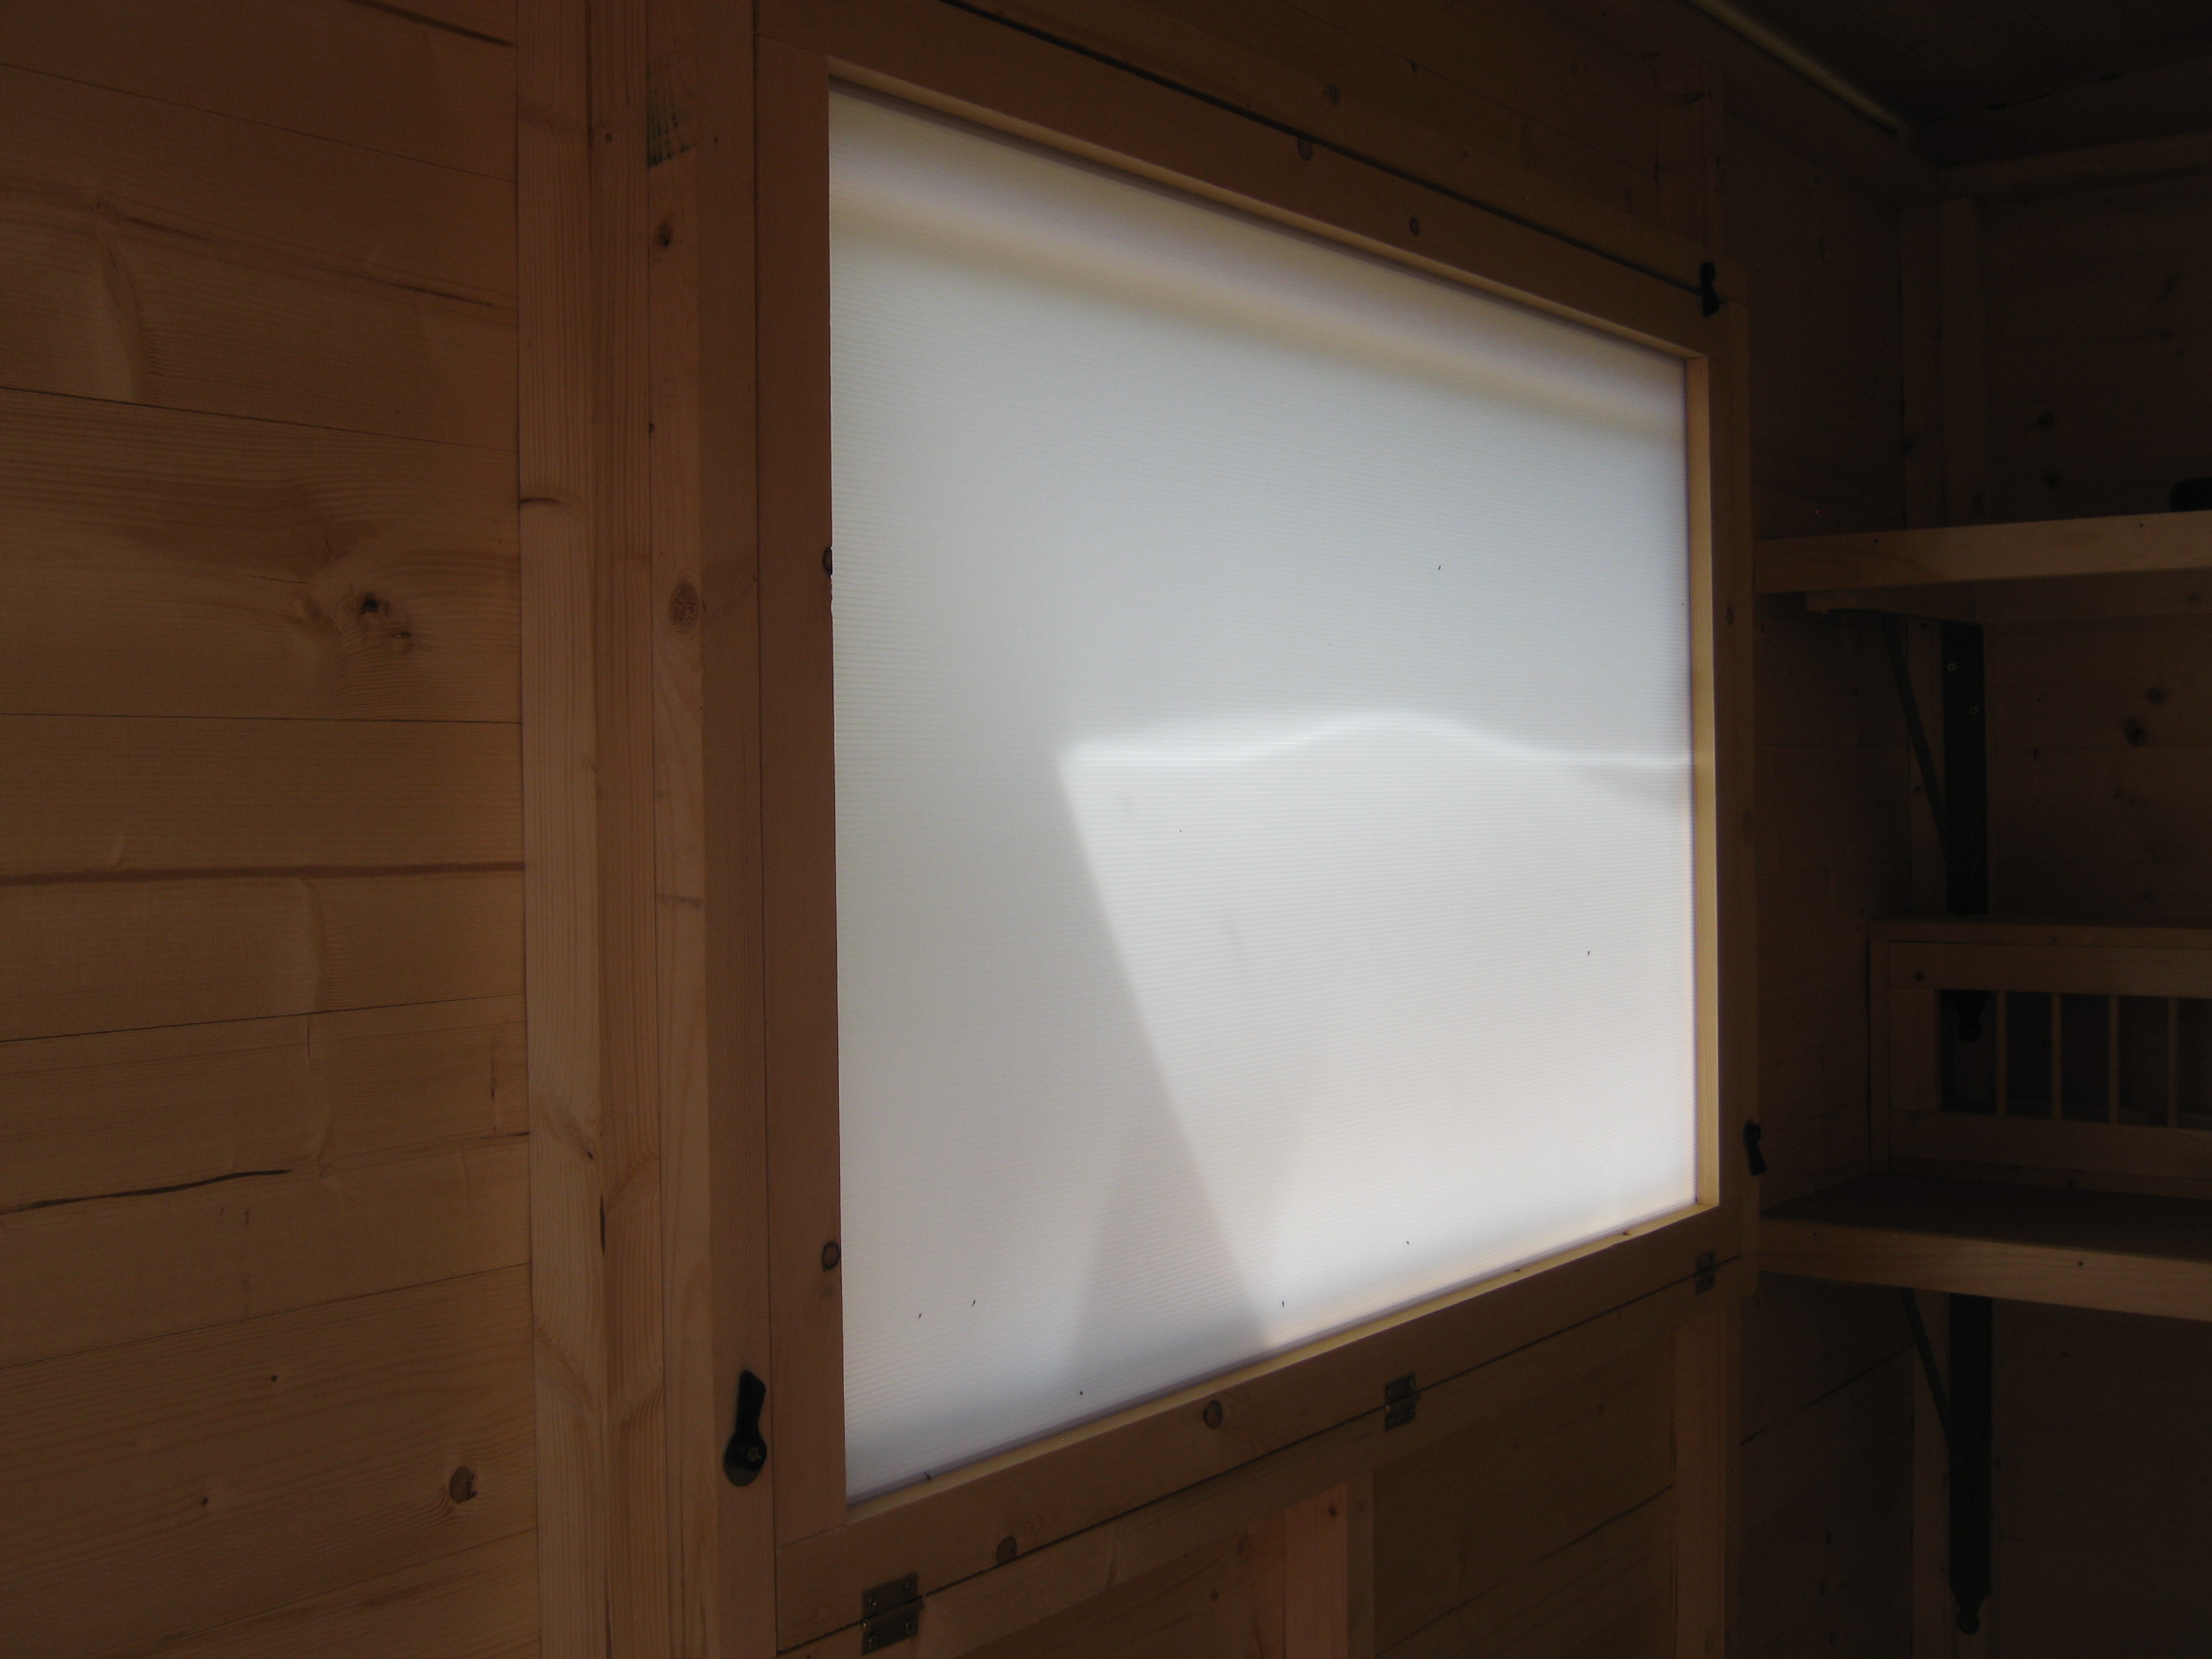
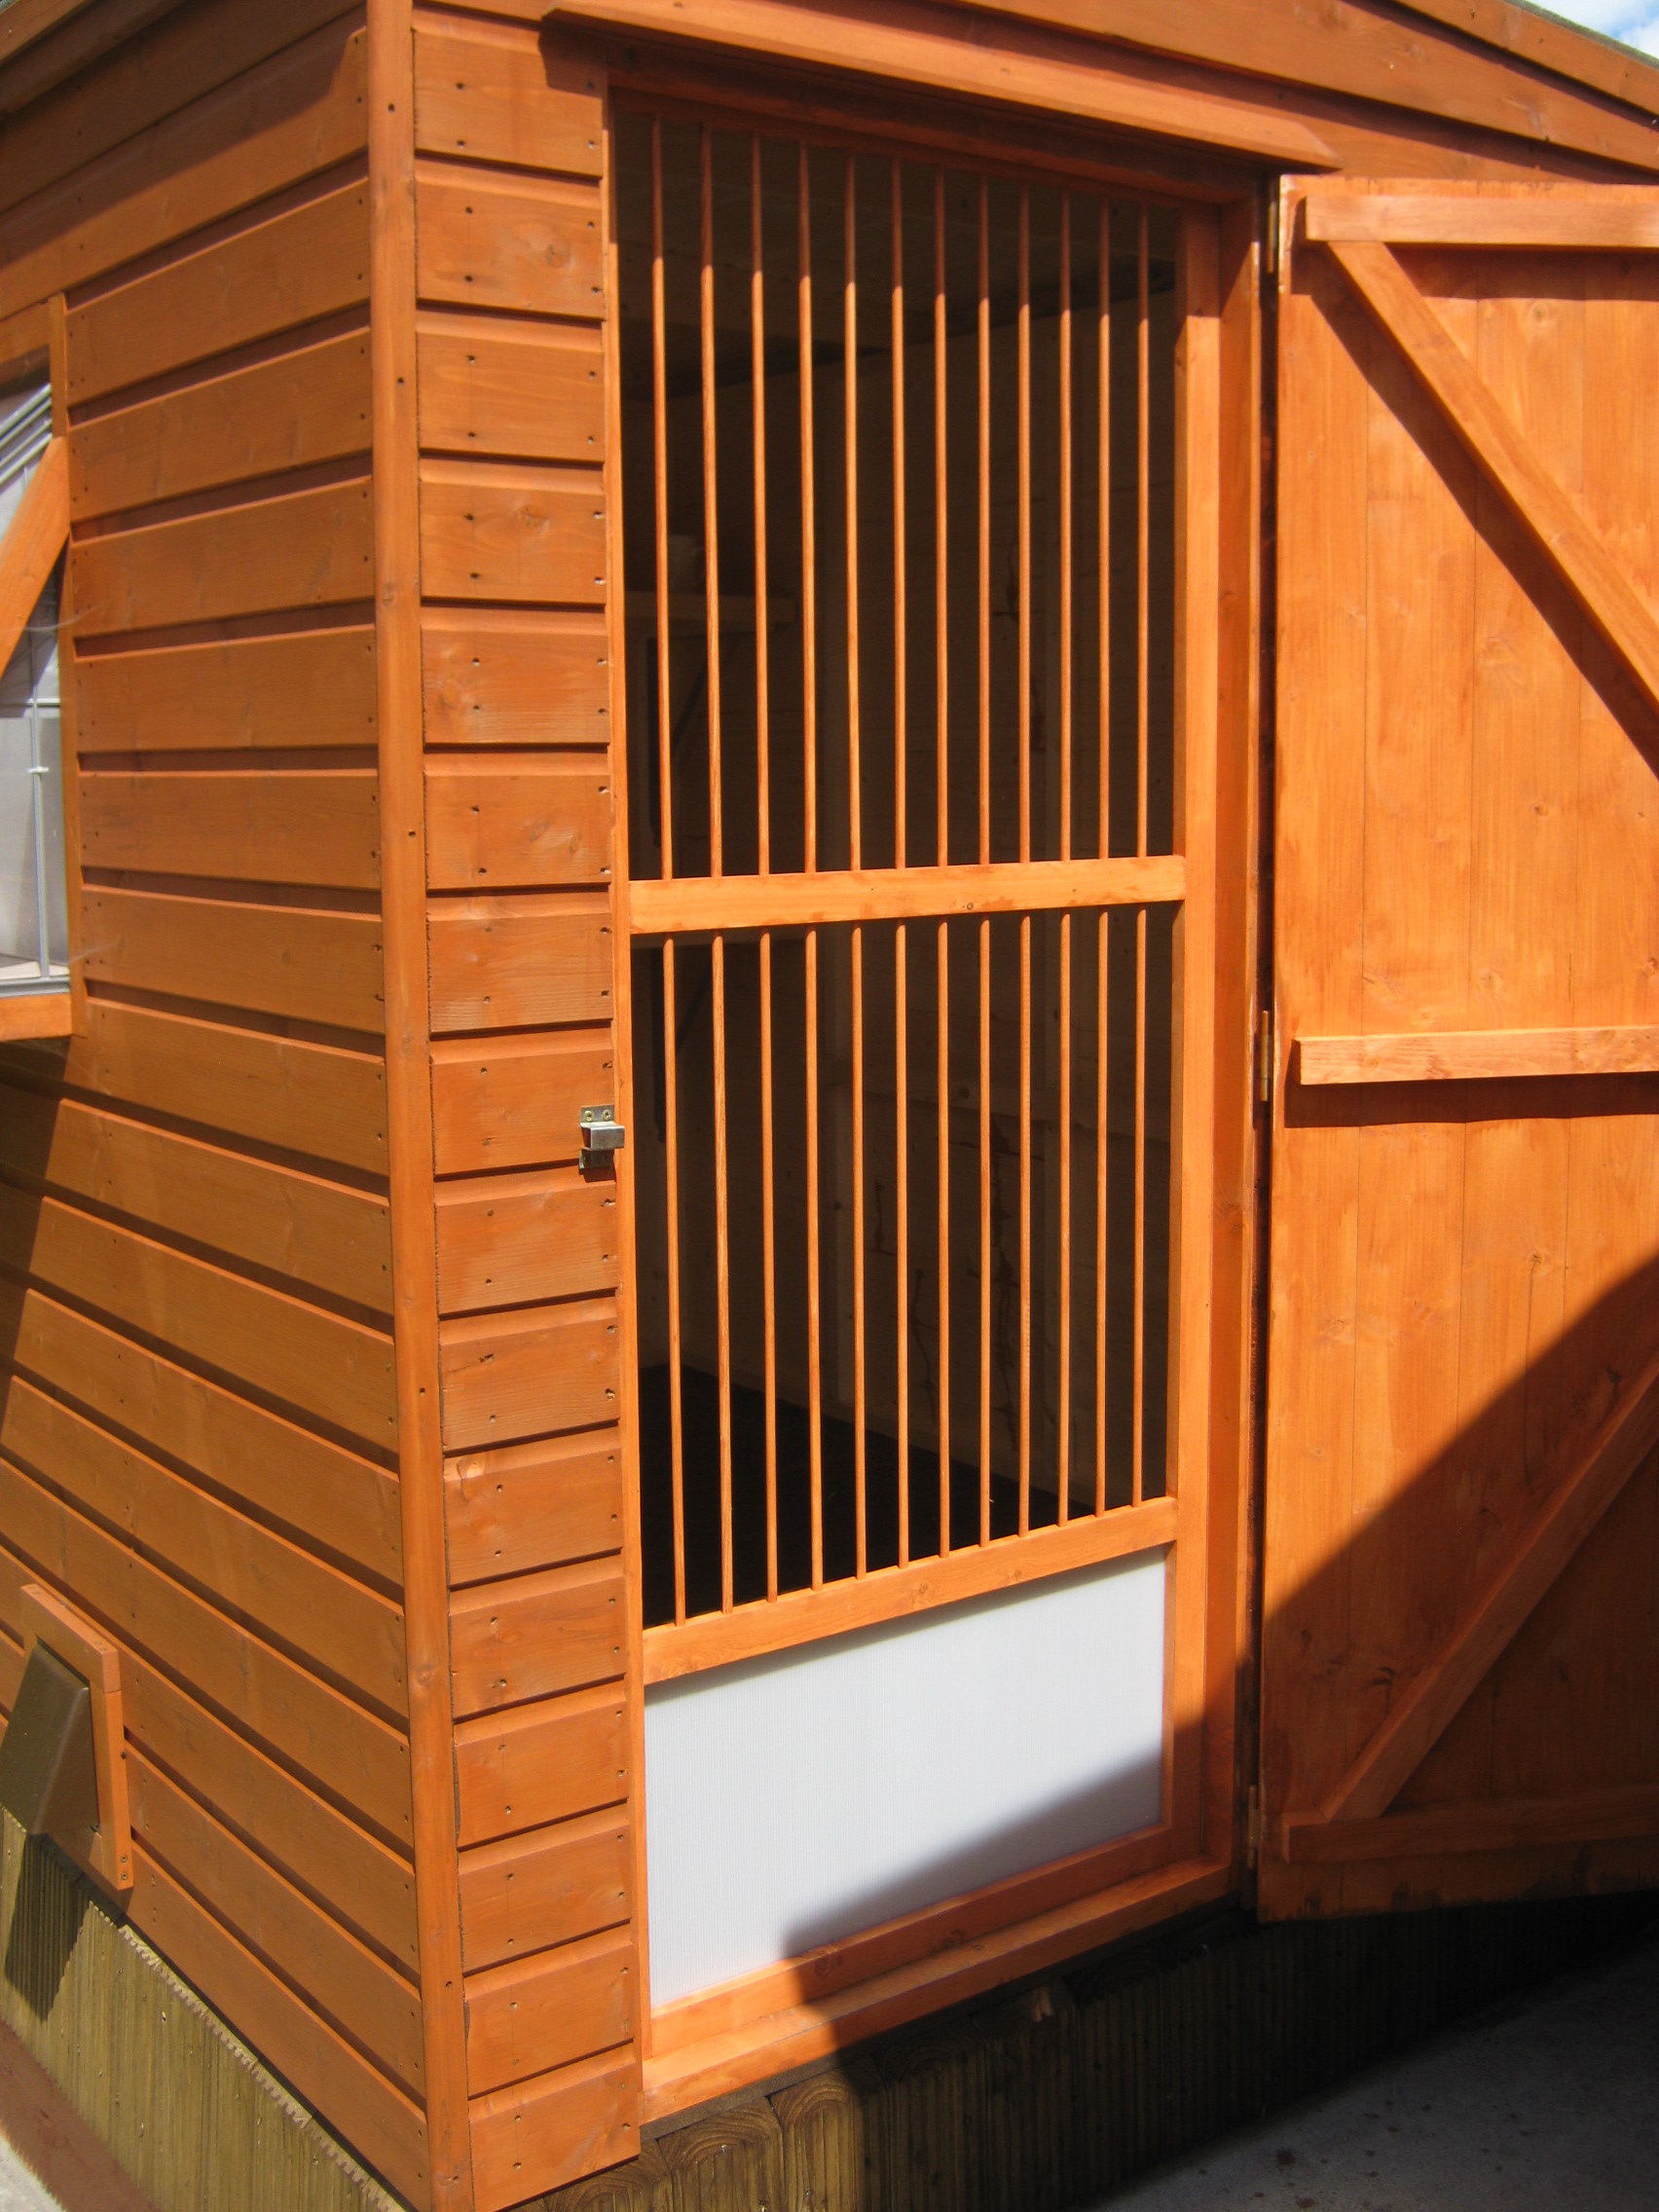
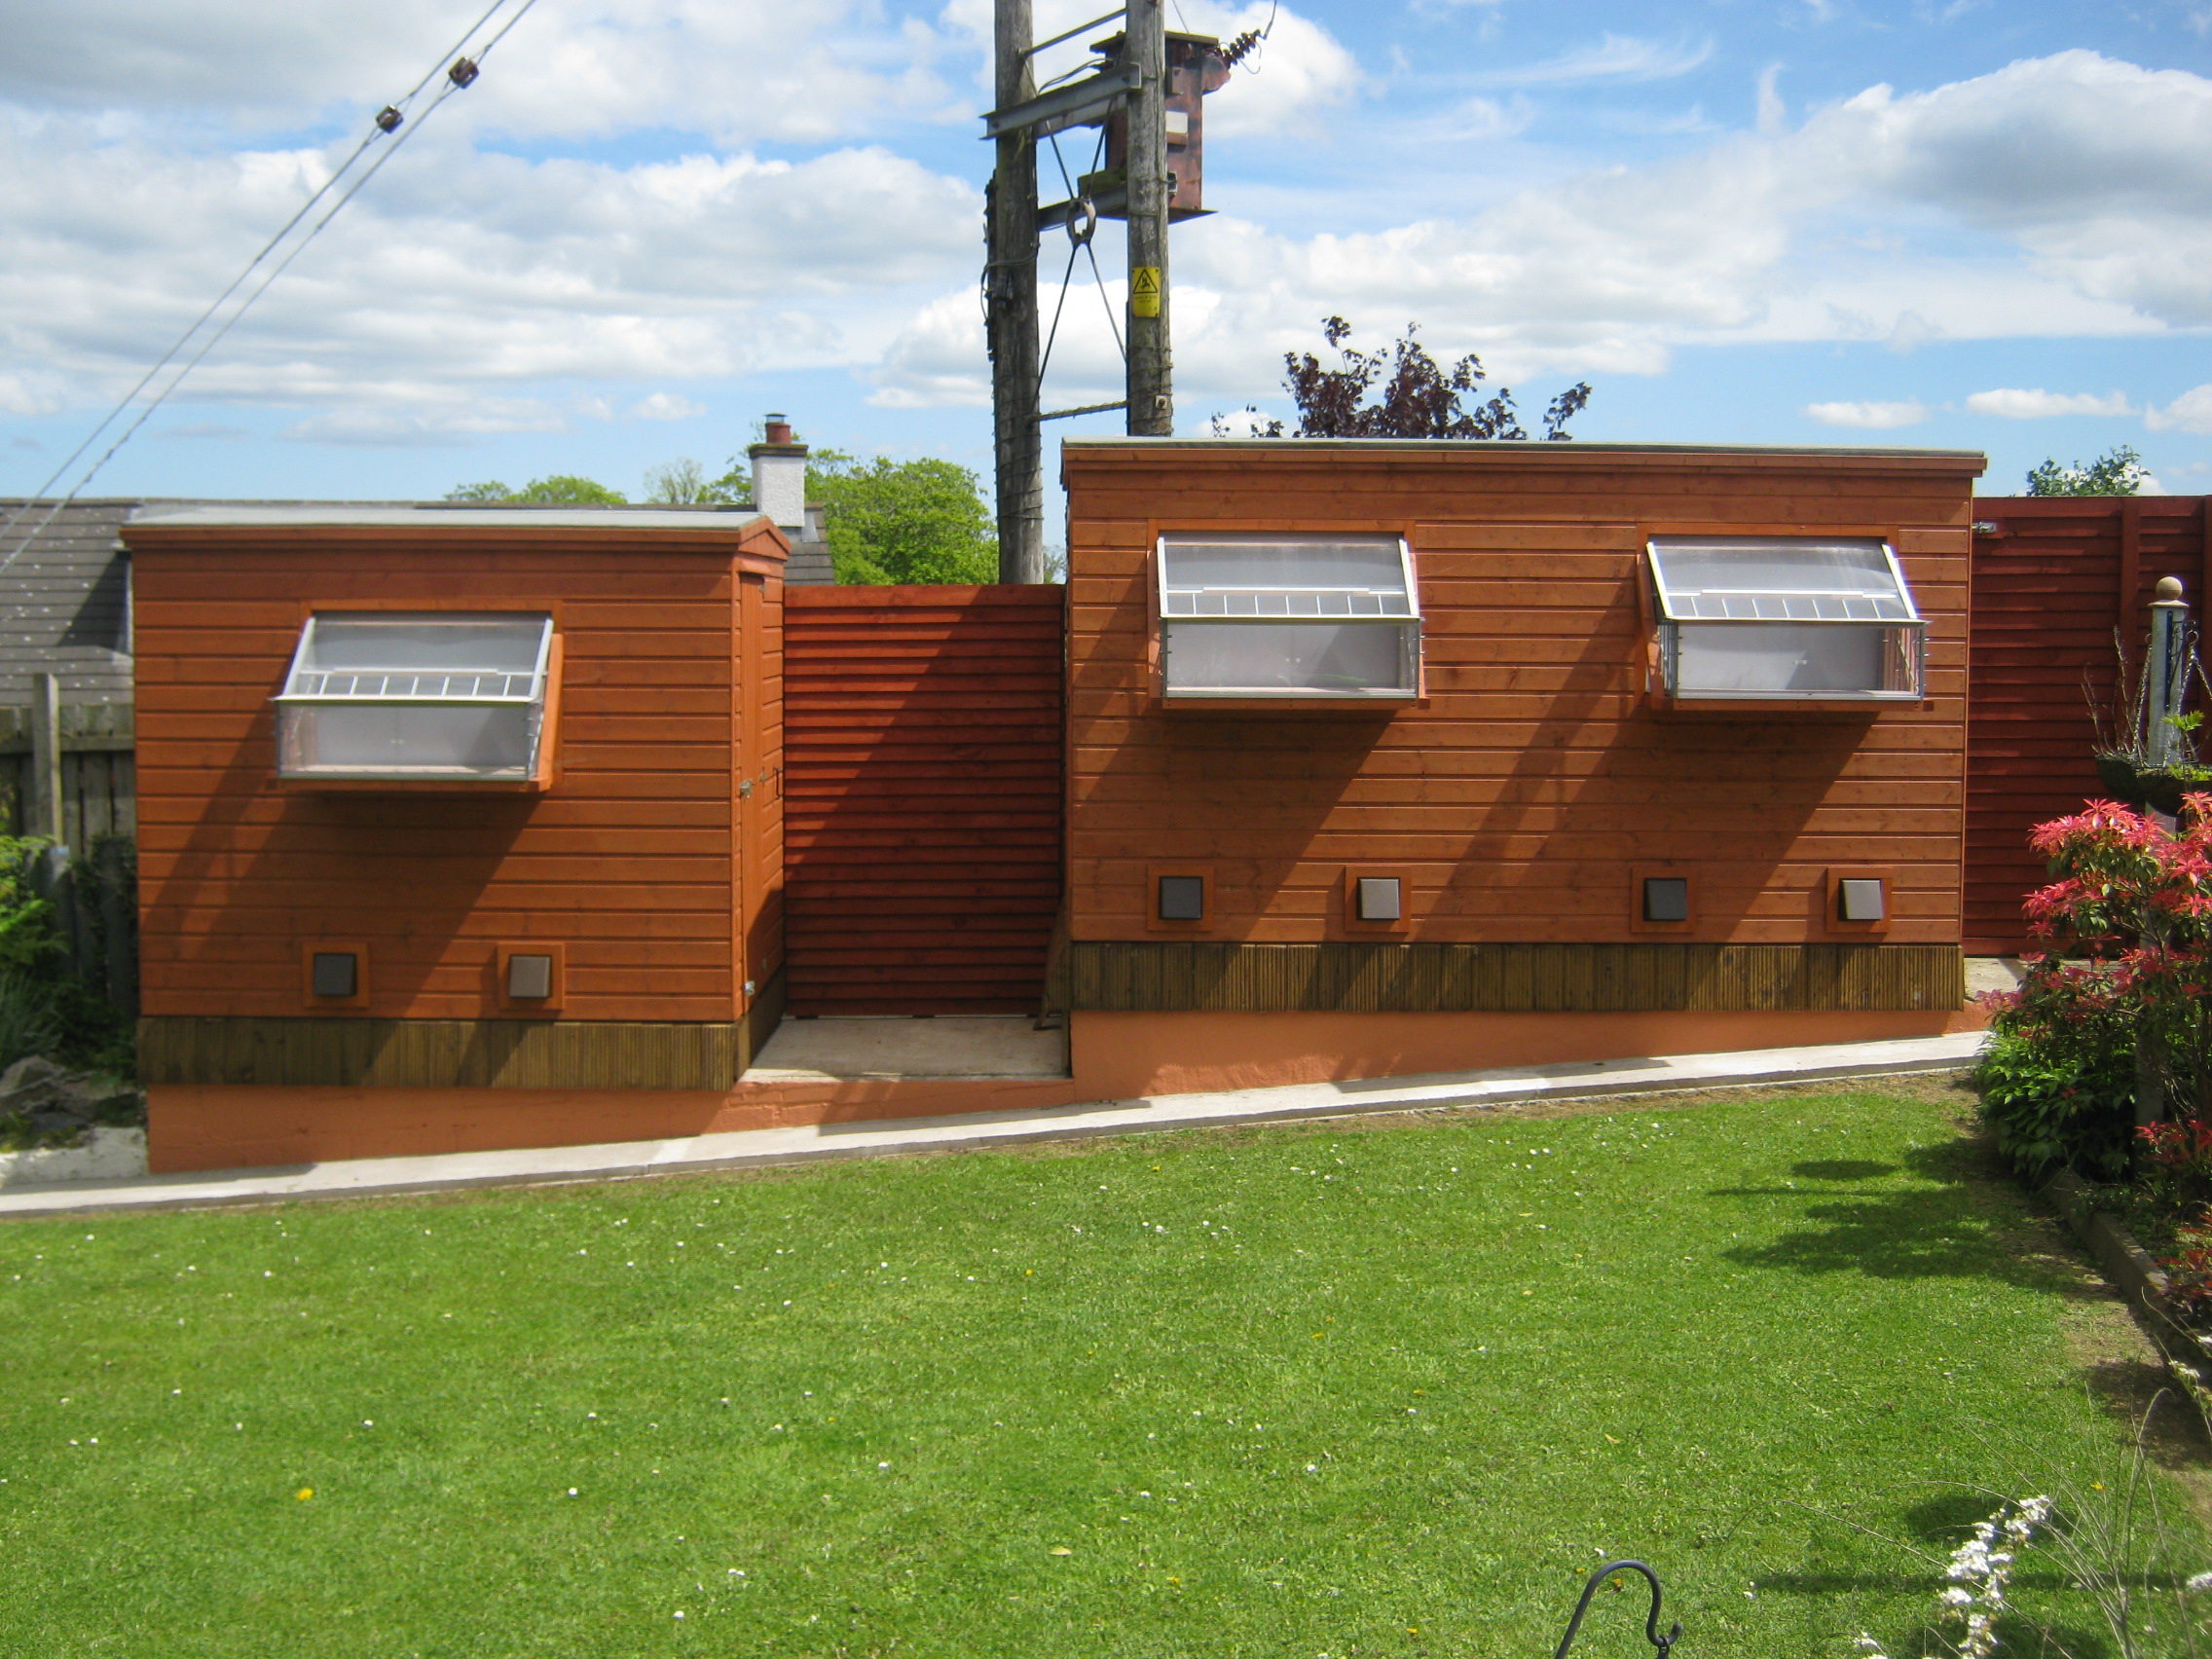
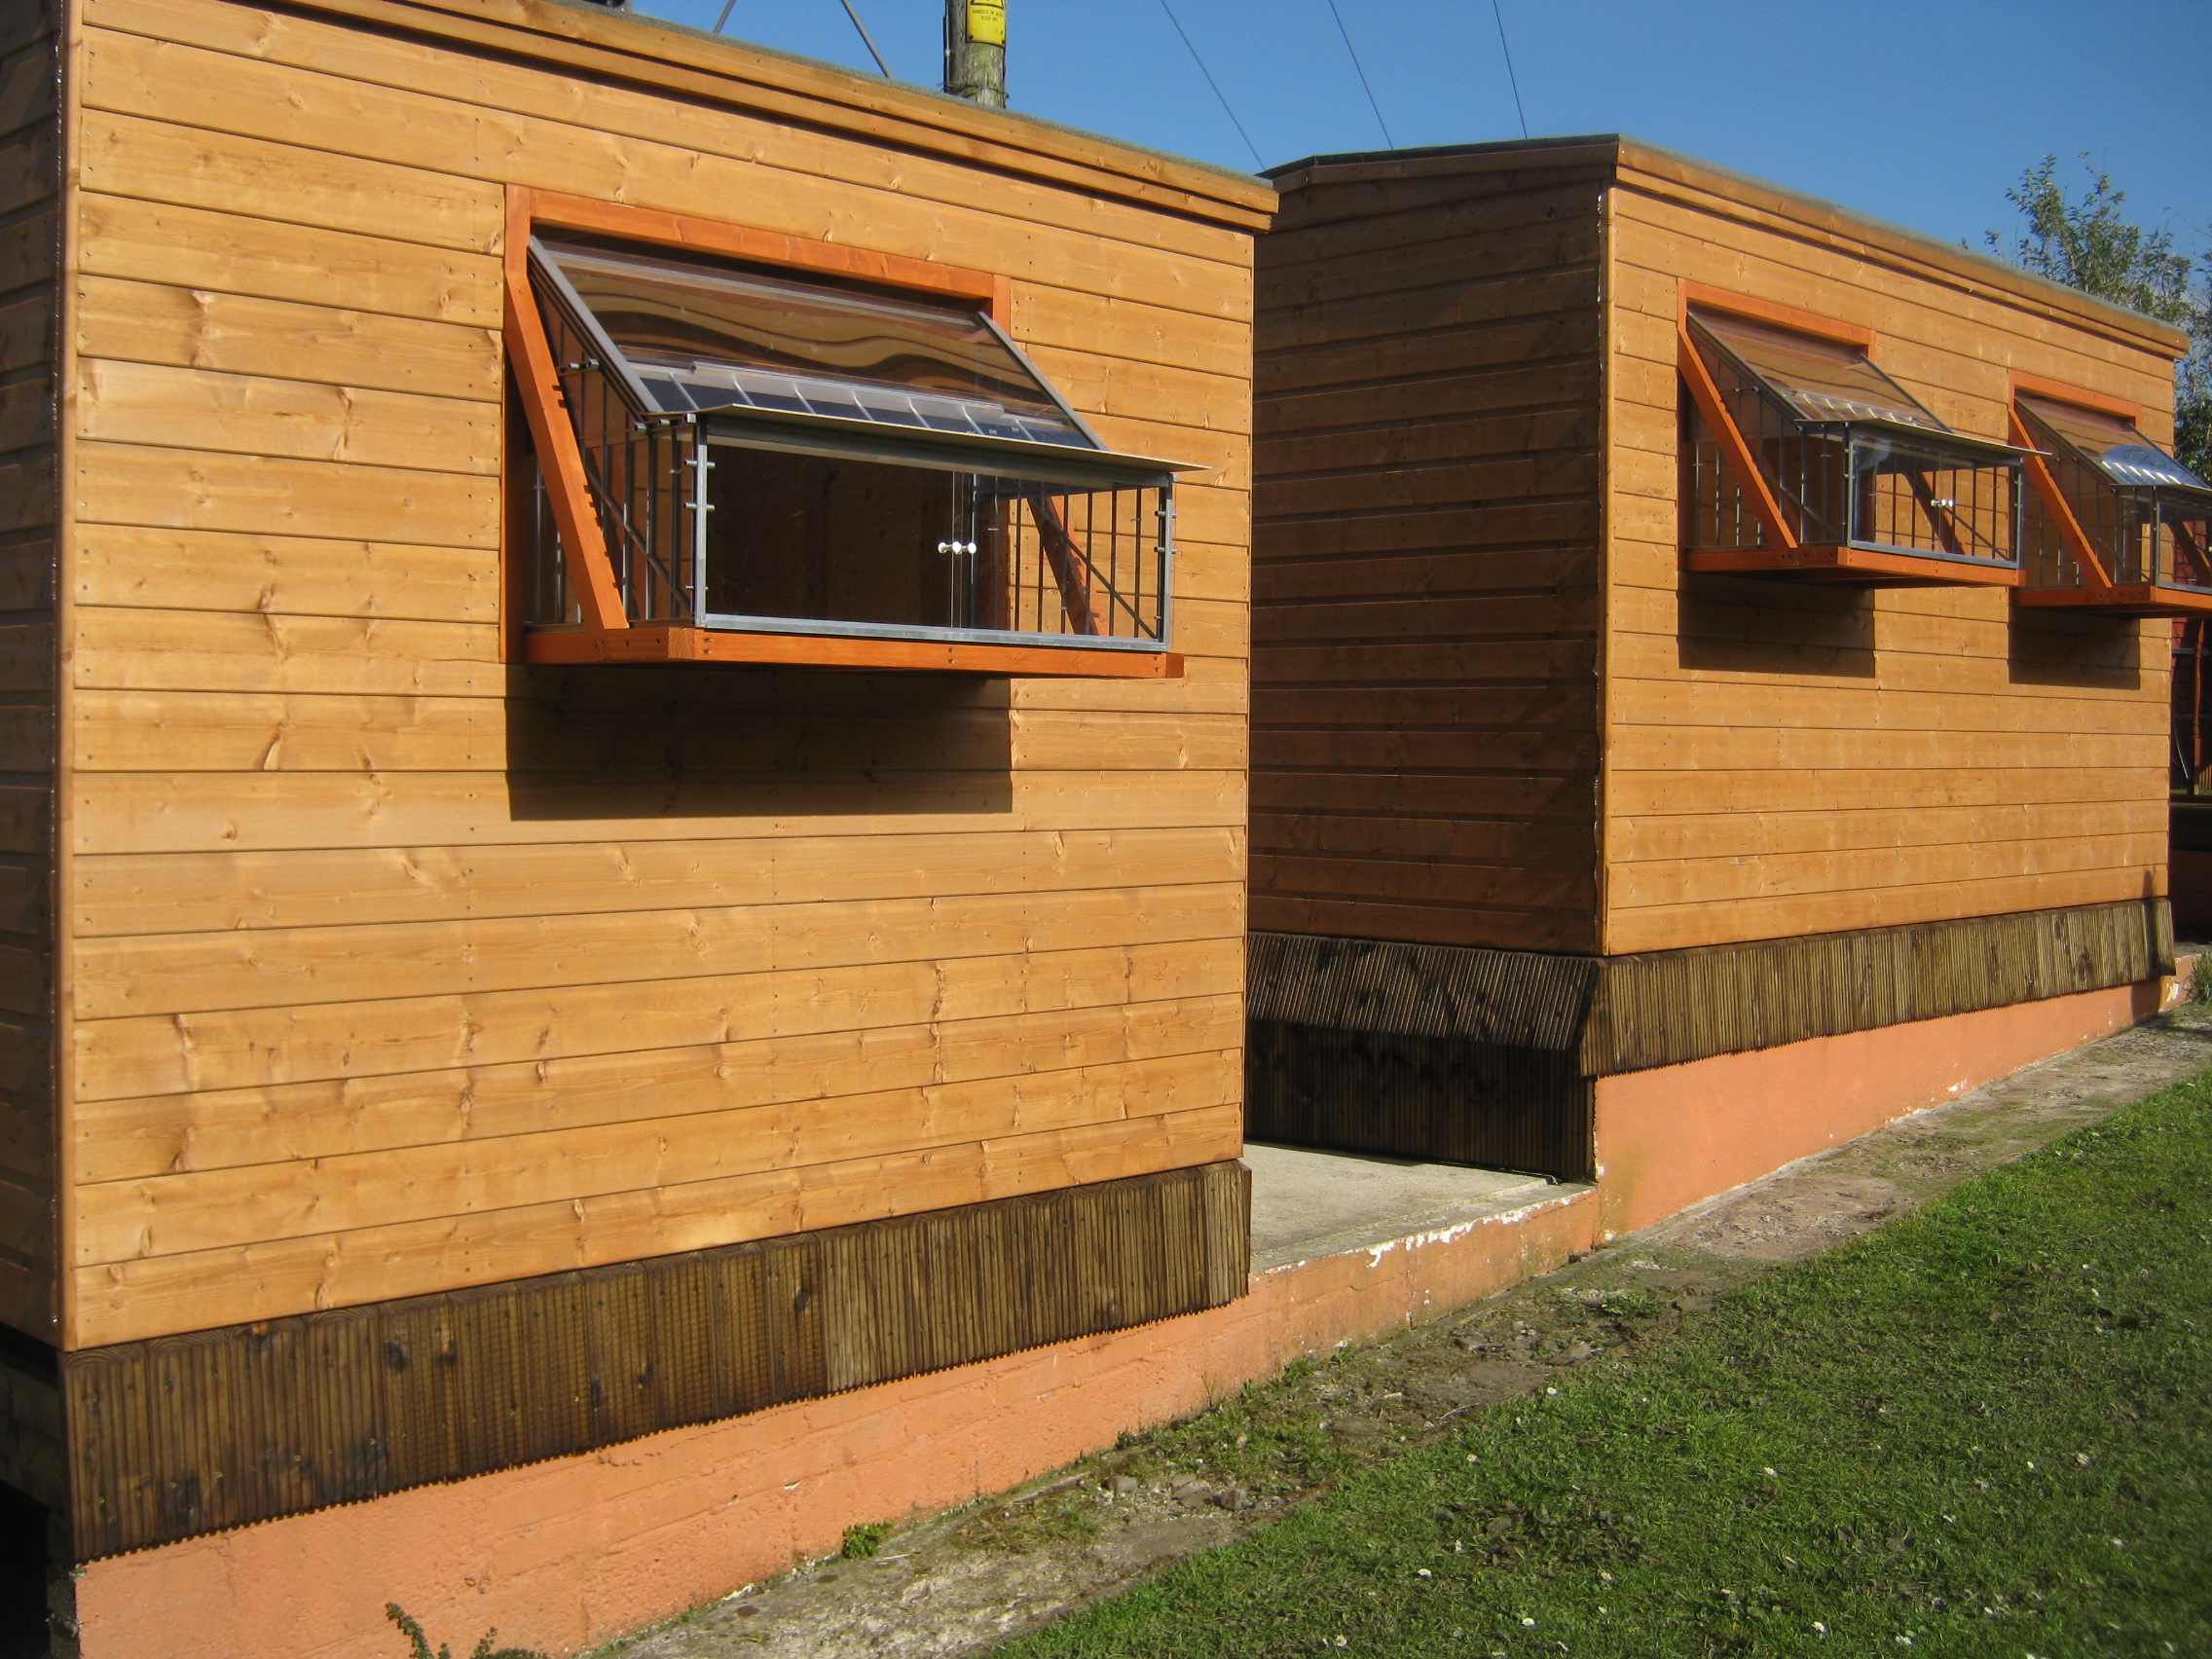
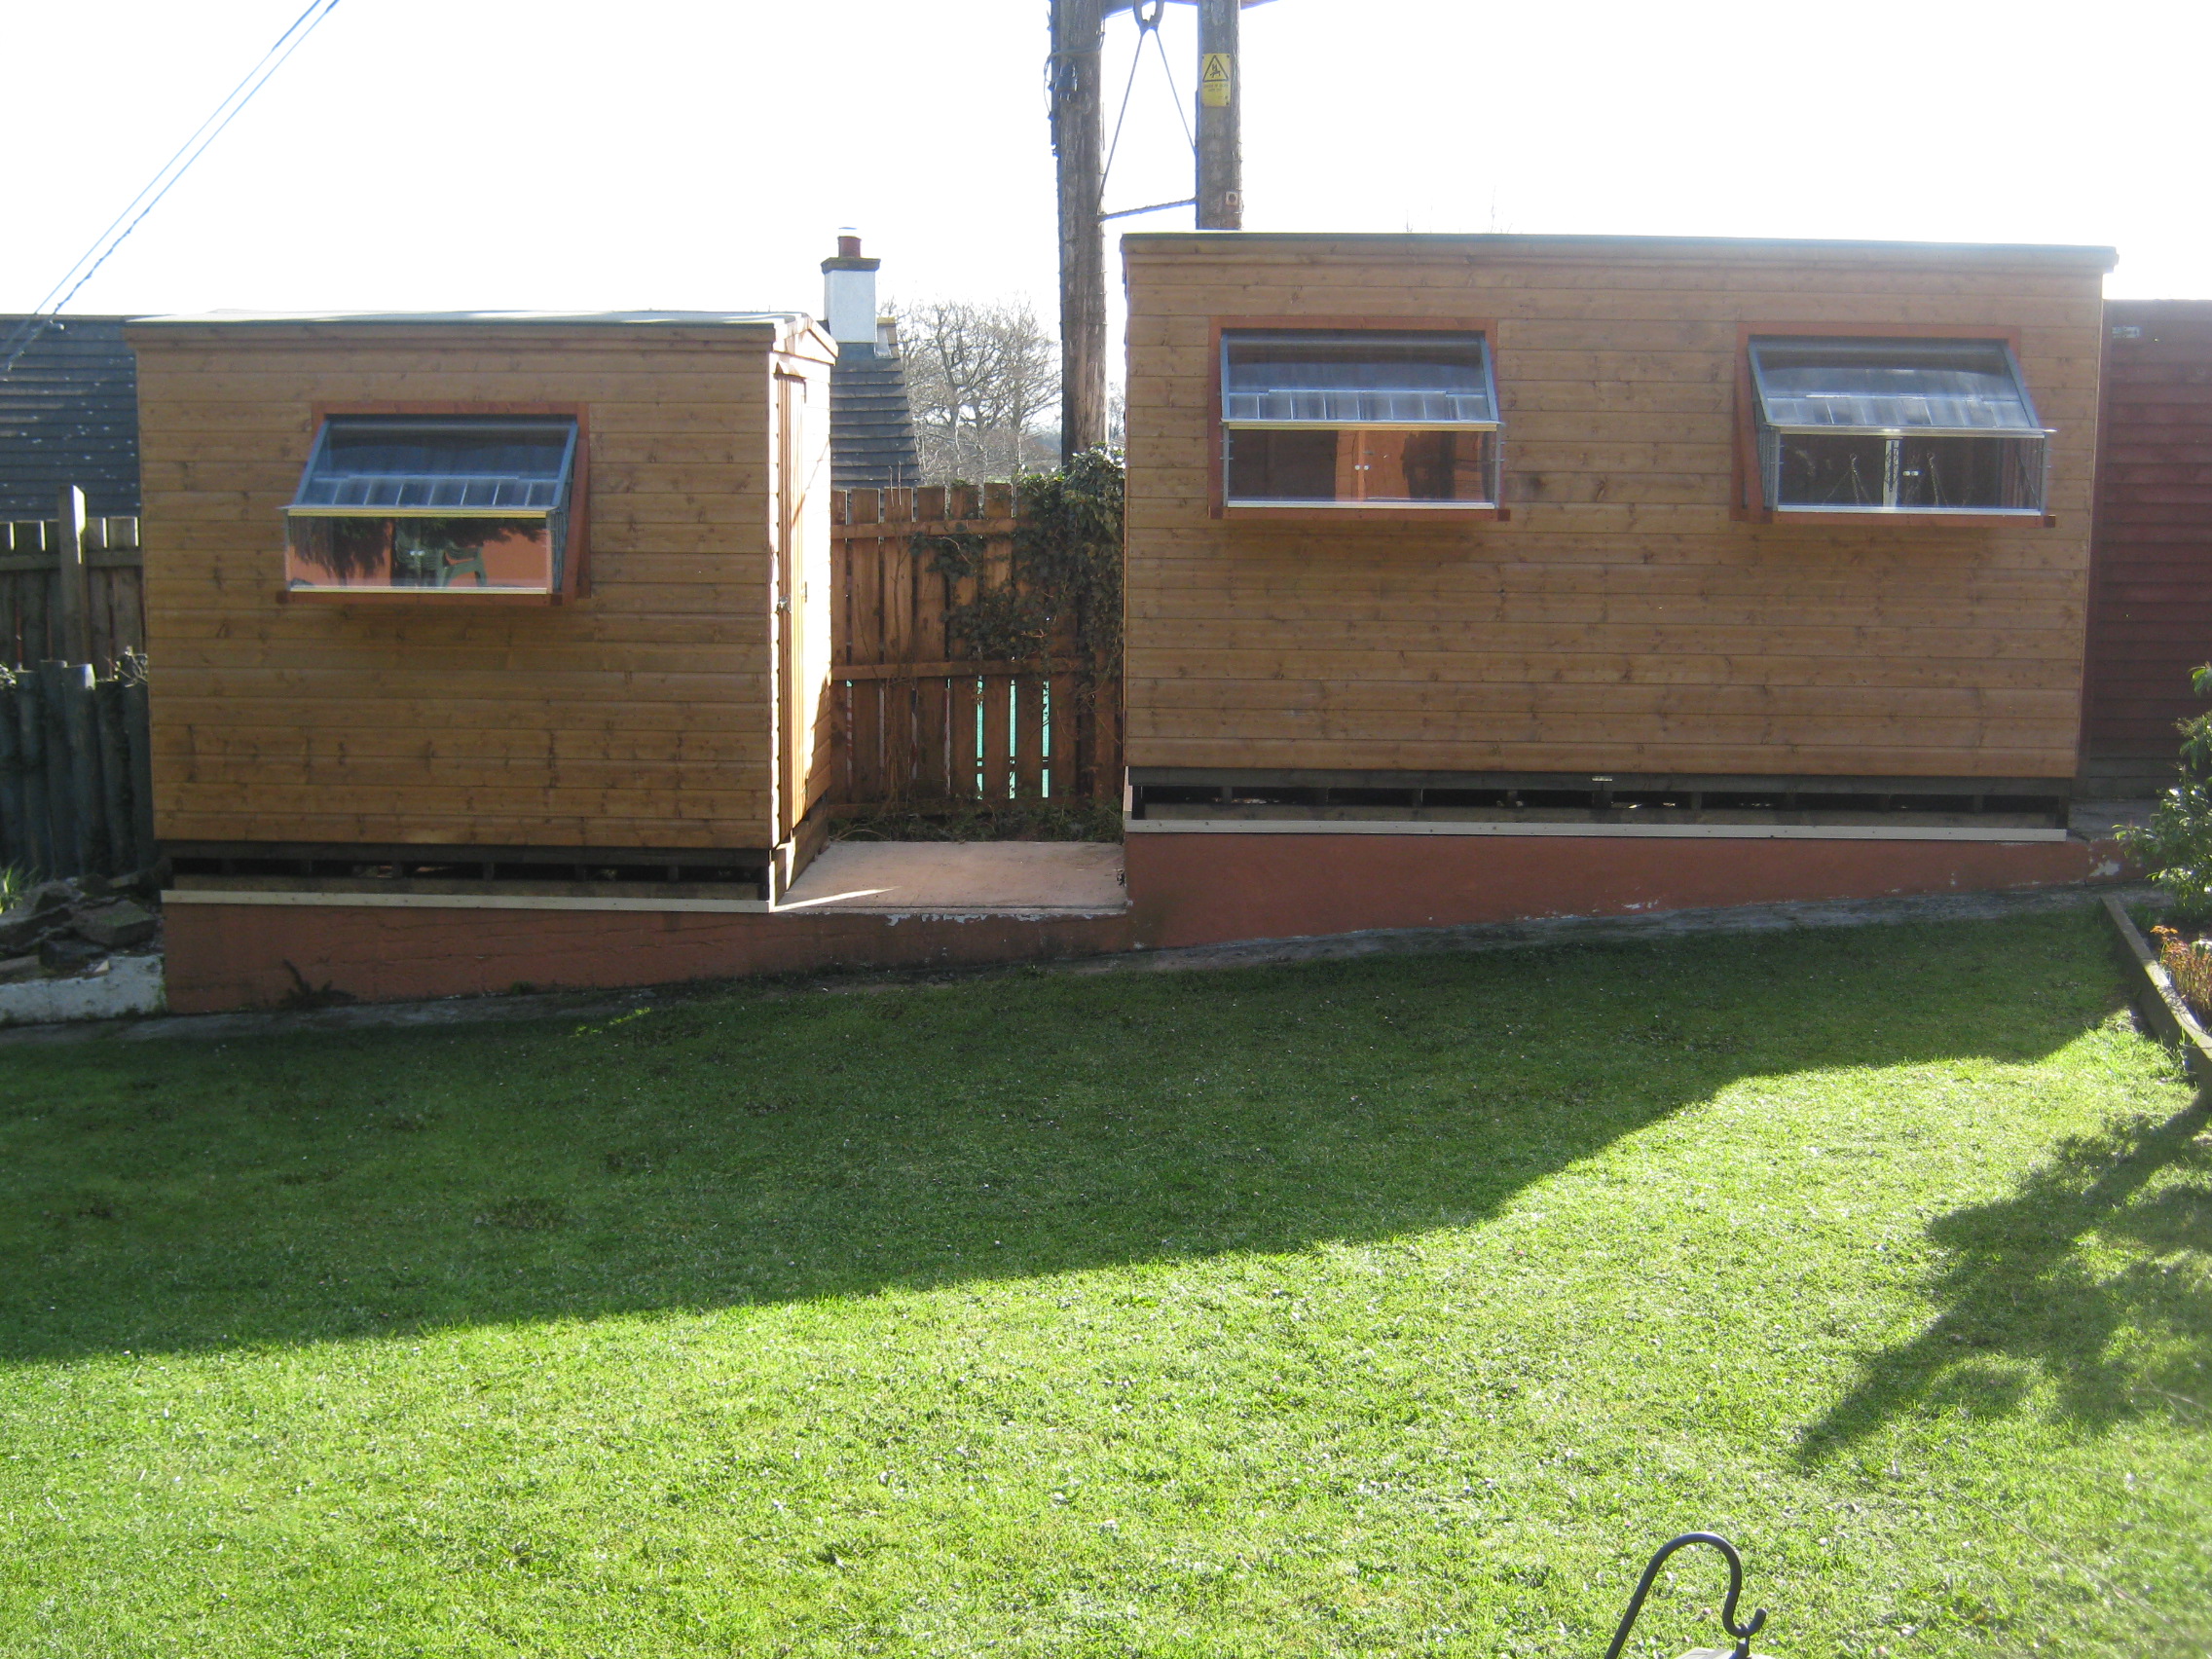
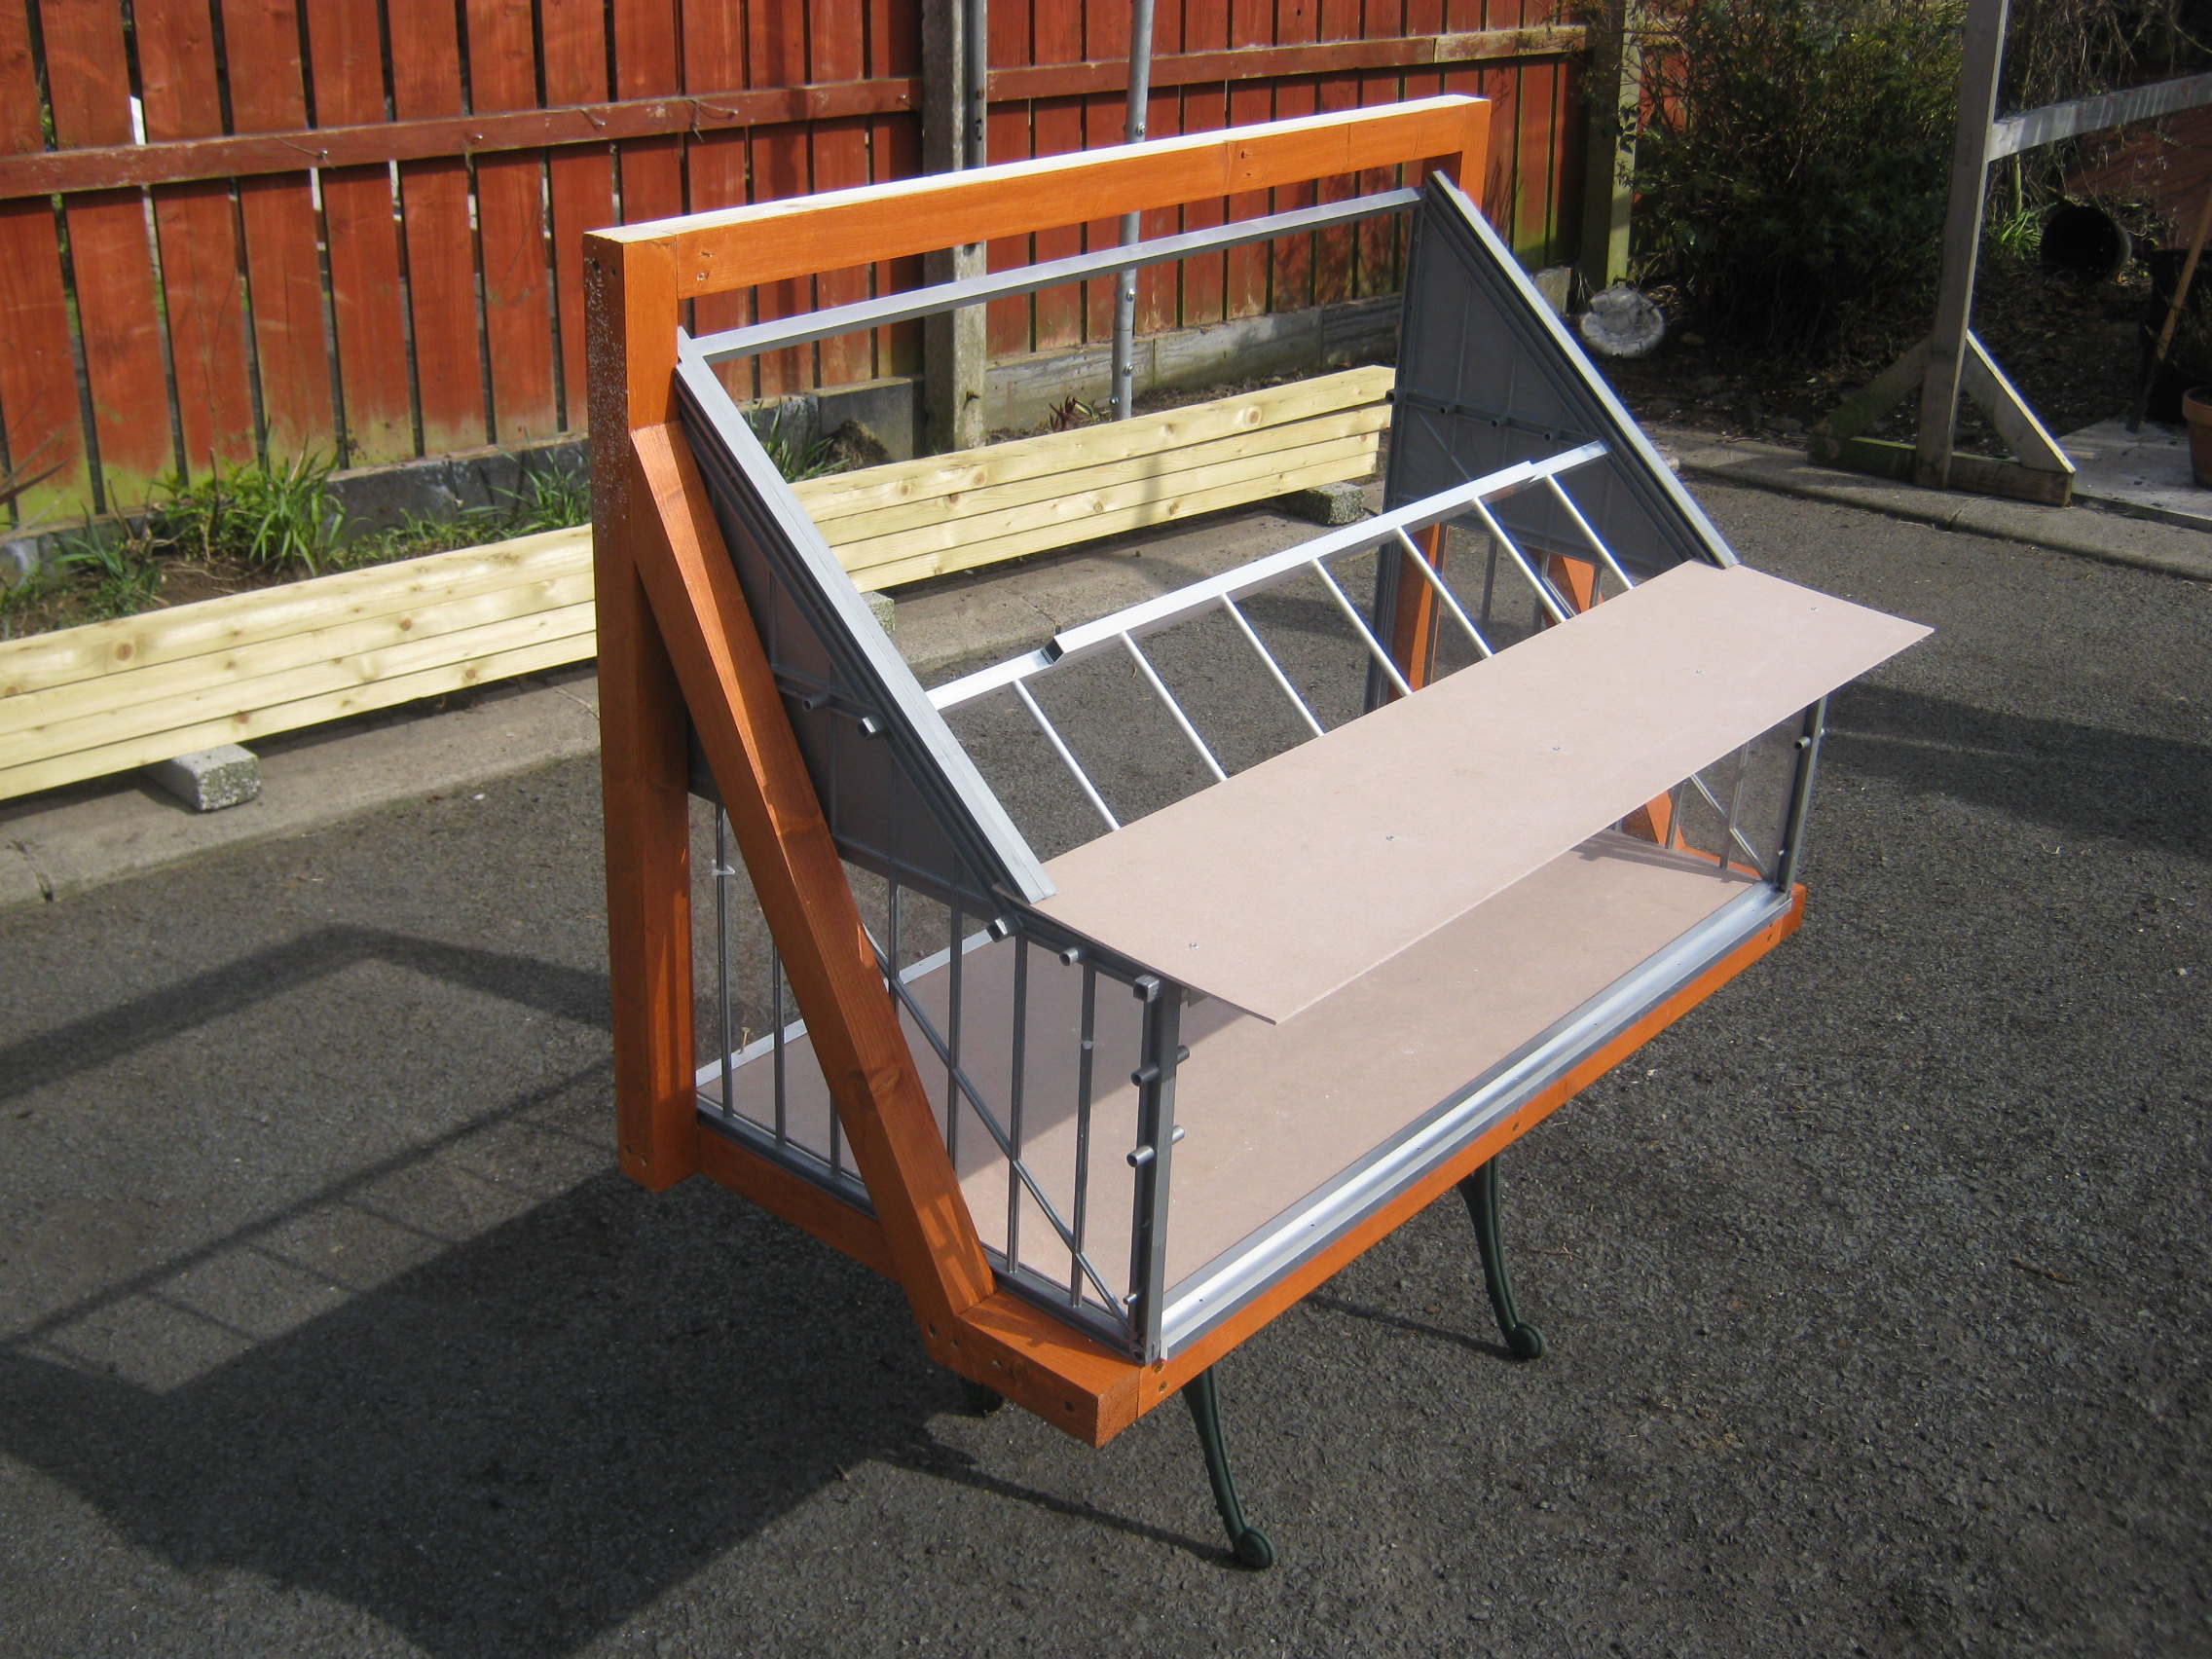
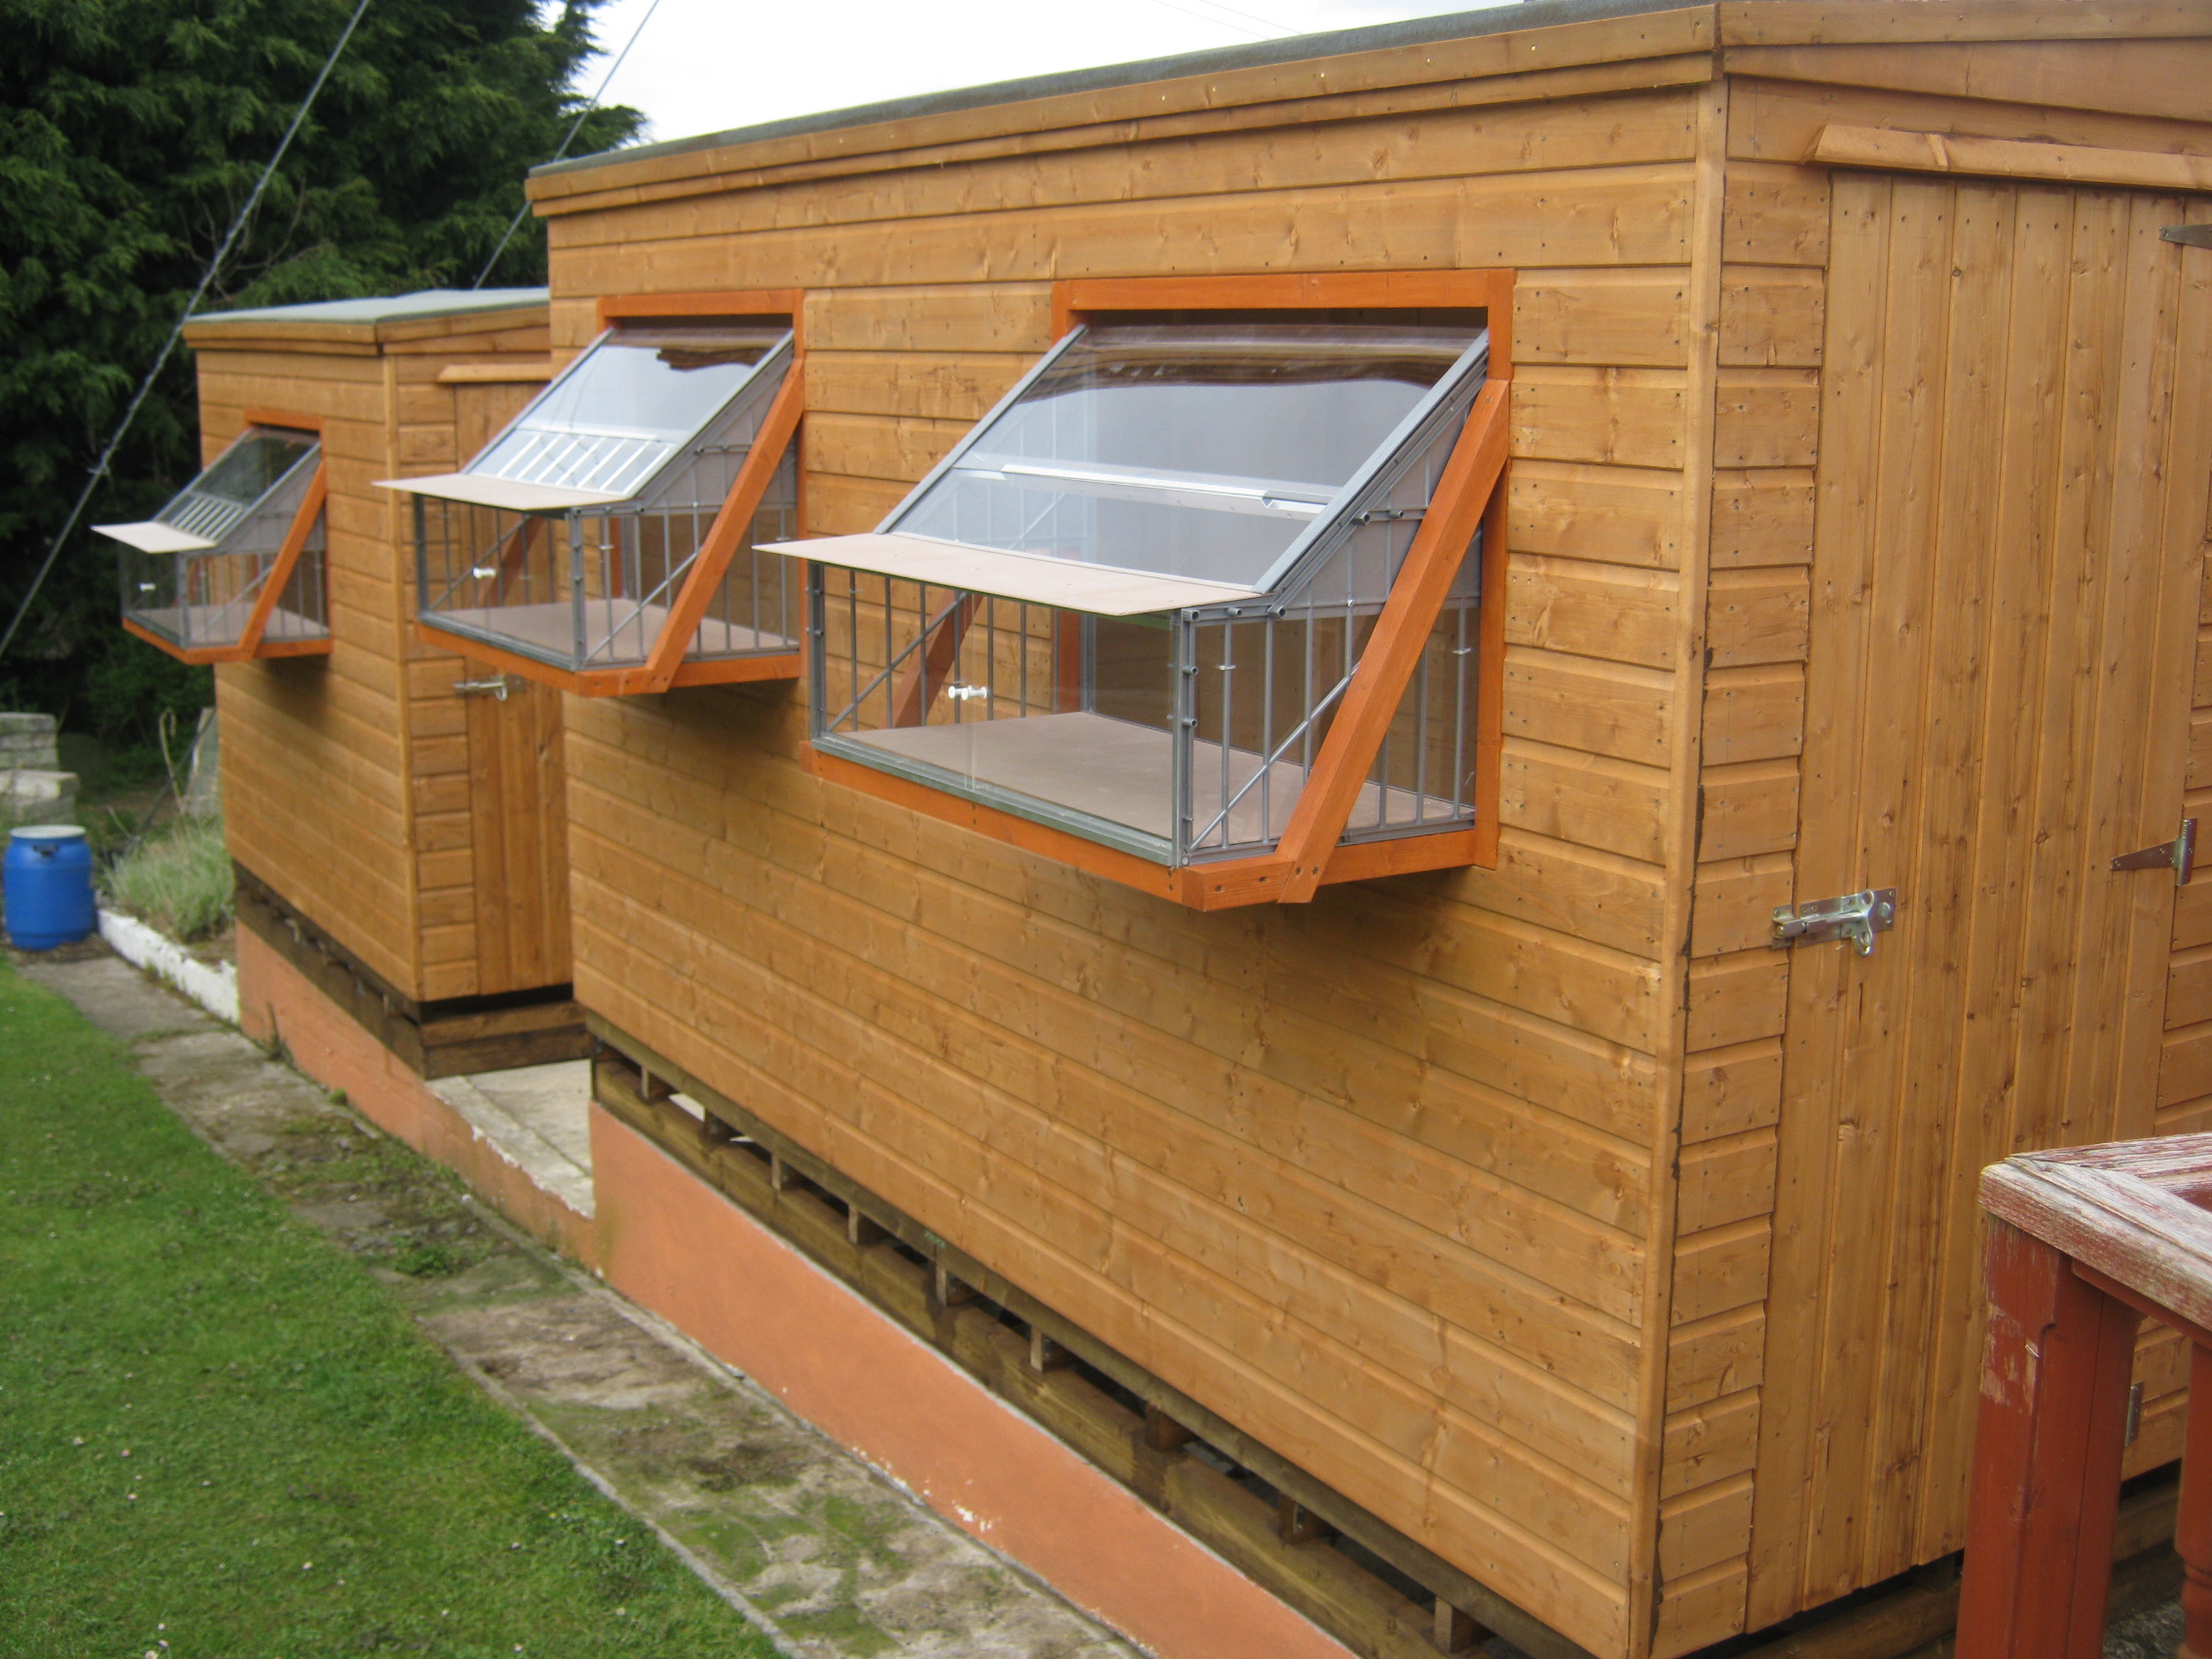
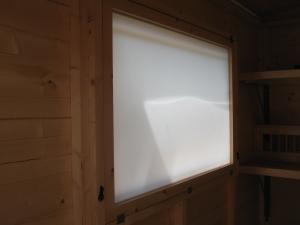
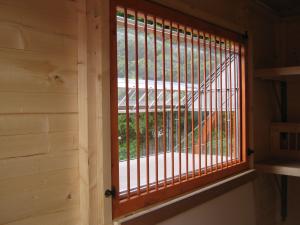
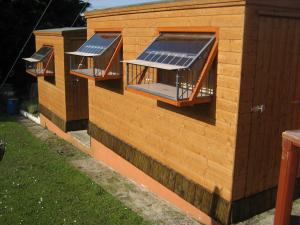
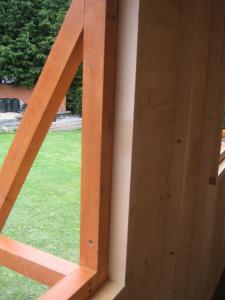
OK folks we've basically reached the end. As you can see in an earlier post, I had left a small 'ledge' on the inside, where the sputnik traps are, and Andy Burgess got to work trying to figure out....what's that for ? On these I wanted to affix an inner 'window' which would still allow copious light, but deny access to the sputnik. I used transluscent Correx for these, and are all hinged at the bottom, so they drop down out of the way. They would also help keep the birds calmer, as out side events will not disturb them. There's also a bit more 'security' for them at night as I have found at times eager cats can still gain access past a sputnik. By the way, loss of light when the windows are closed is negligible, and the entering light becomes non-directional, with no 'sun spots' If, on warmer days, where I want more air to enter, yet still not allow access to the sputnik, I have made dowelled fronts which simply 'clip in' to the space. The release doors to the sputnik can then be opened to allow greater air ingress. I didn't want to fit wire inner doors, so I made my doors from dowels, and used 16" of correx at the bottom. What say you, Alex Wight, will they do ? !!!! The YB loft has two shelves for feeder and drinker, and the other for grits, minerals etc. I made a feather-edge panel to fill in the gap between the lofts, and re-laid the concrete path along the front of the lofts to tidy it up a bit. Just a couple more jobs to do, such as perches and nest boxes. I'll also lay 12mm chipboard down on the floors to give a better scraper surface. Also thinking of an aviary on YB loft...not sure yet. So, there you go folks, and thanks for following me on my journey. Thanks for watching !! Suppose all I have to do now is get some birds organised !! It'll be a pity, 'cause all they'll do is s**t all over it!! Paul.

-
An absolutely glorious morning here, probably the best one yet. A good day for a pigeon race !!
-
Agree with Alex. Depends what you're making. I would also add, both spacing and dowel size can vary....after all it would not be my idea to use 6mm dowel if making partitions !!
-
Many congrats :emoticon-0140-rofl:
-
Very dull morning. Total cloud cover and raining. Not much wind. Due to brighten up later in day.
-
R.I.P
-
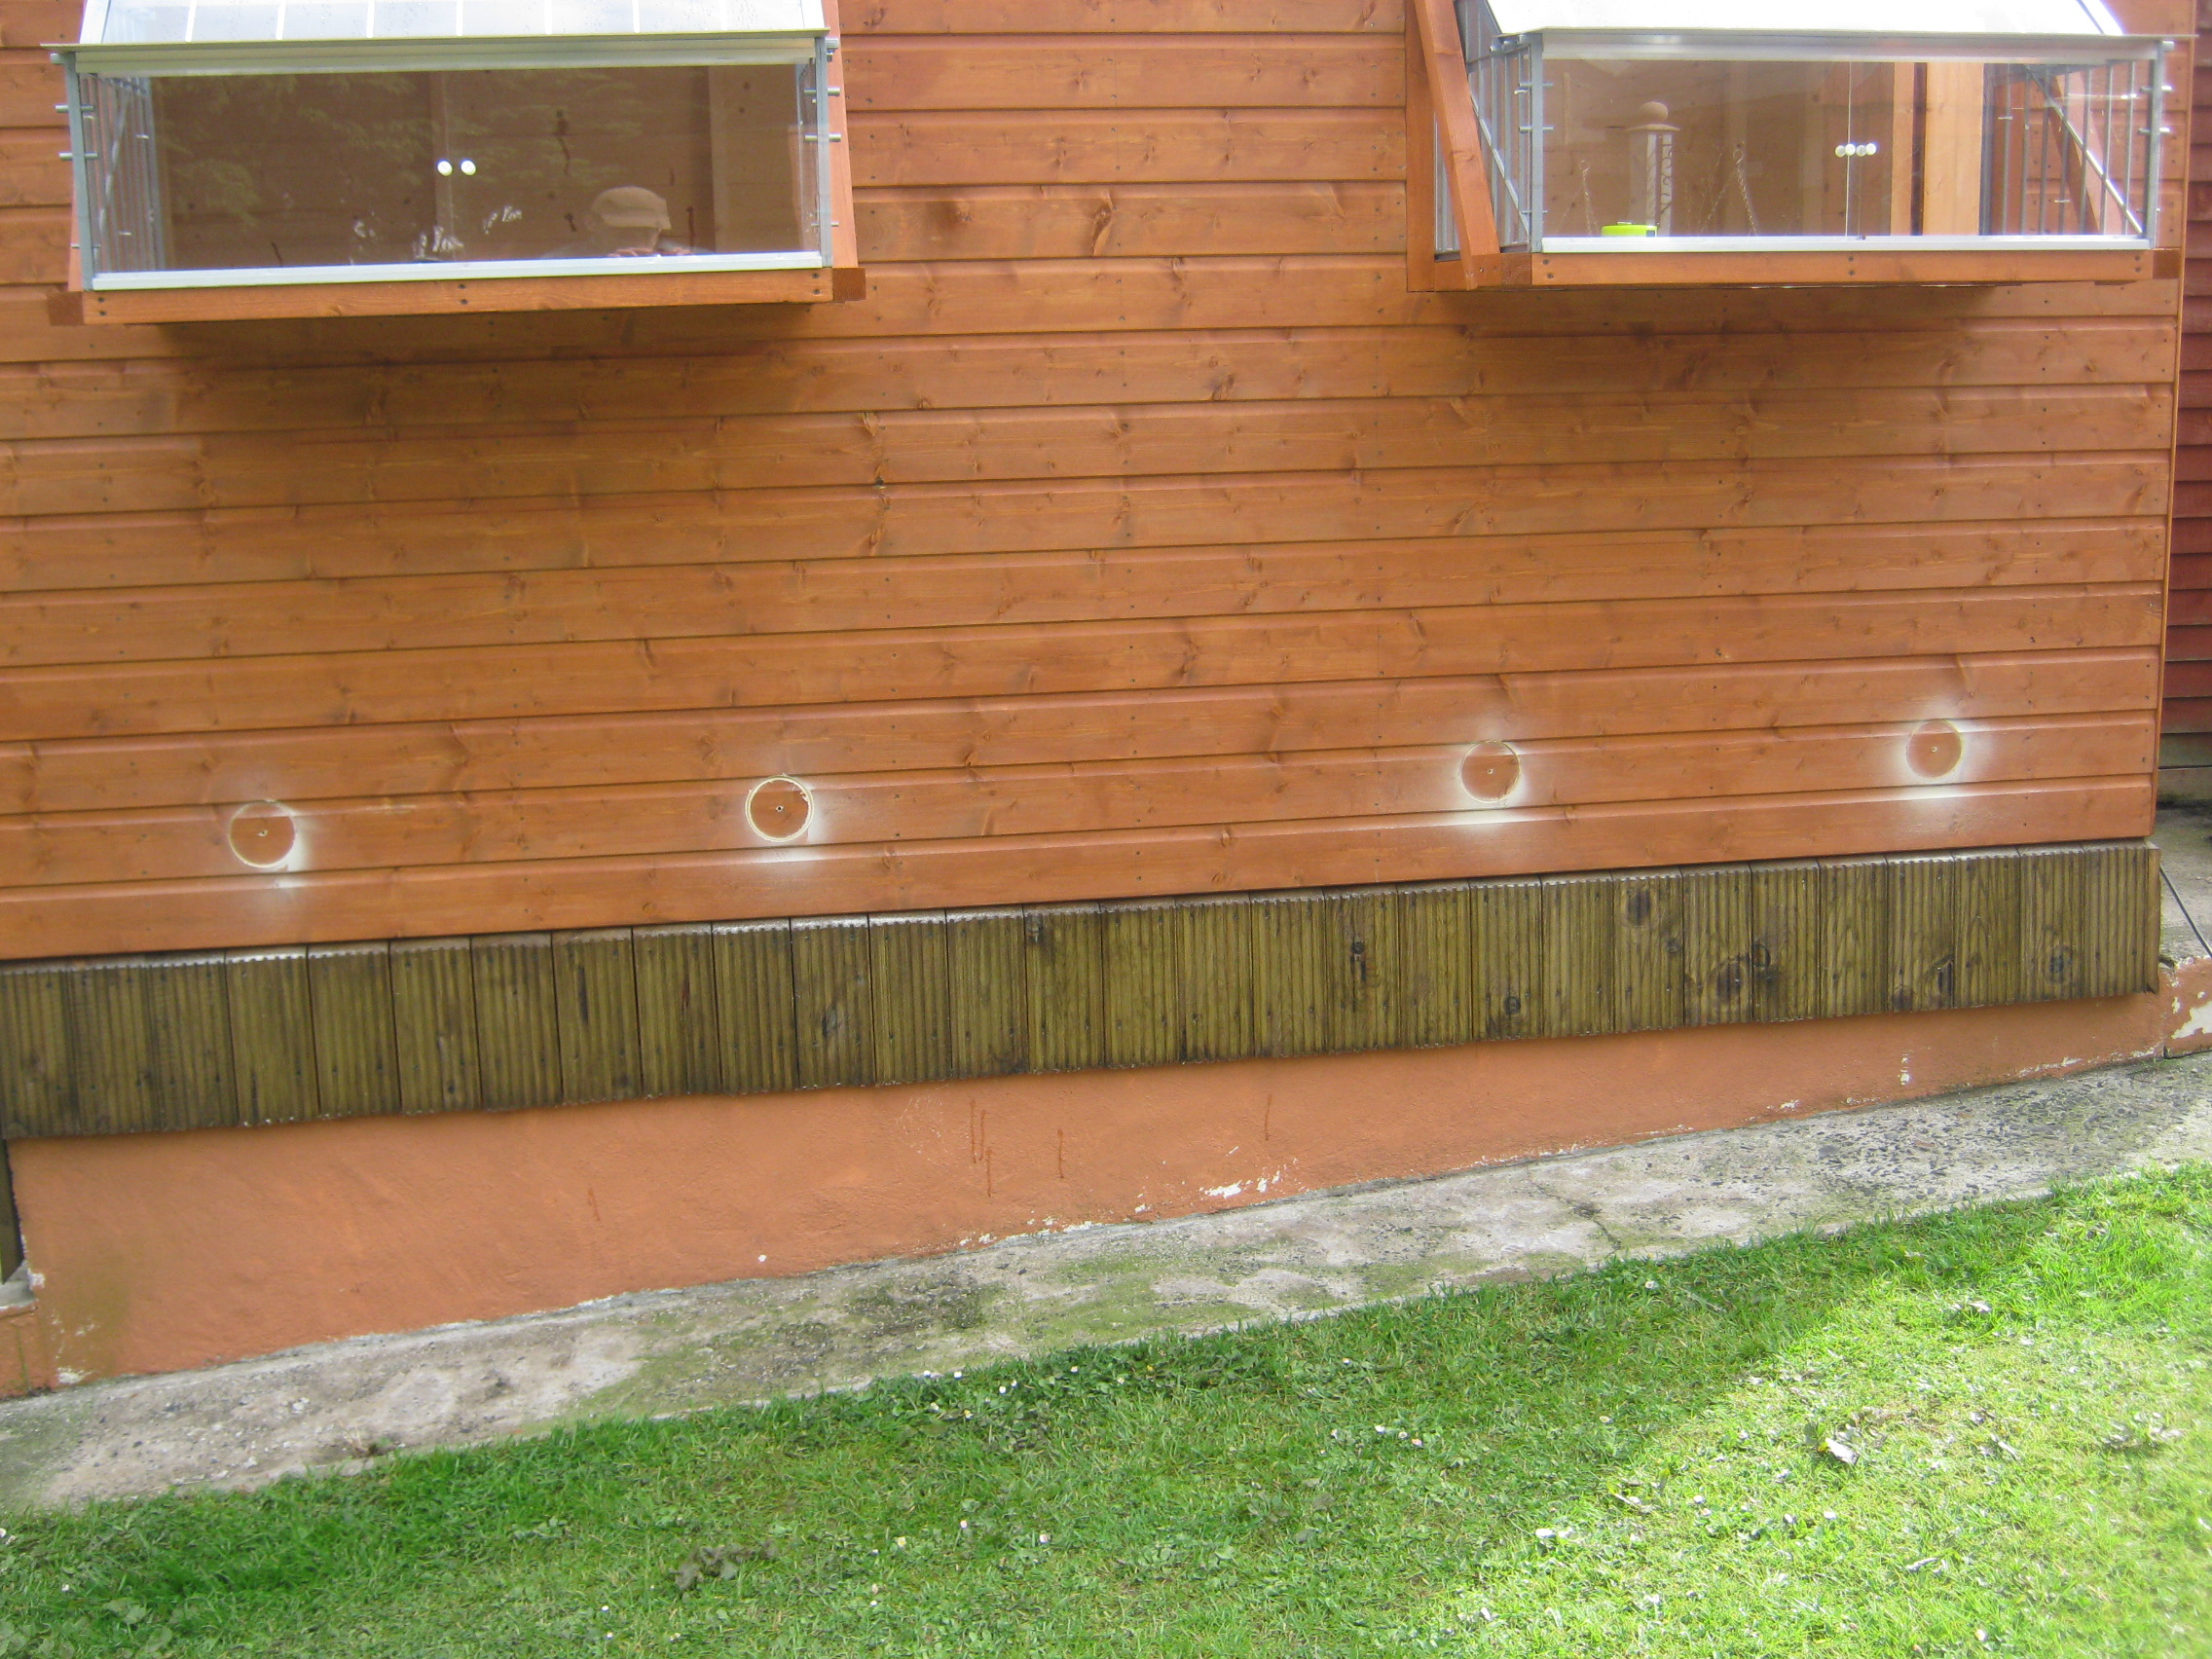
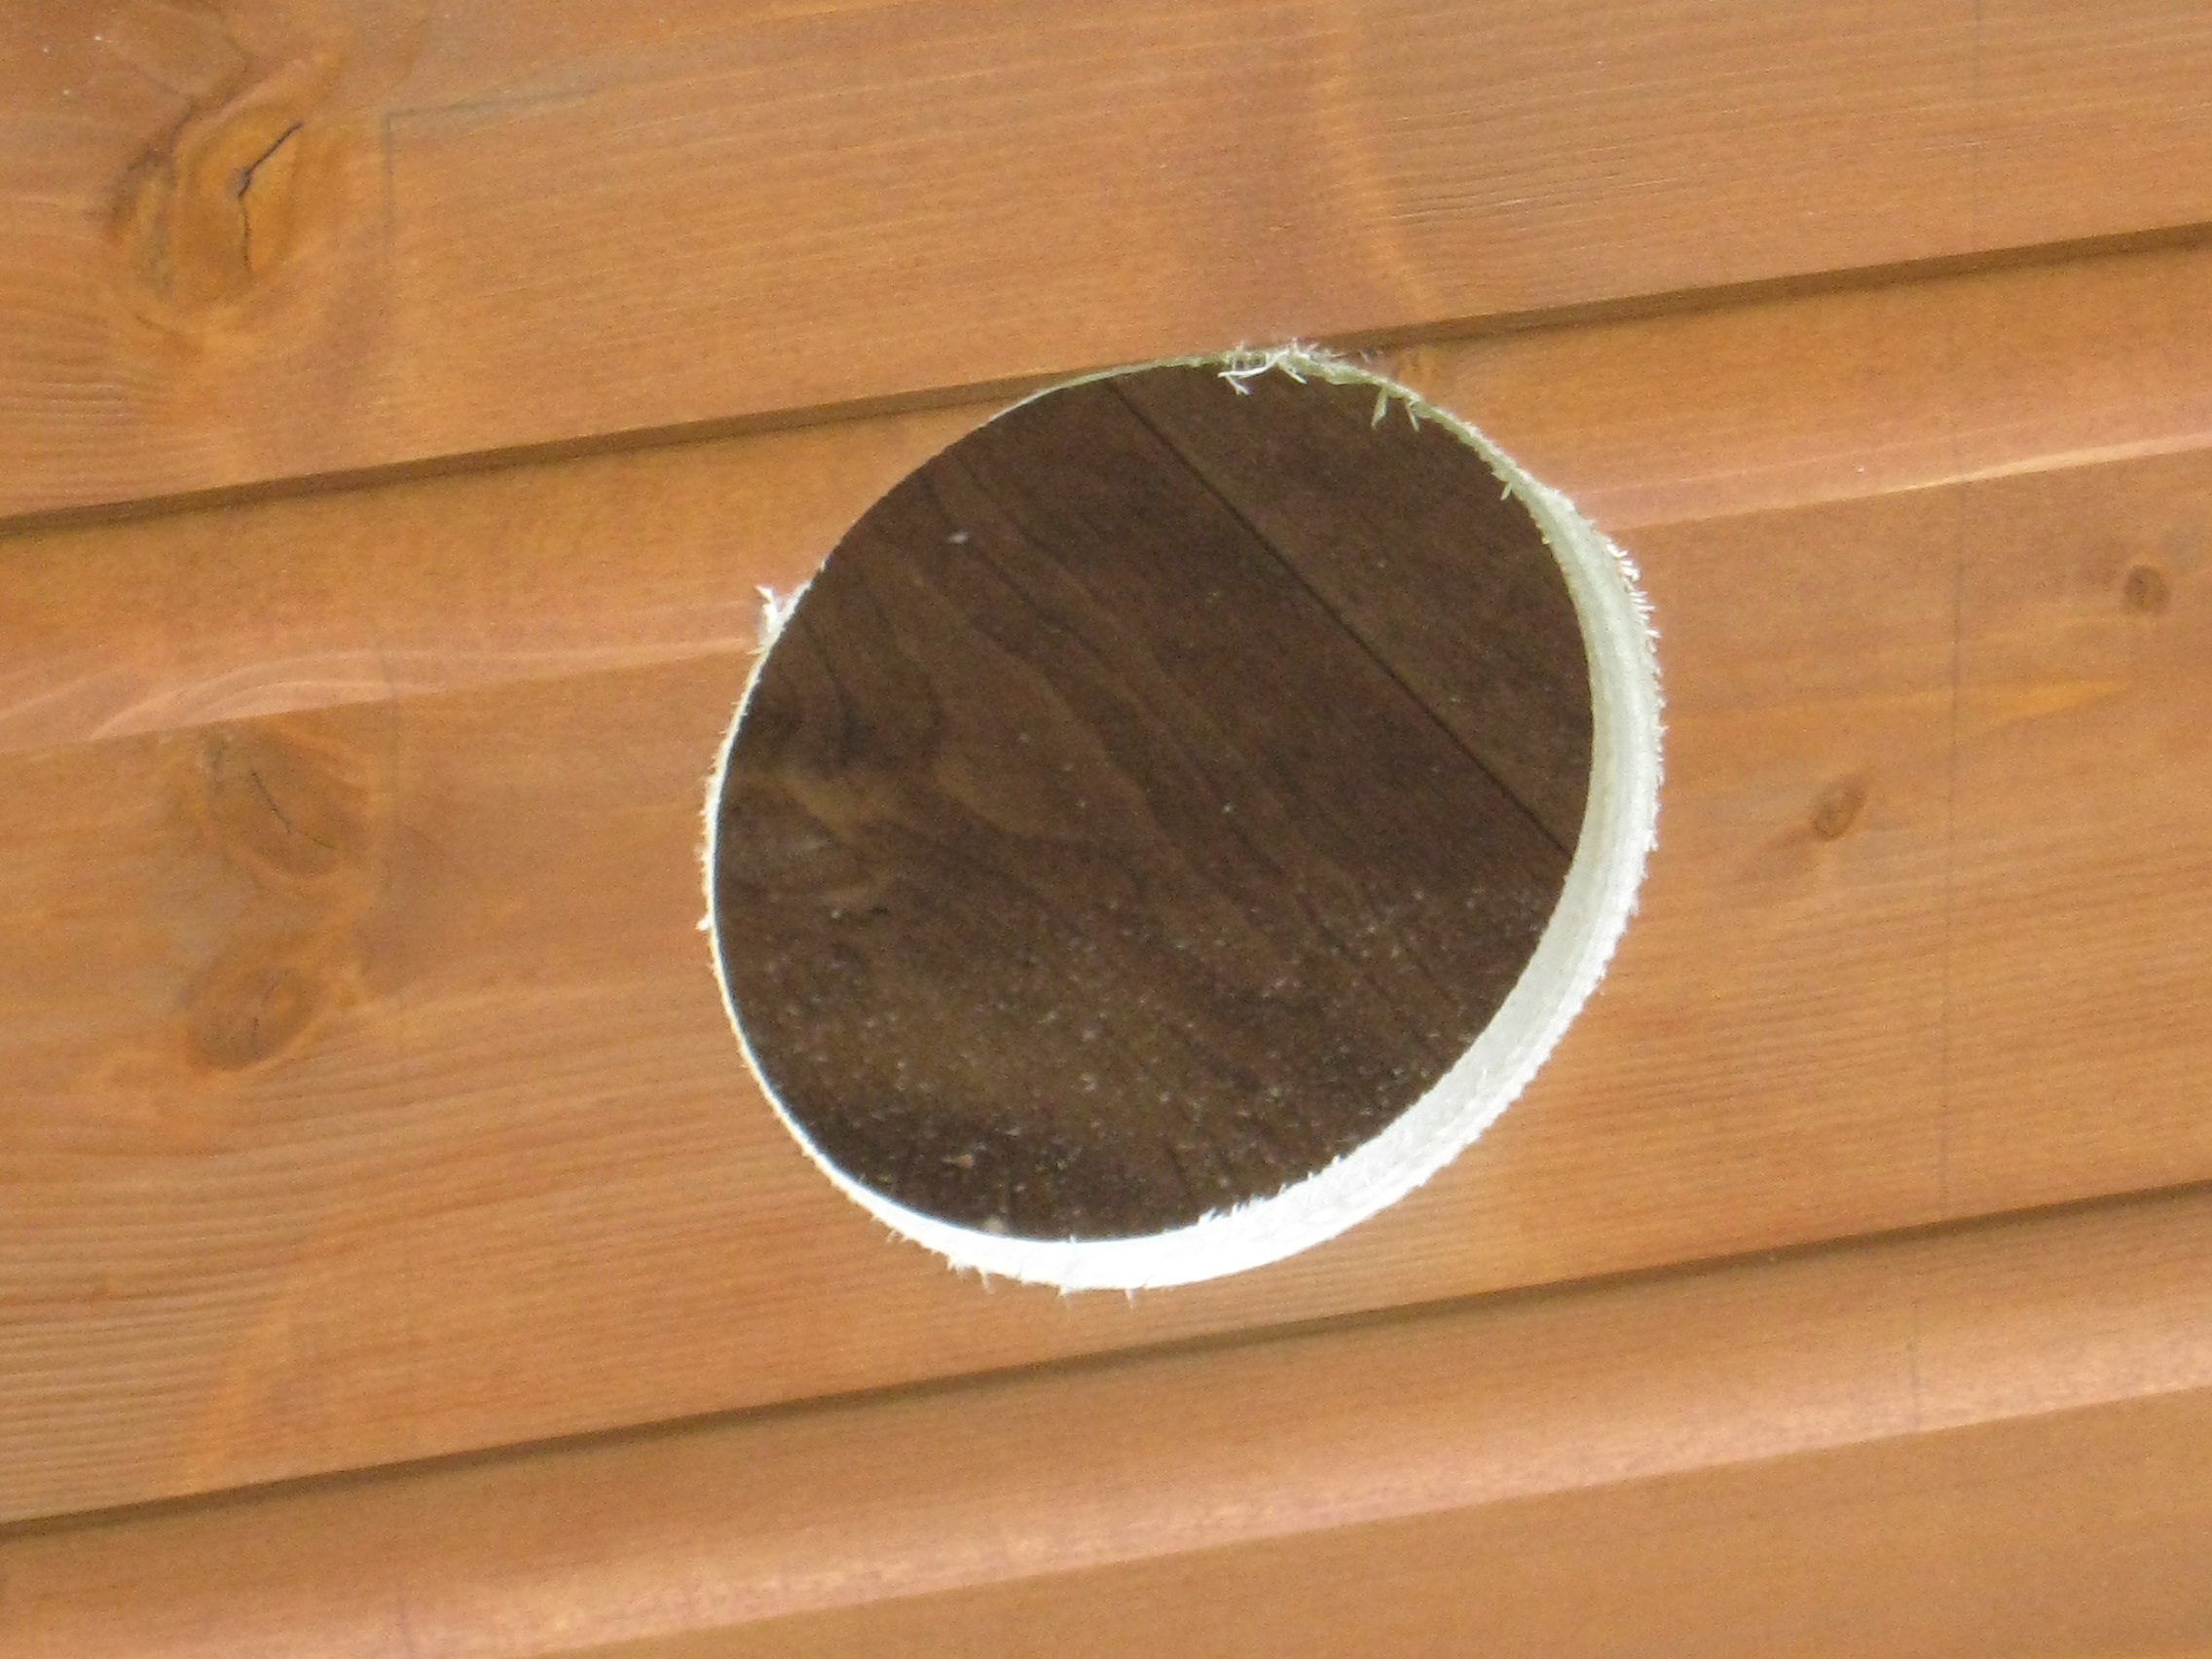
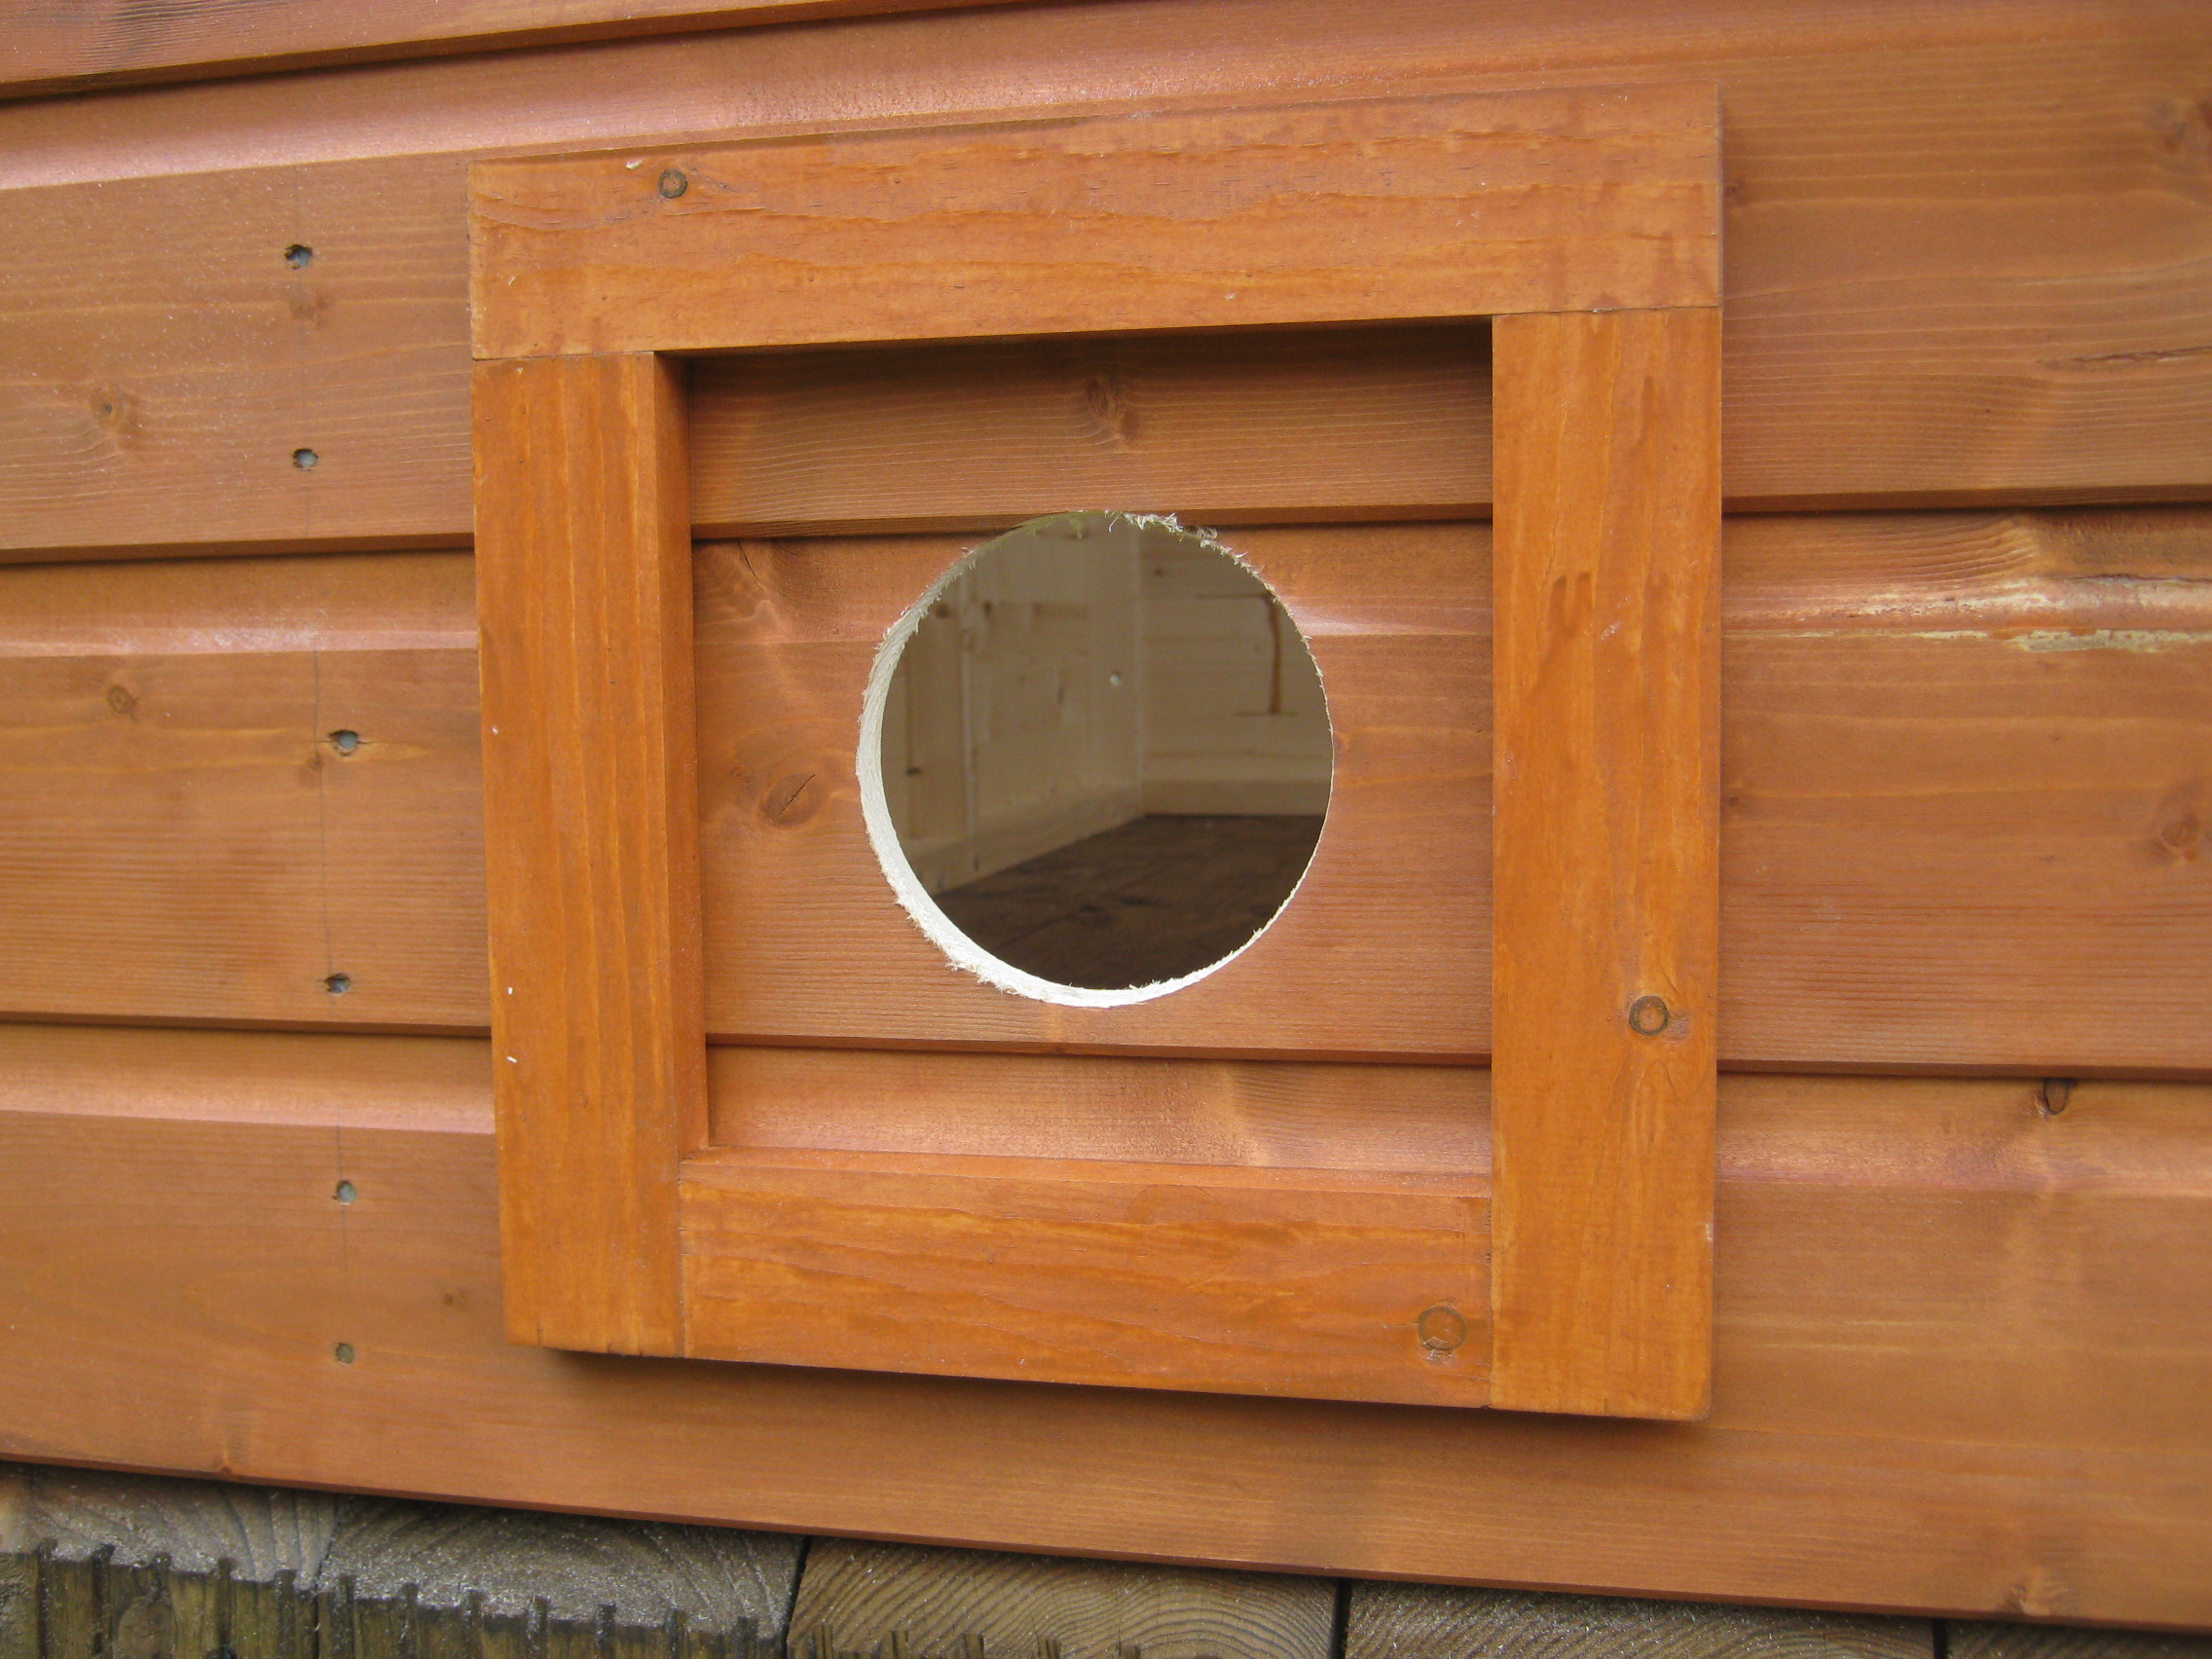
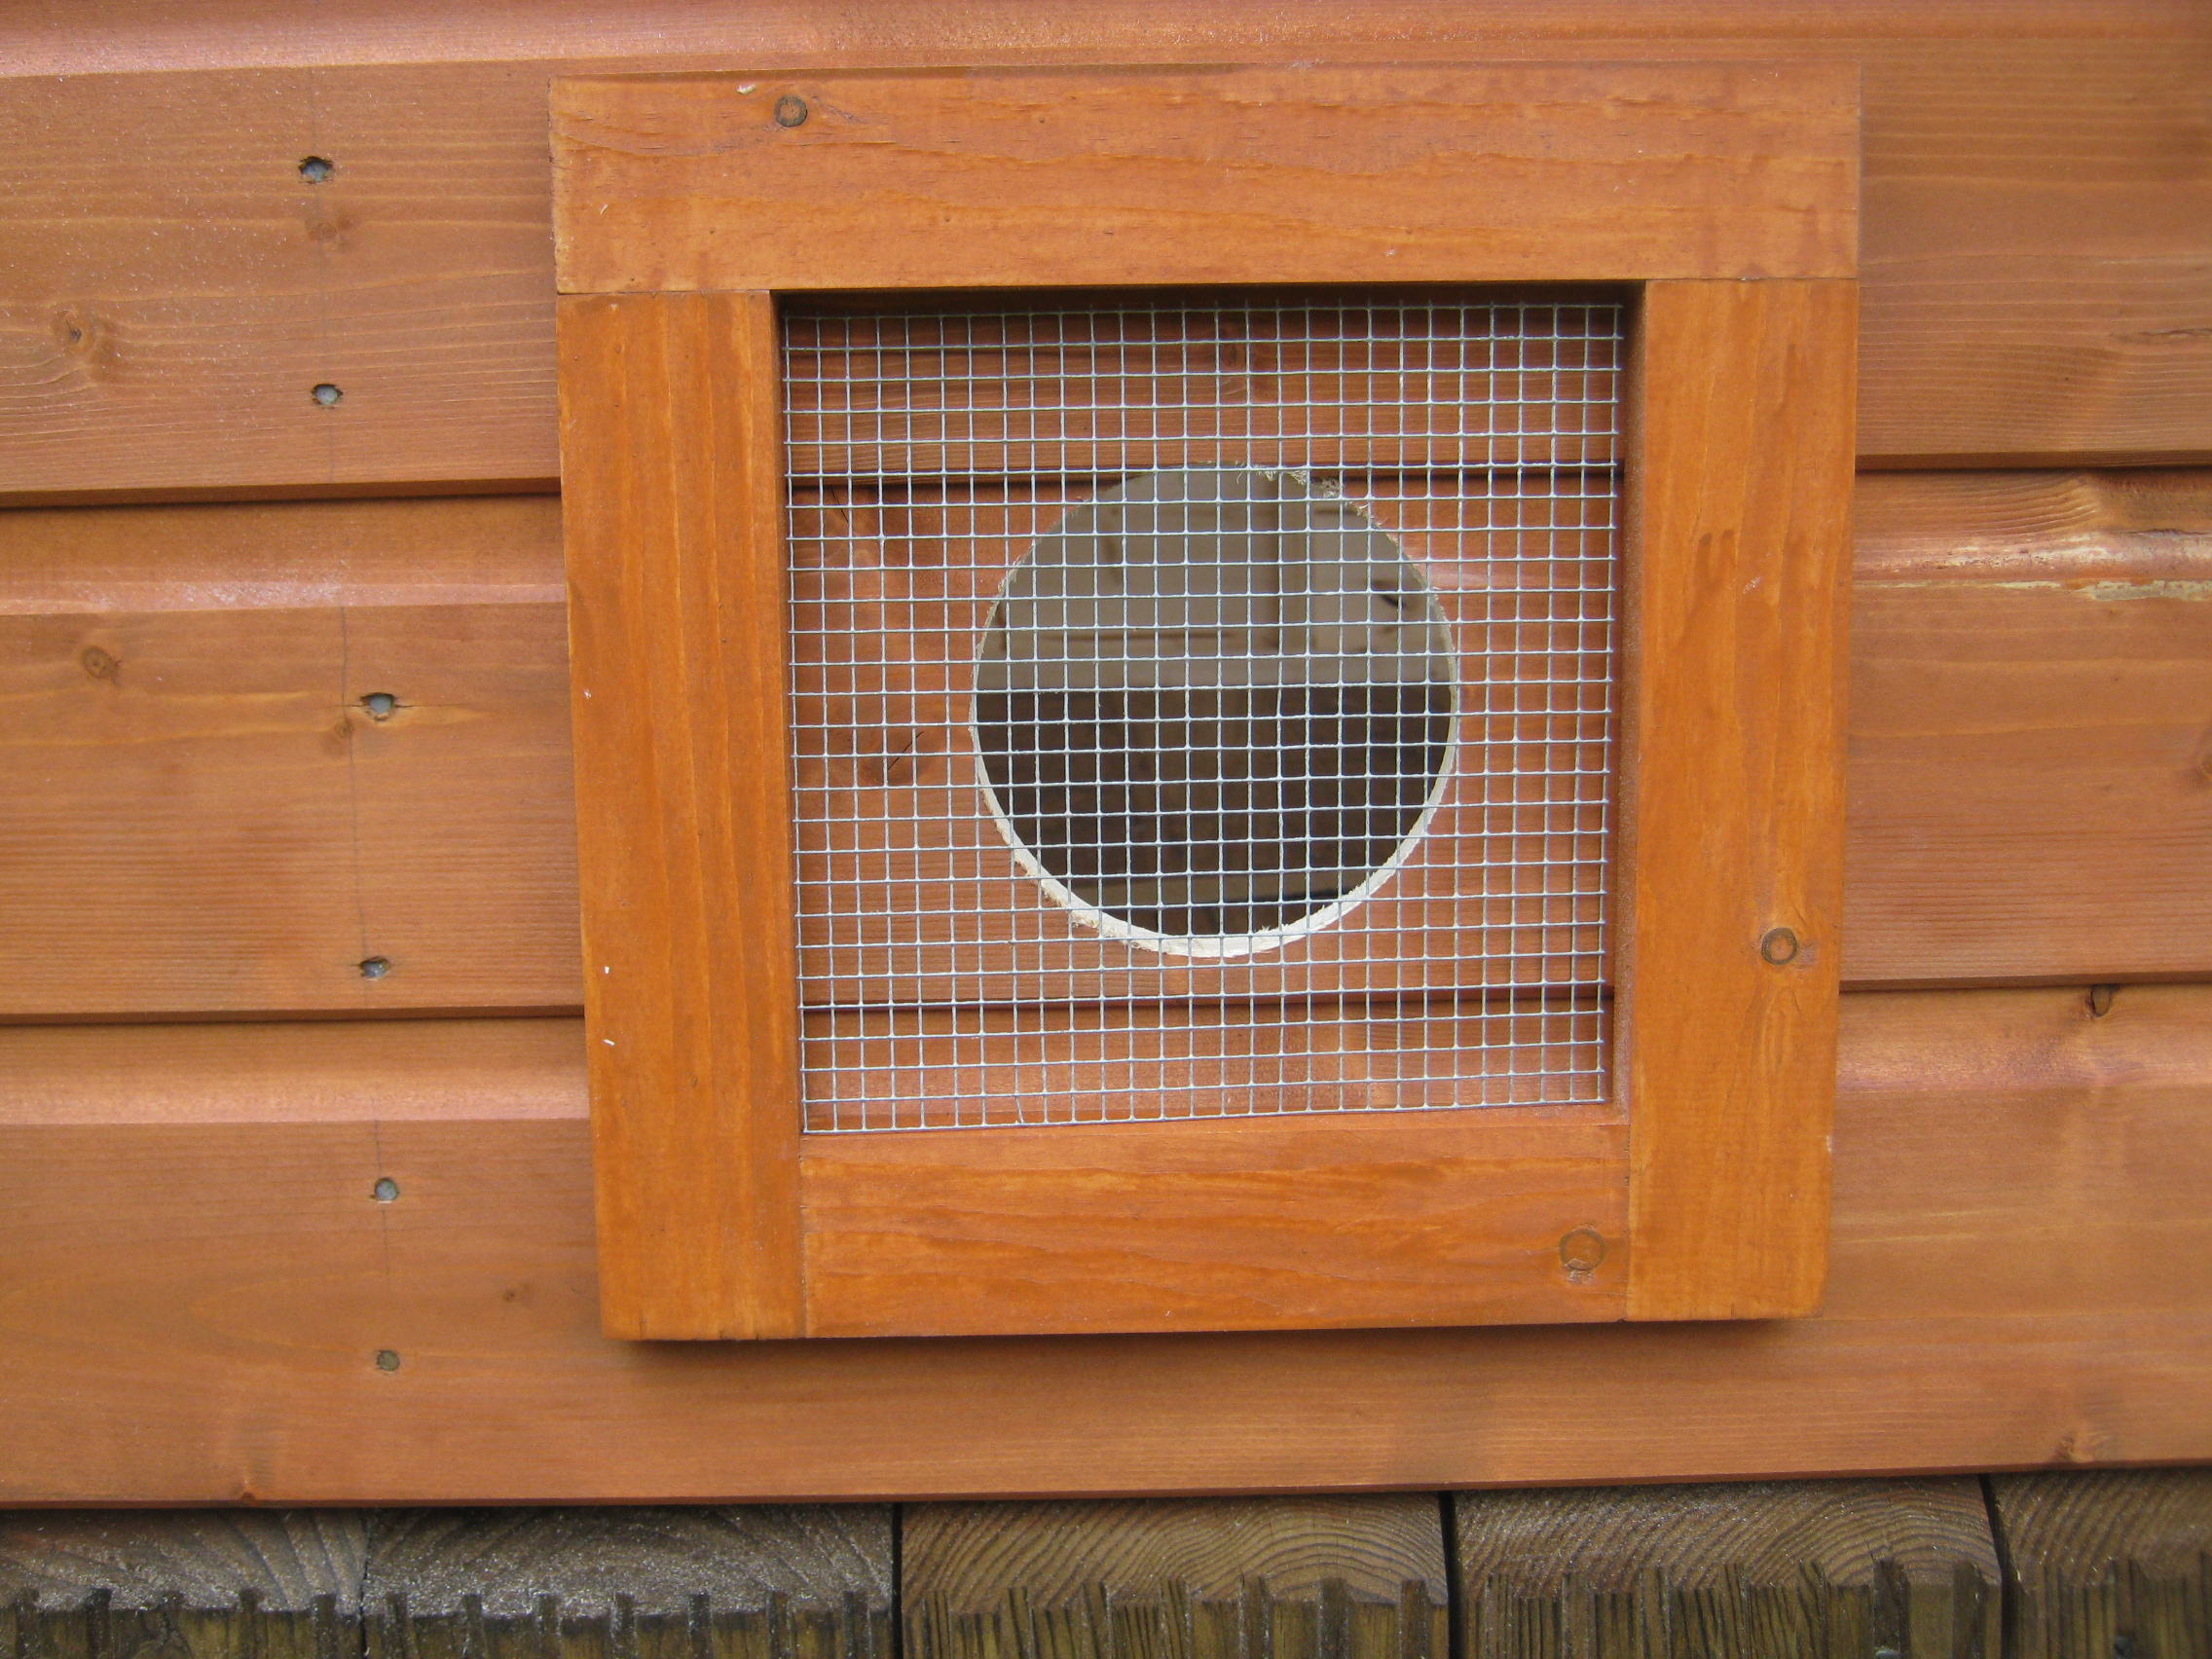
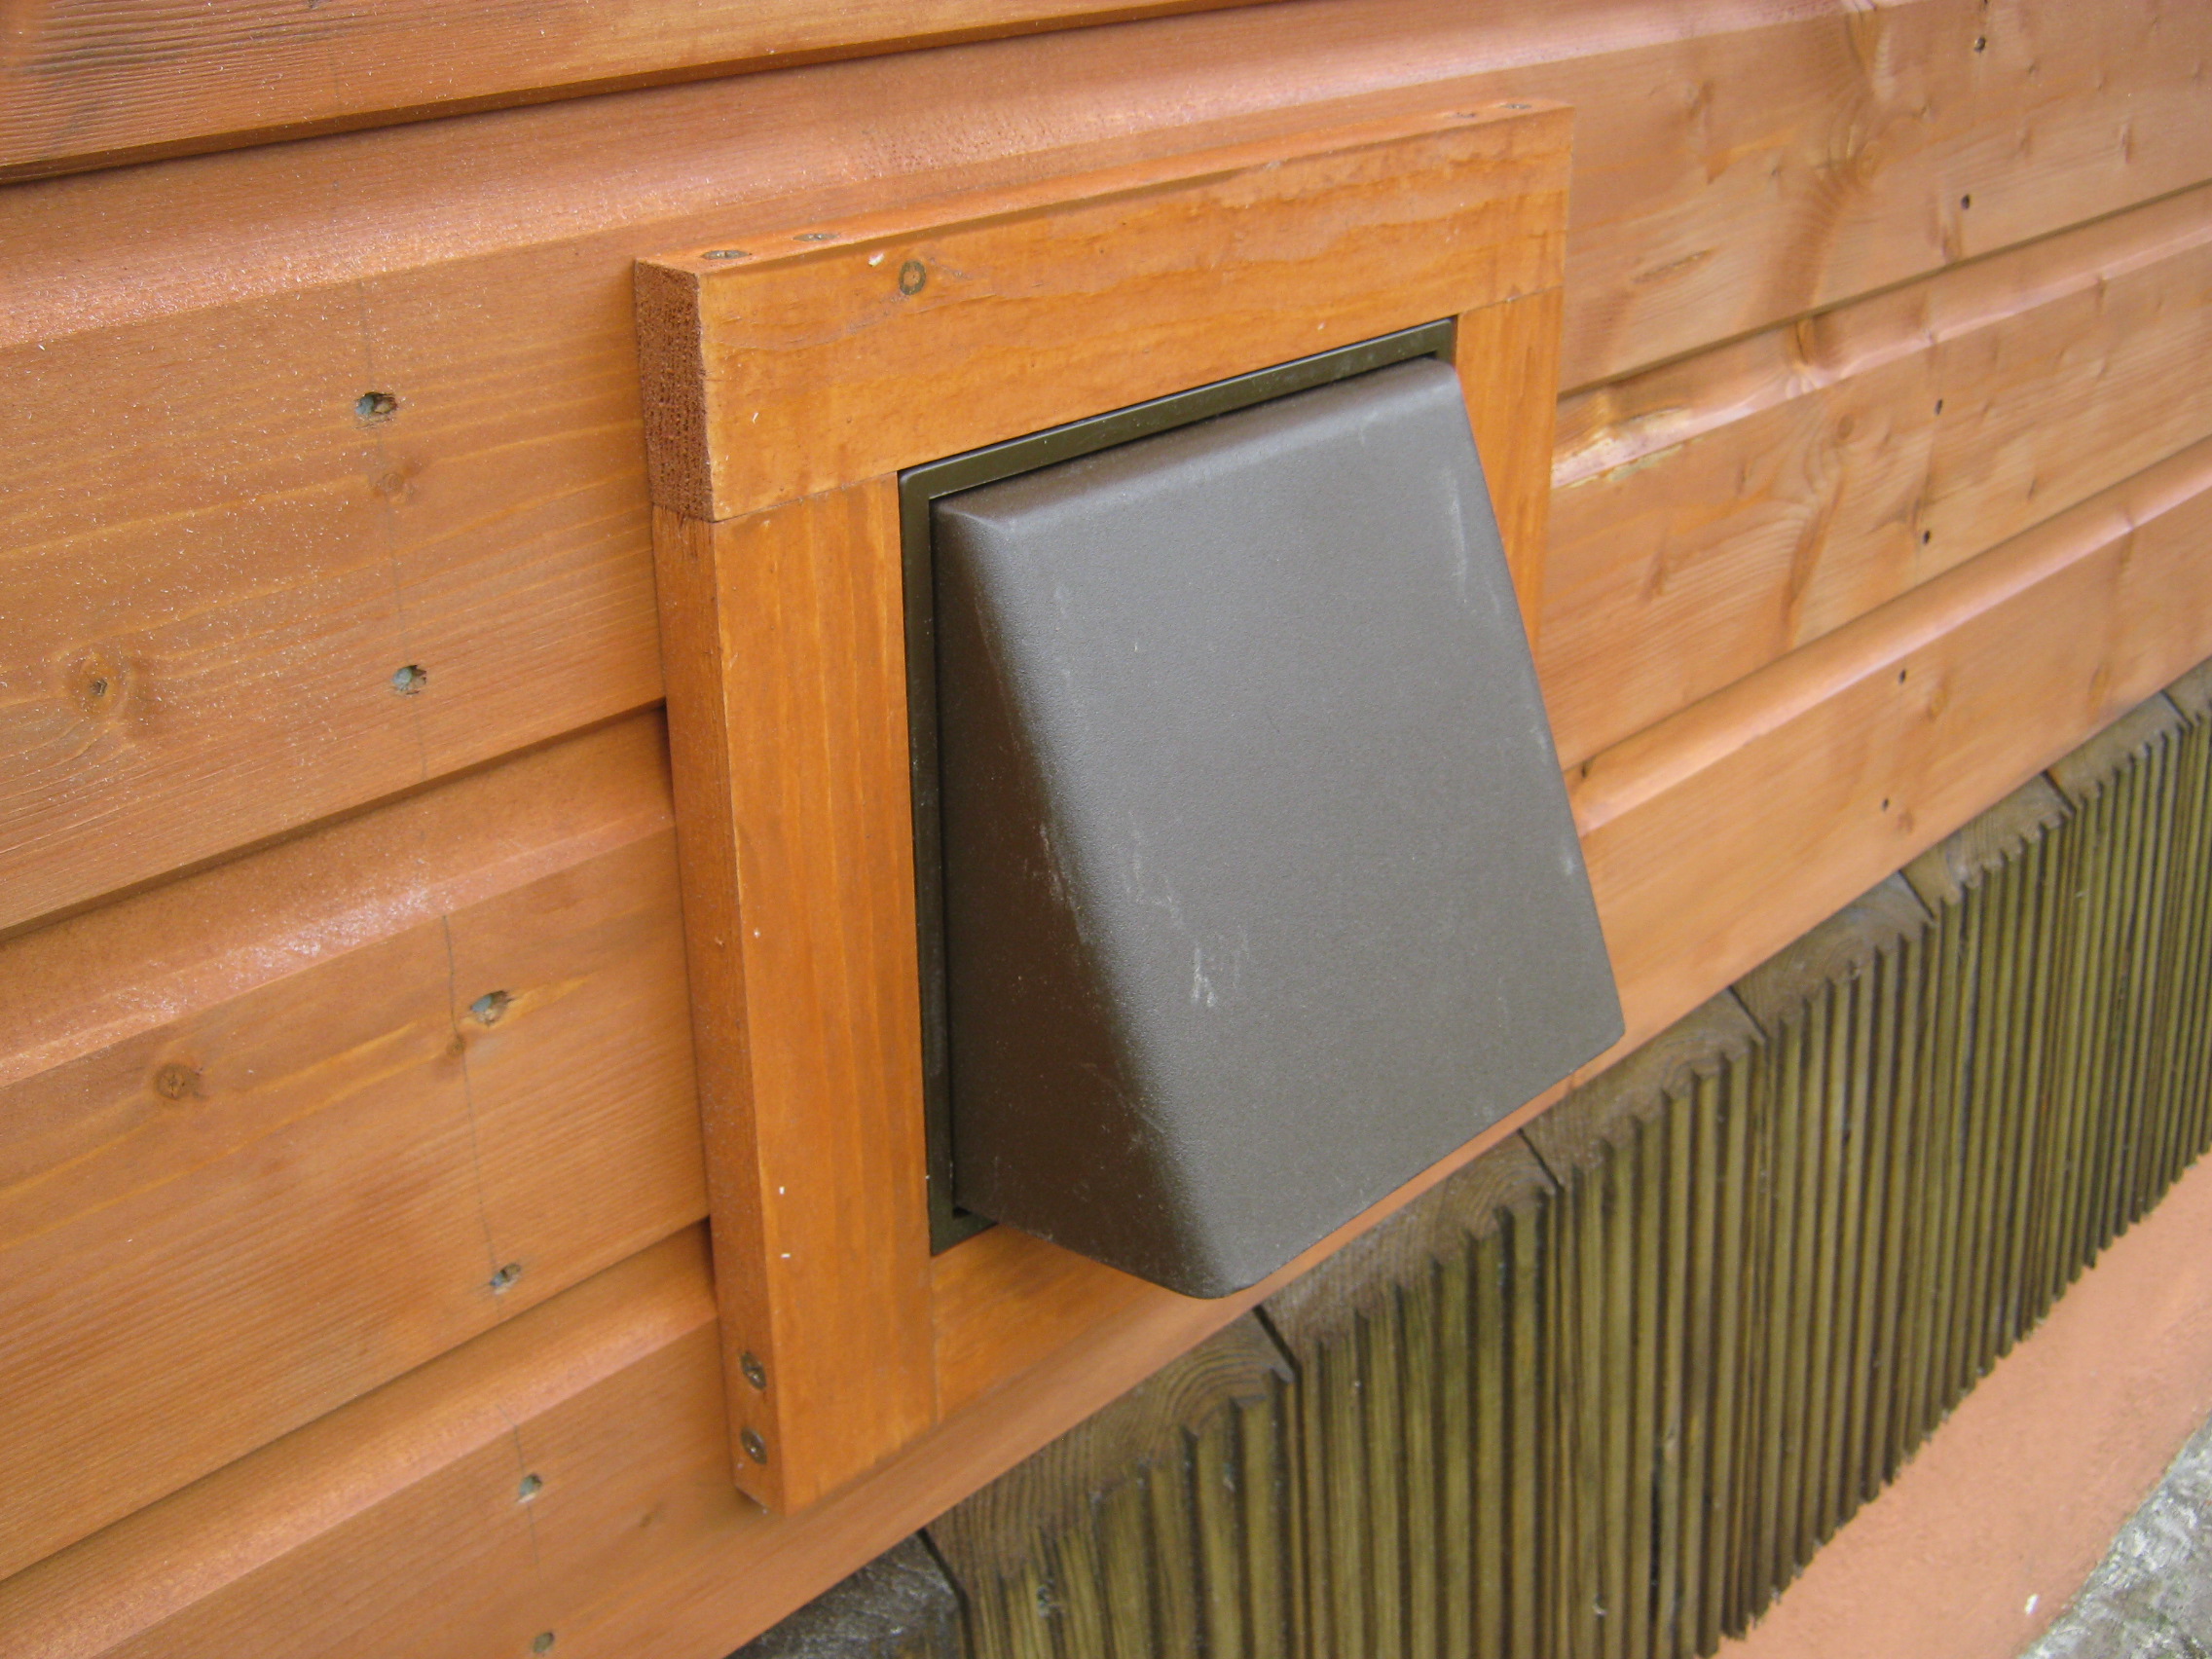
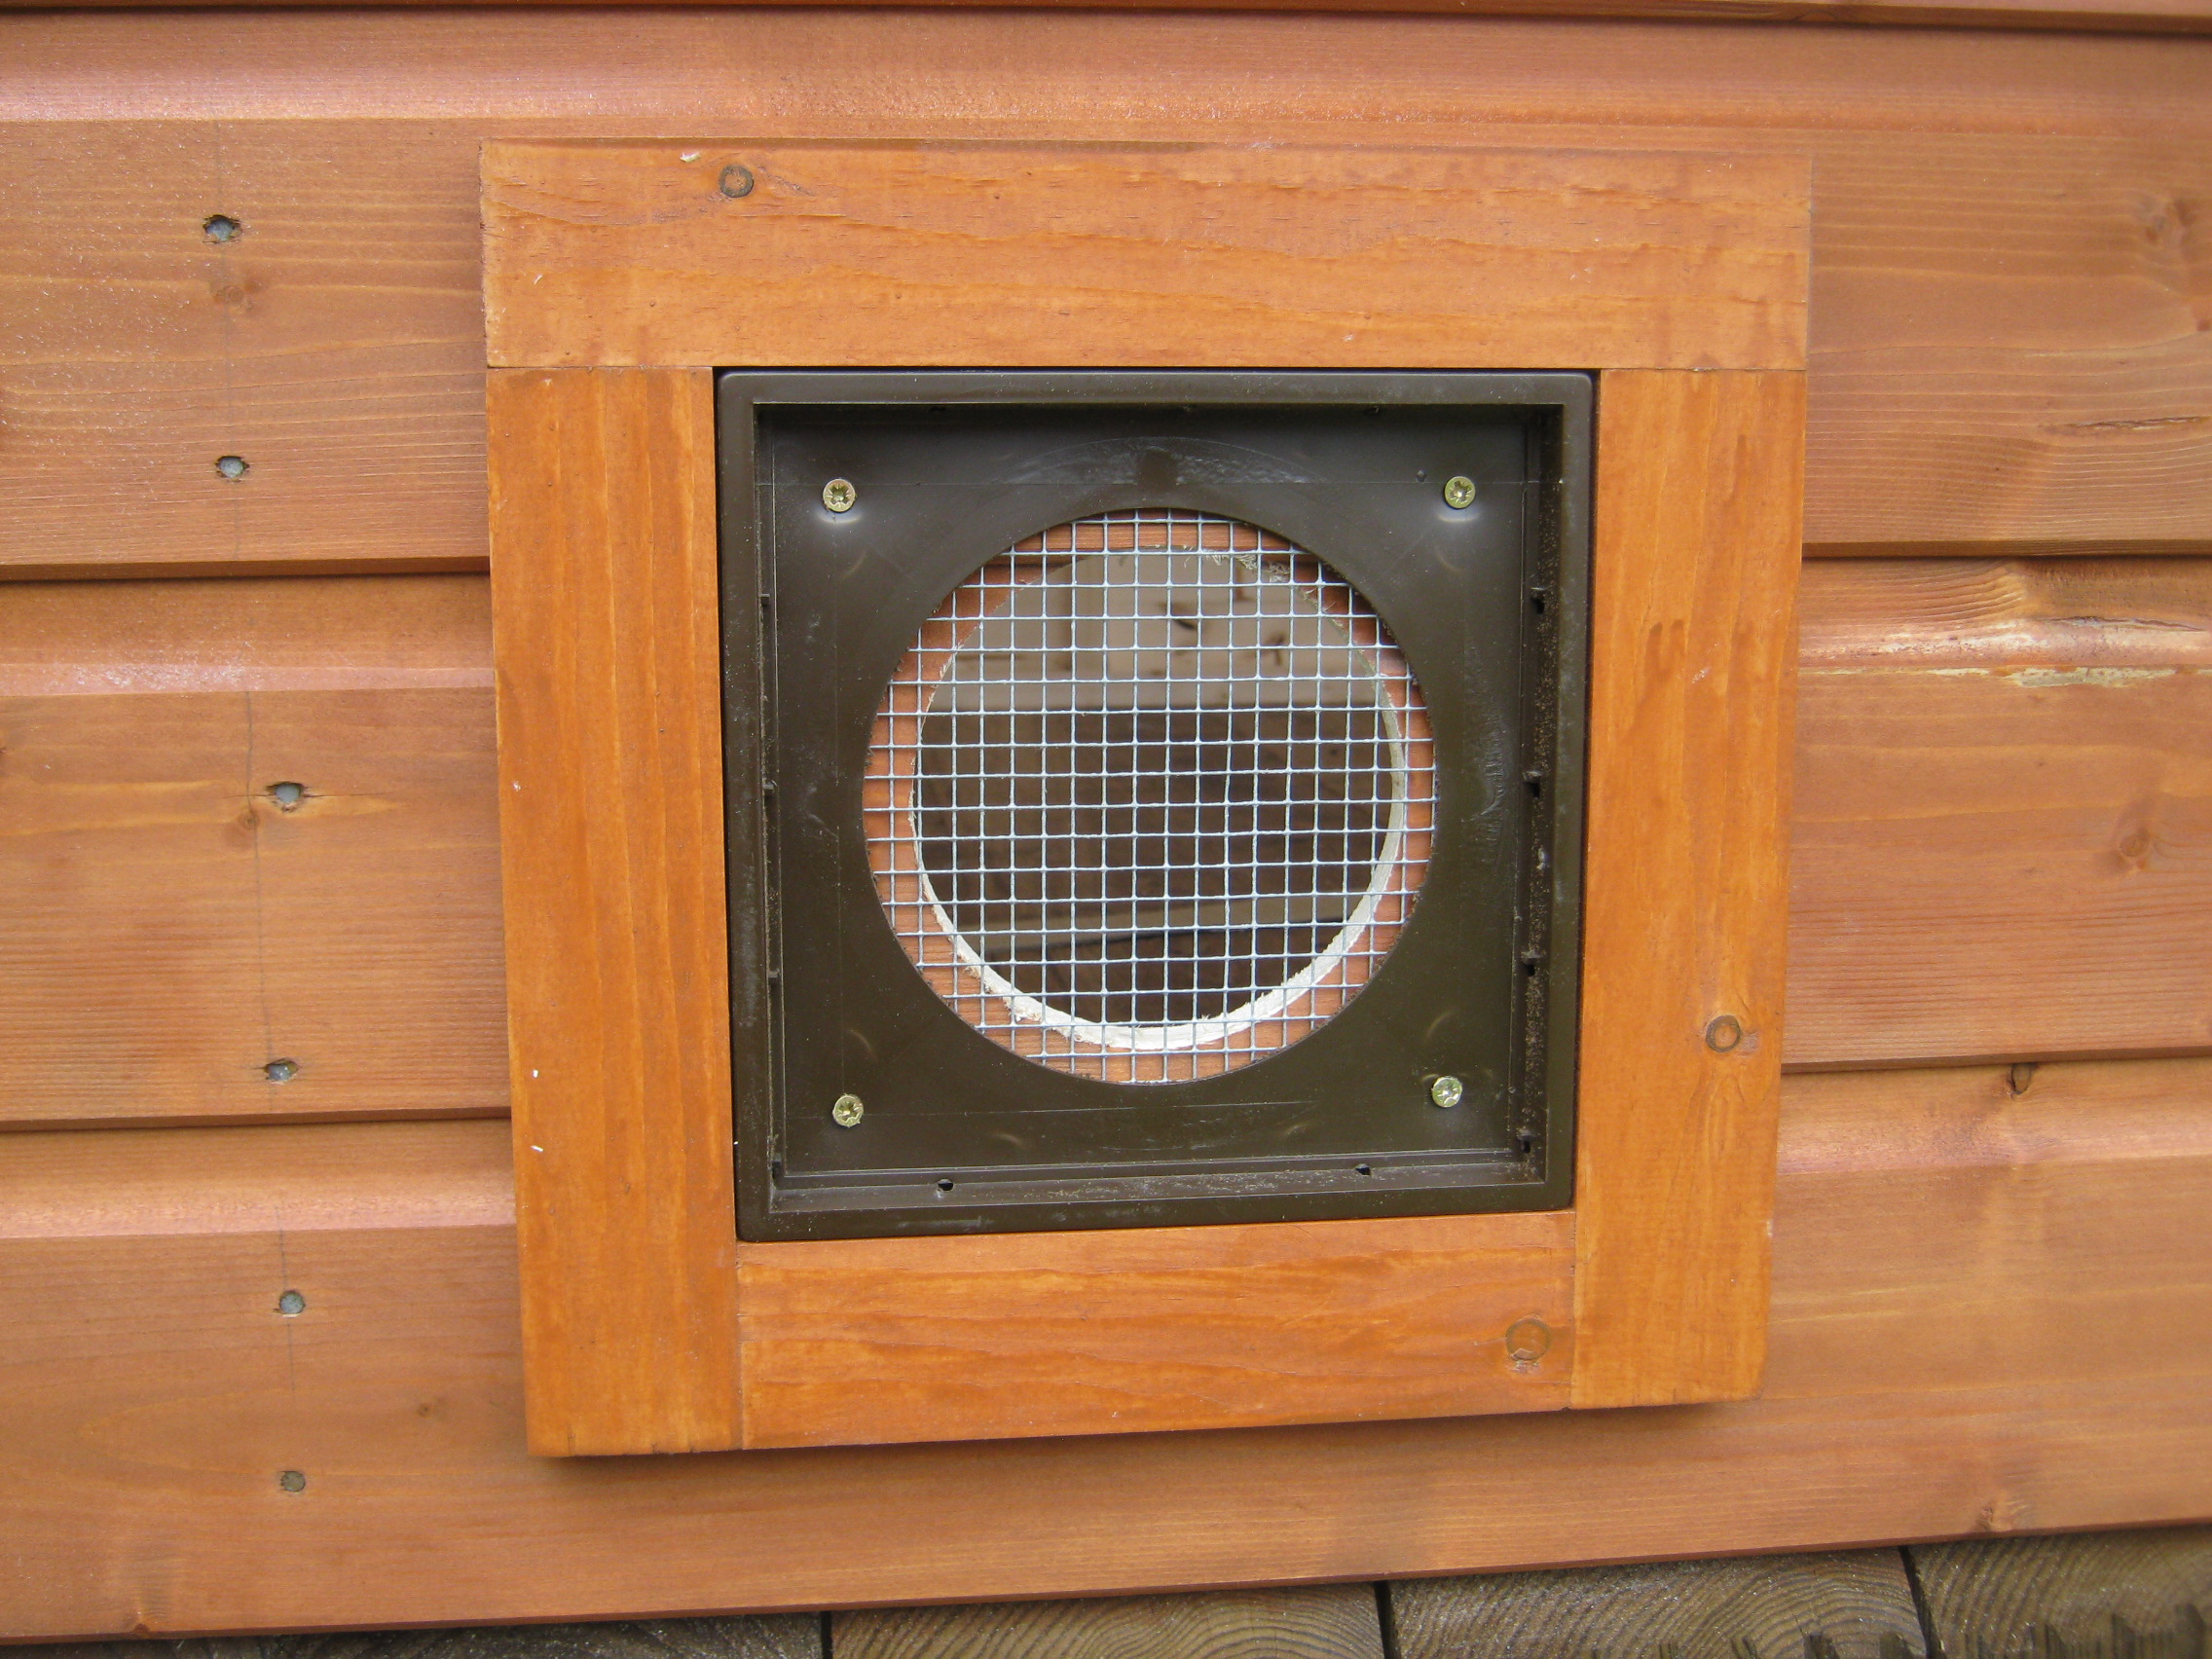
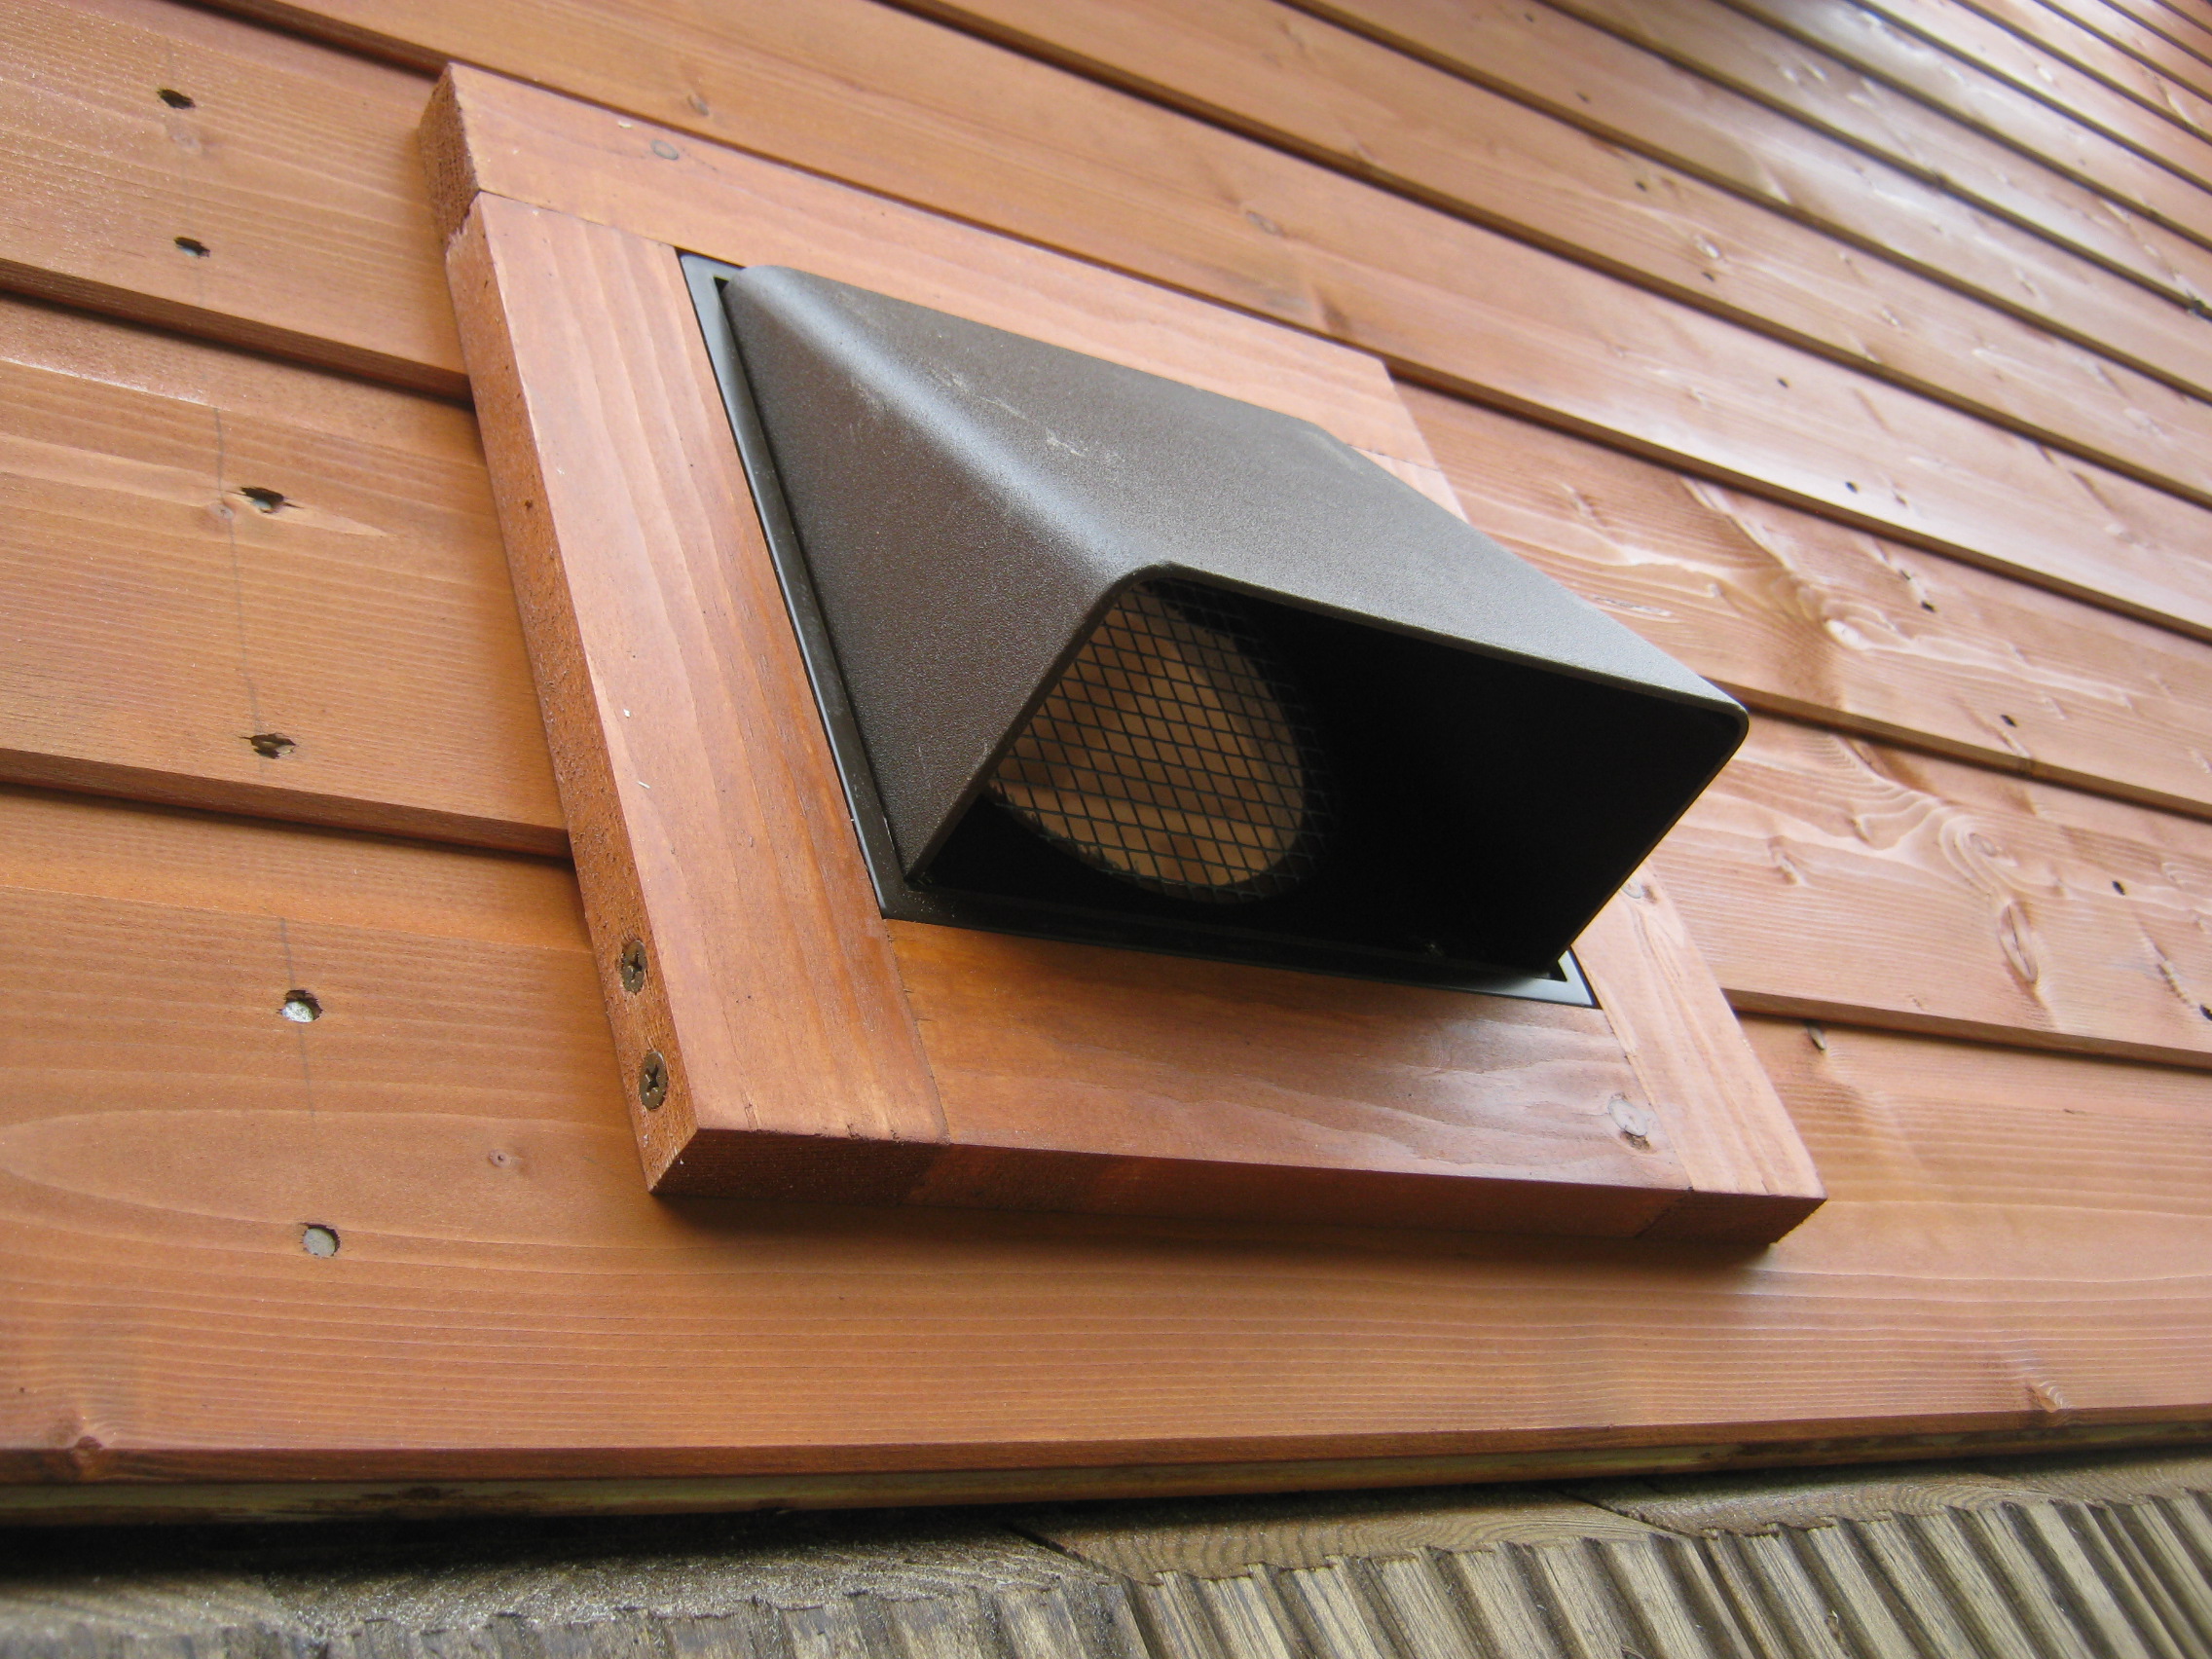
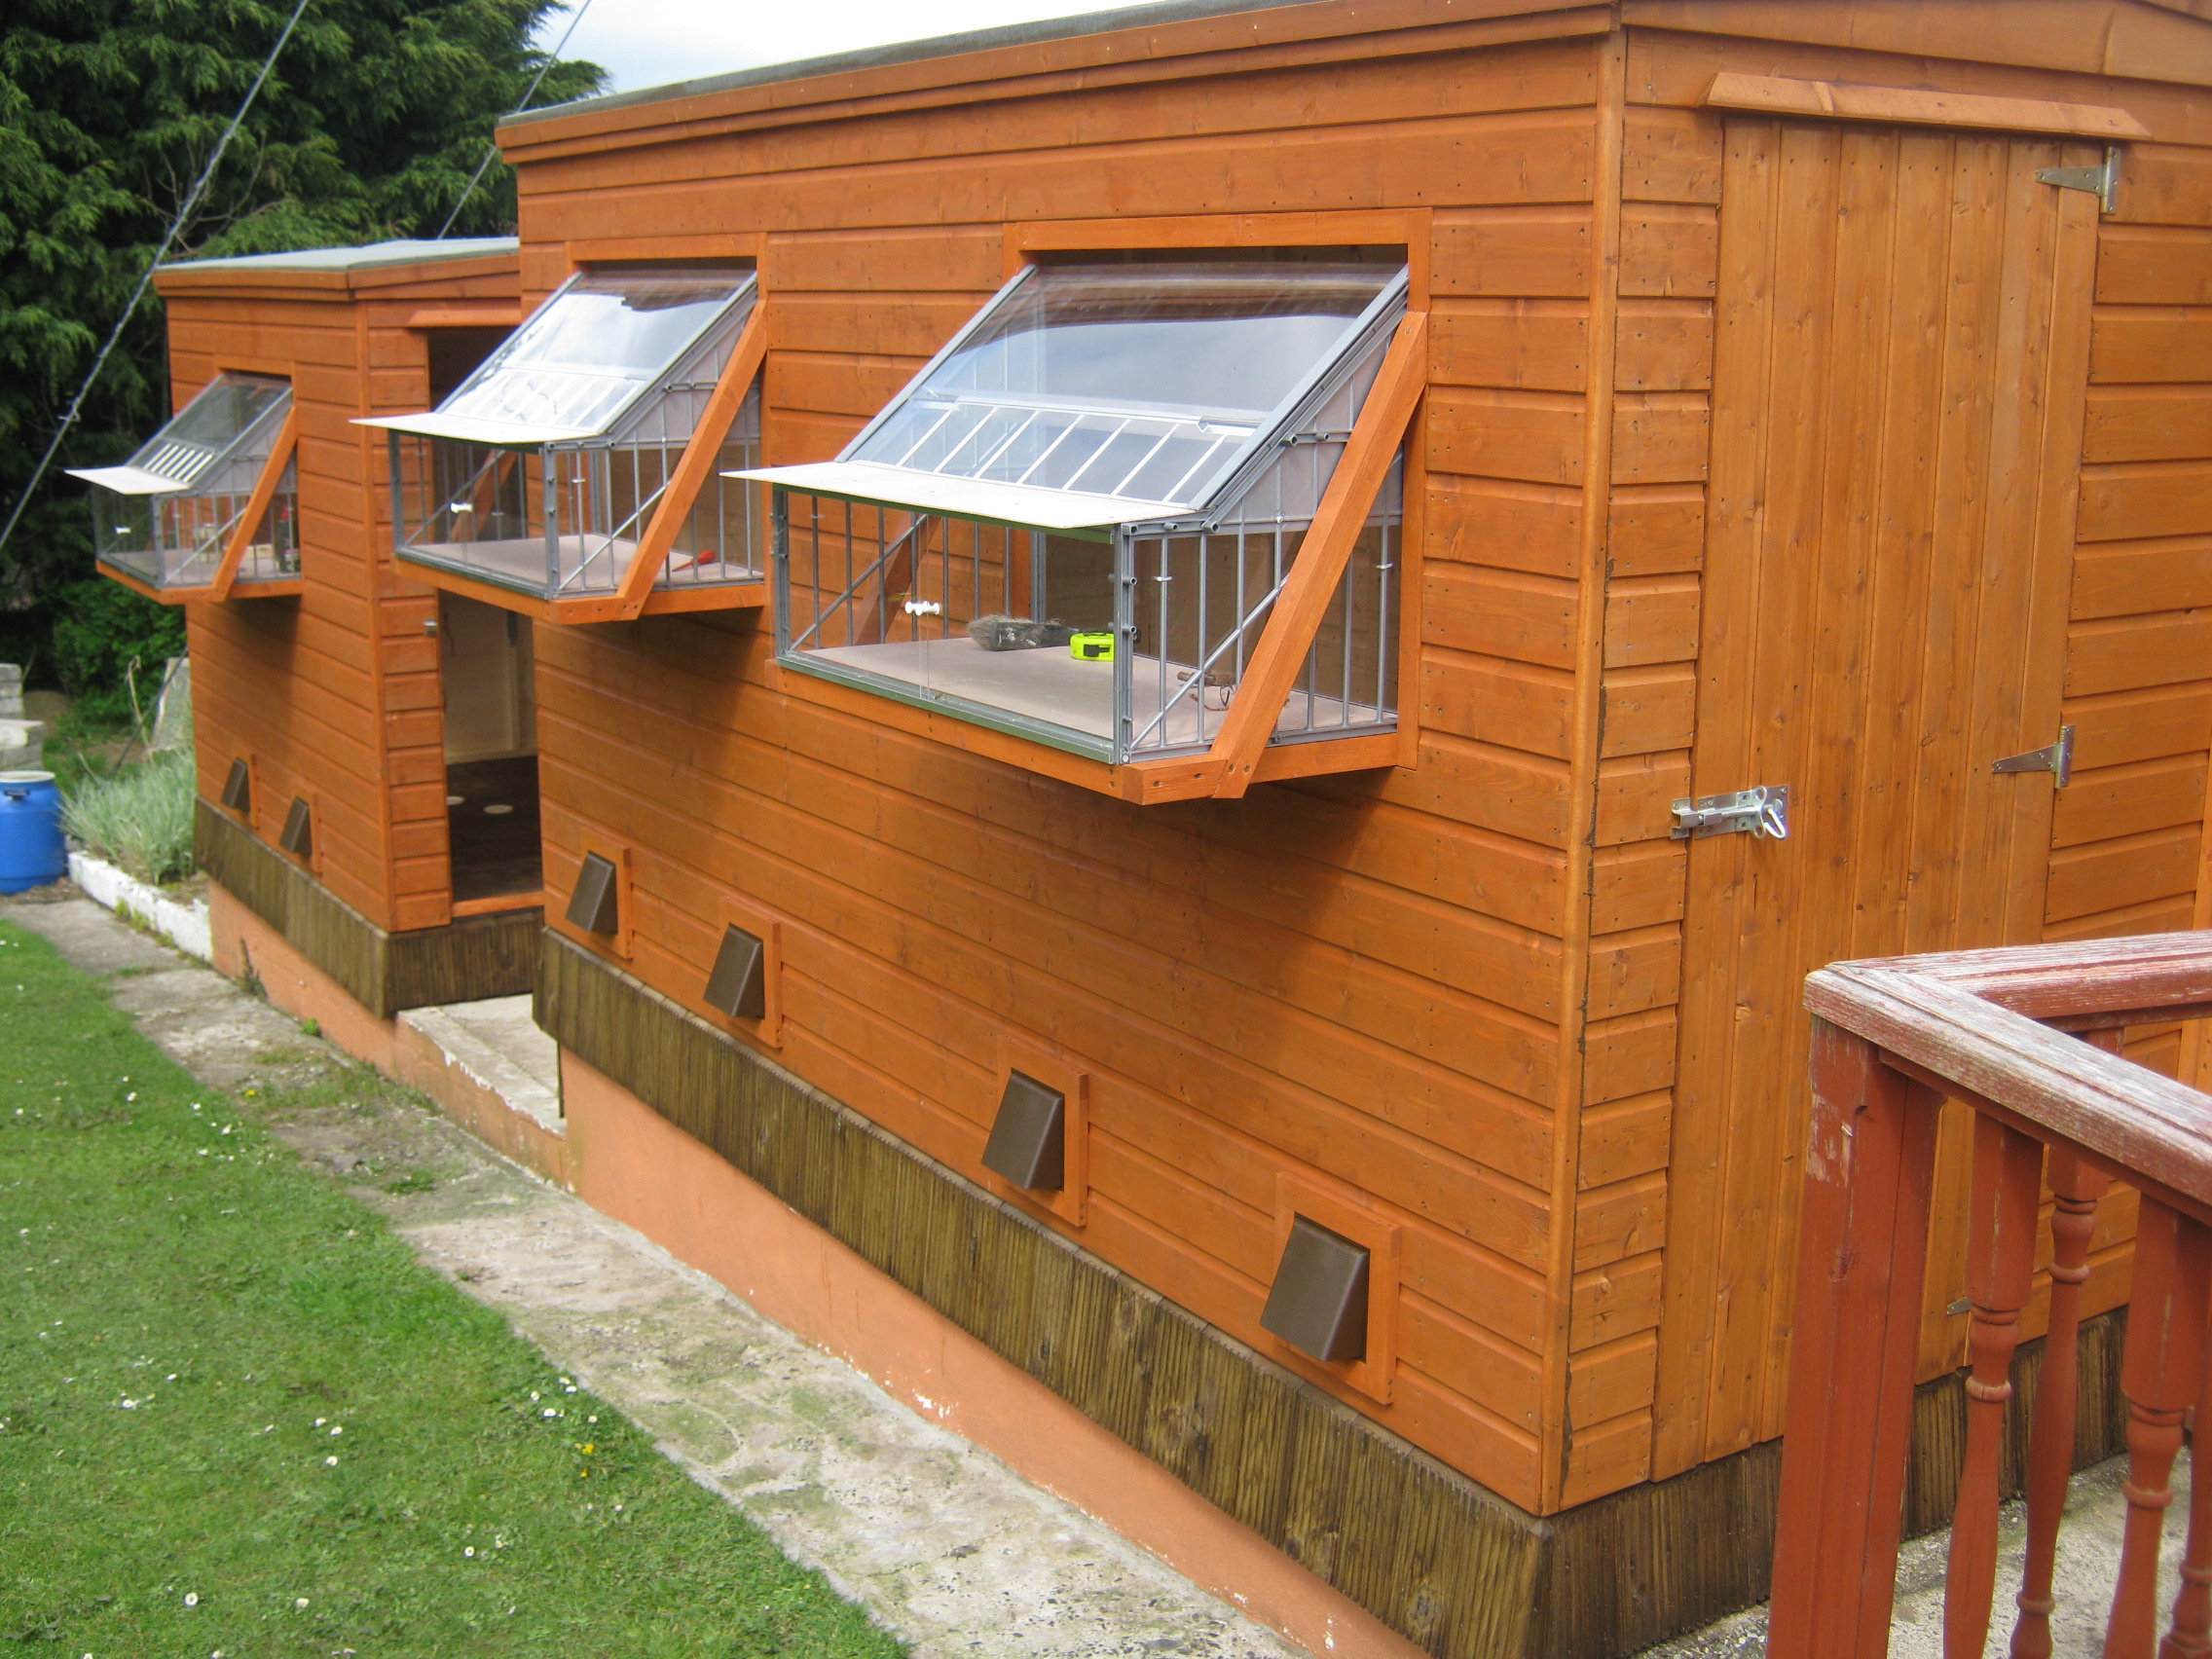
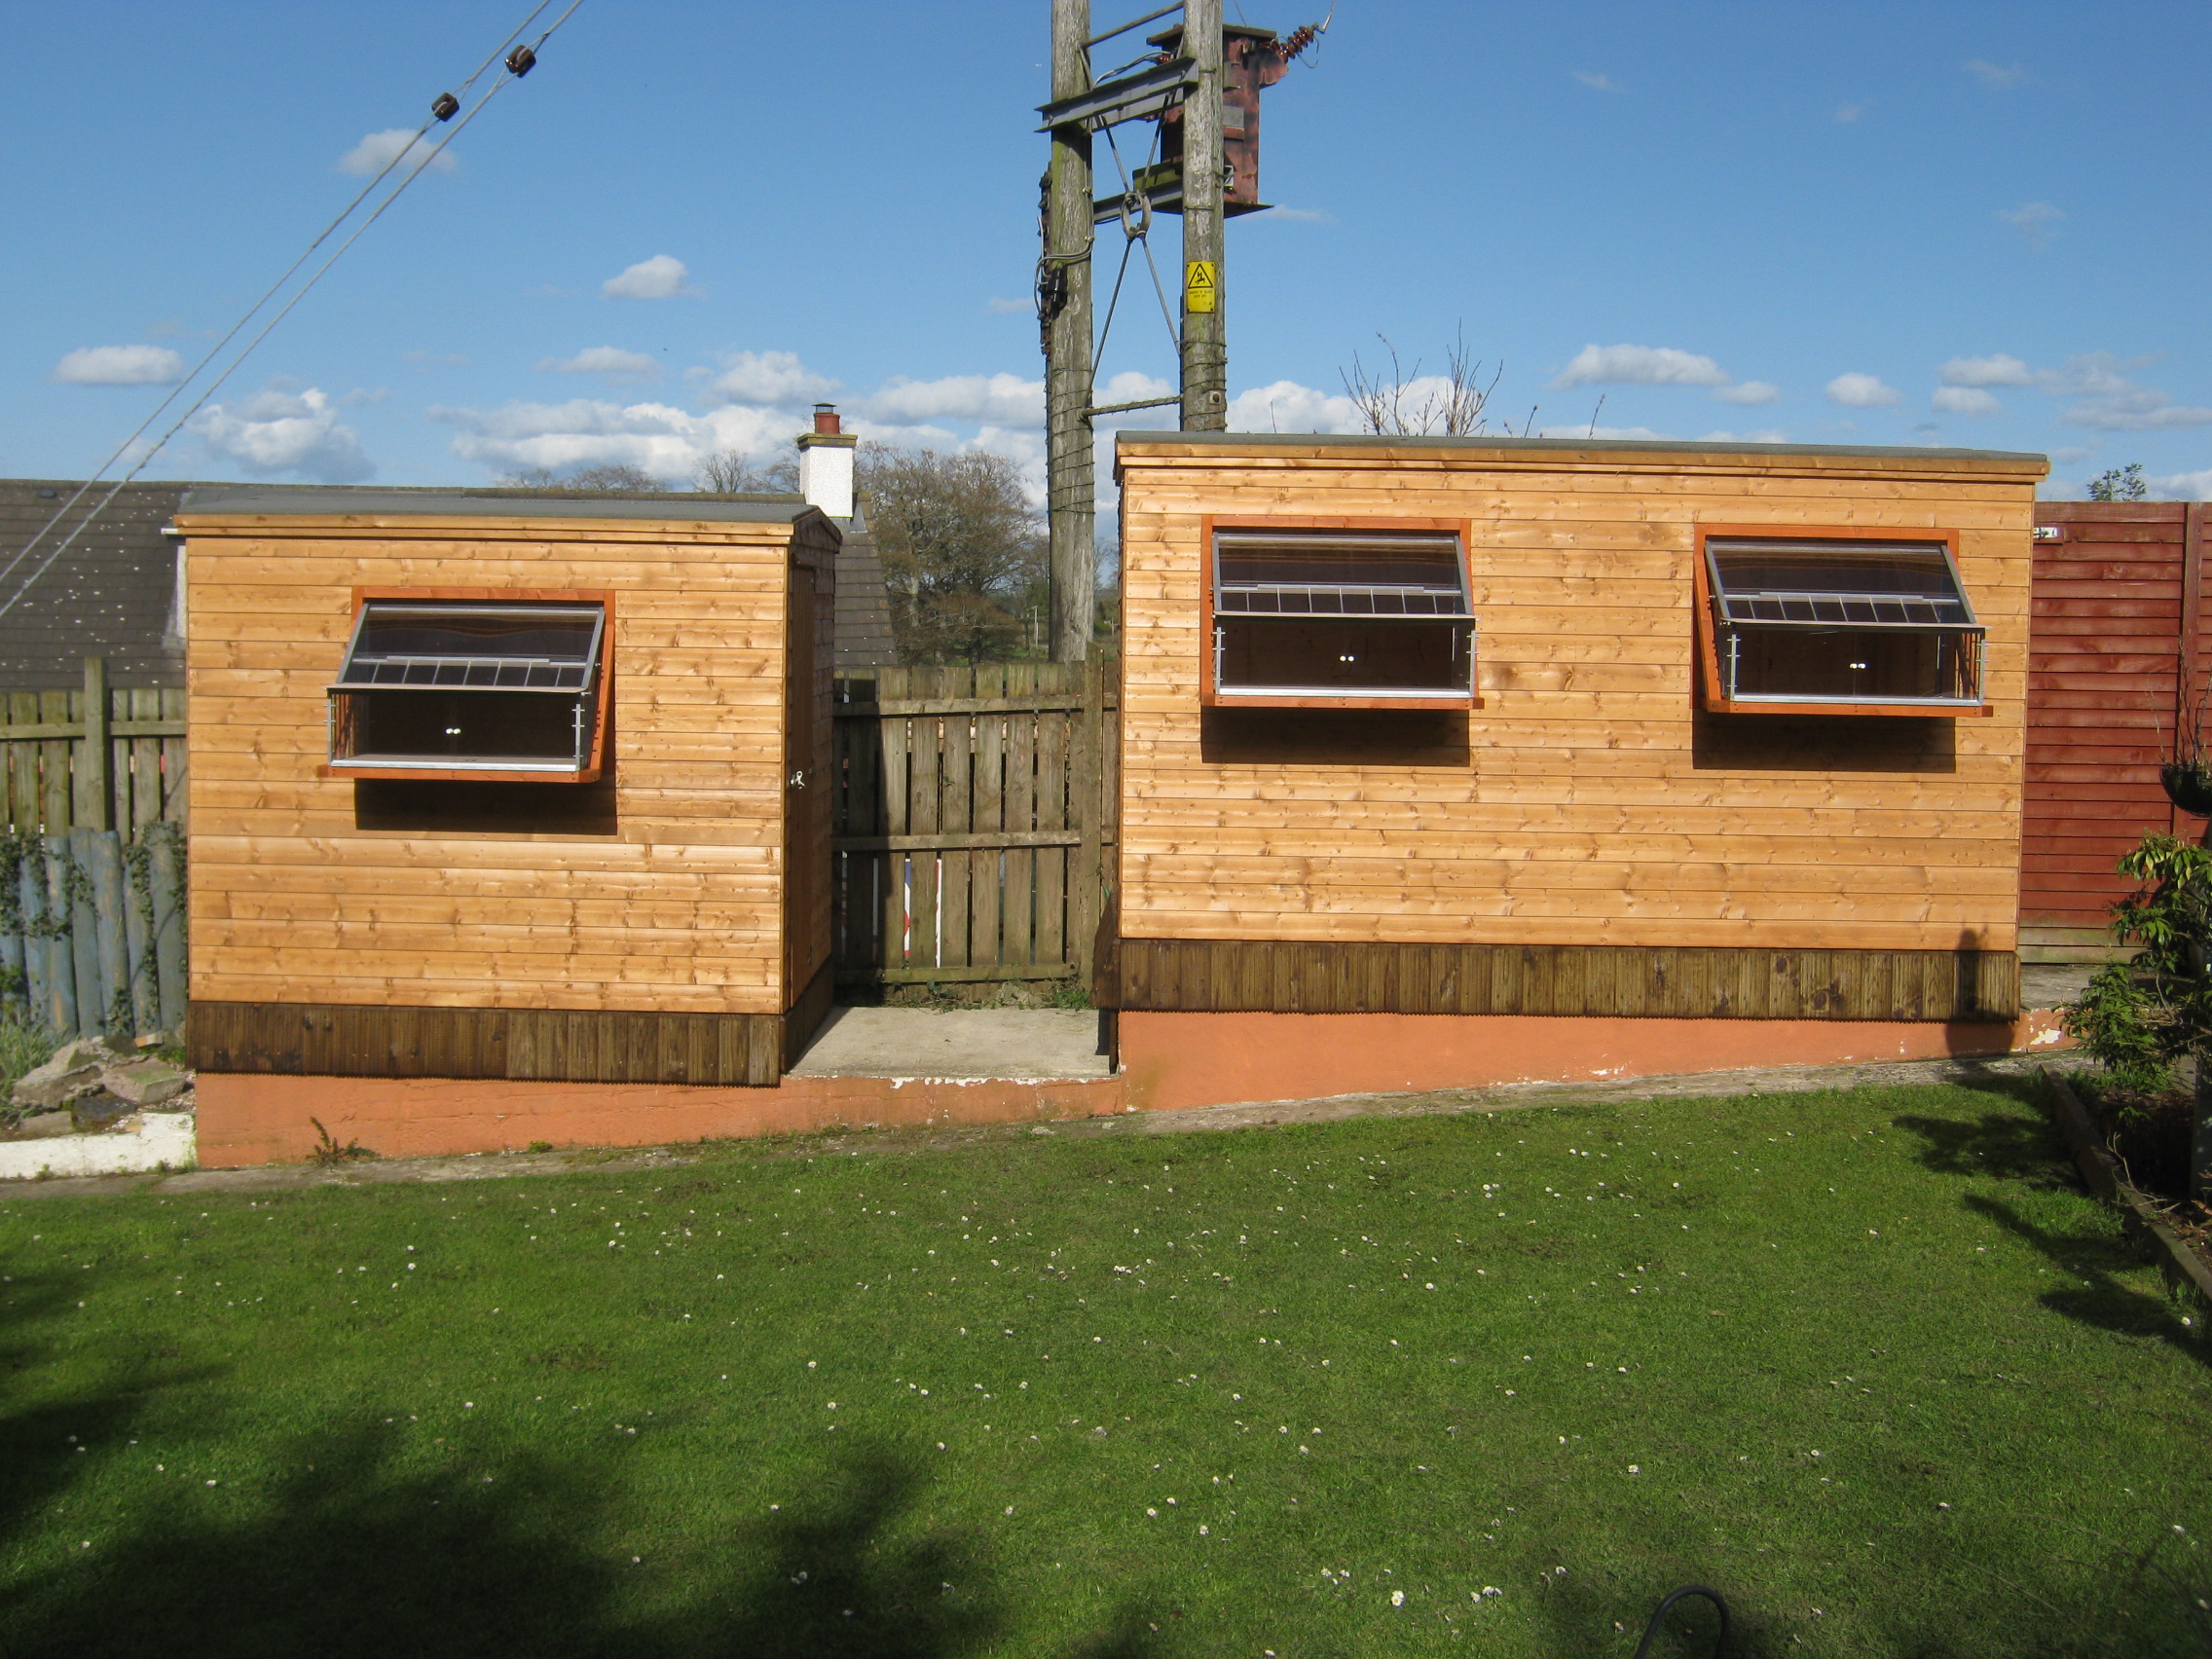
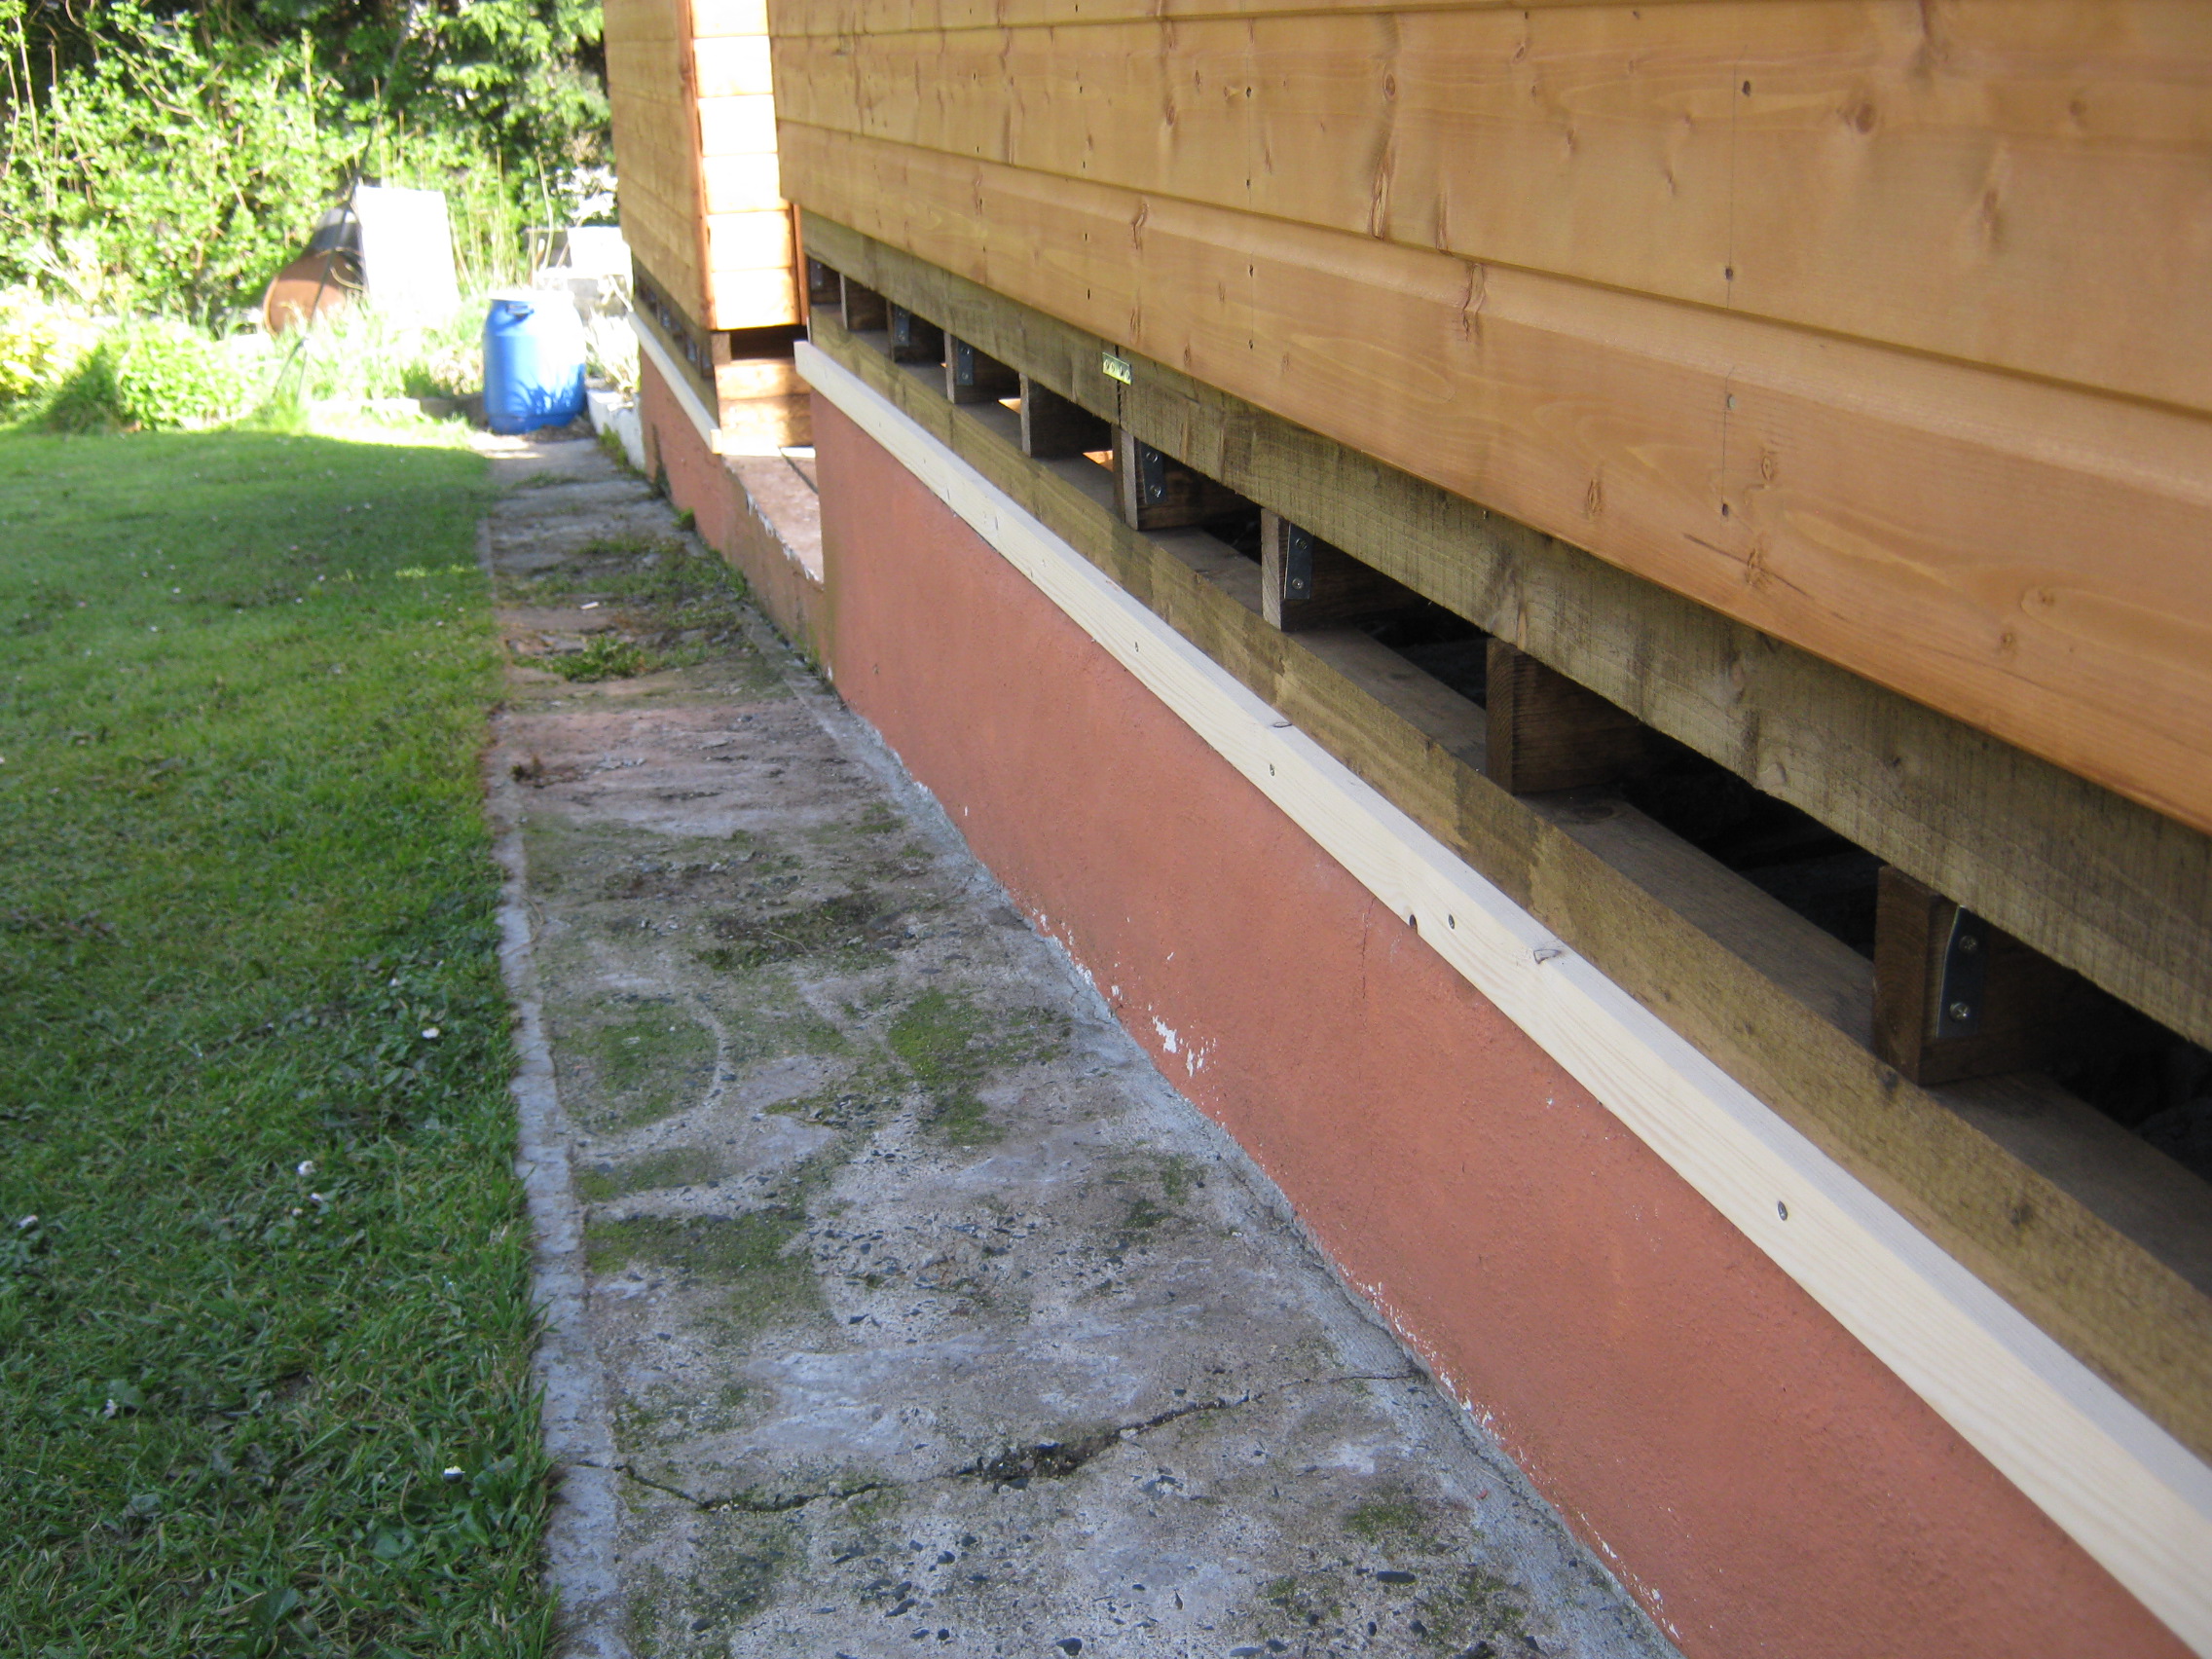
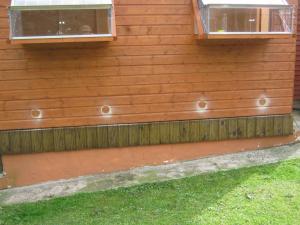
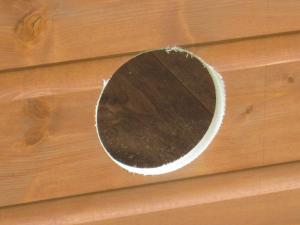
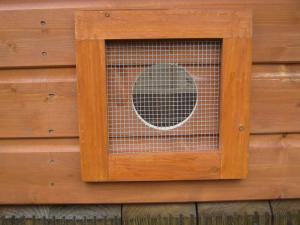
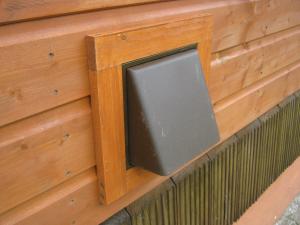
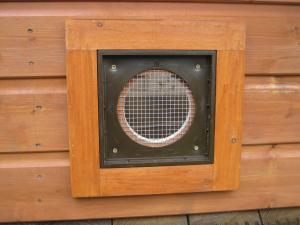
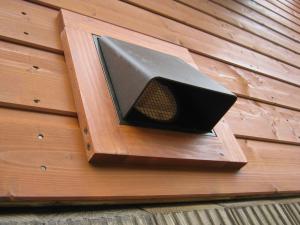
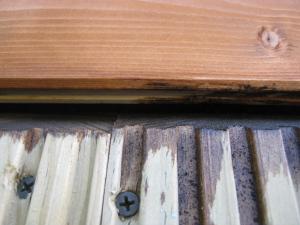
OK, air vents ! Size of holes naturally depend on vents being used. As you will notice, I have treated the lofts with Cuprinol Ultimate. A great product......and looks nice ! Firstly, I cut the holes needed. In this instance - 100mm. I then placed the timber surrounds on each hole. Within the confines of the surround, I placed a piece of 6mm square wire (stops the mice). The retainer for the vent is then located and screwed into place. This also keeps the wire in place. The outer part is then snapped into place. All joints will be sealed later. Another job done !!


-
Good morning everyone, have a good one.
-
Gladsmuir P.C.
showman replied to andy Burgess's topic in East of Scotland Federation and Club Results
Well done to all. Heavens above Andy, 2 races = 2great results......anybody would think you knew what you were doing -
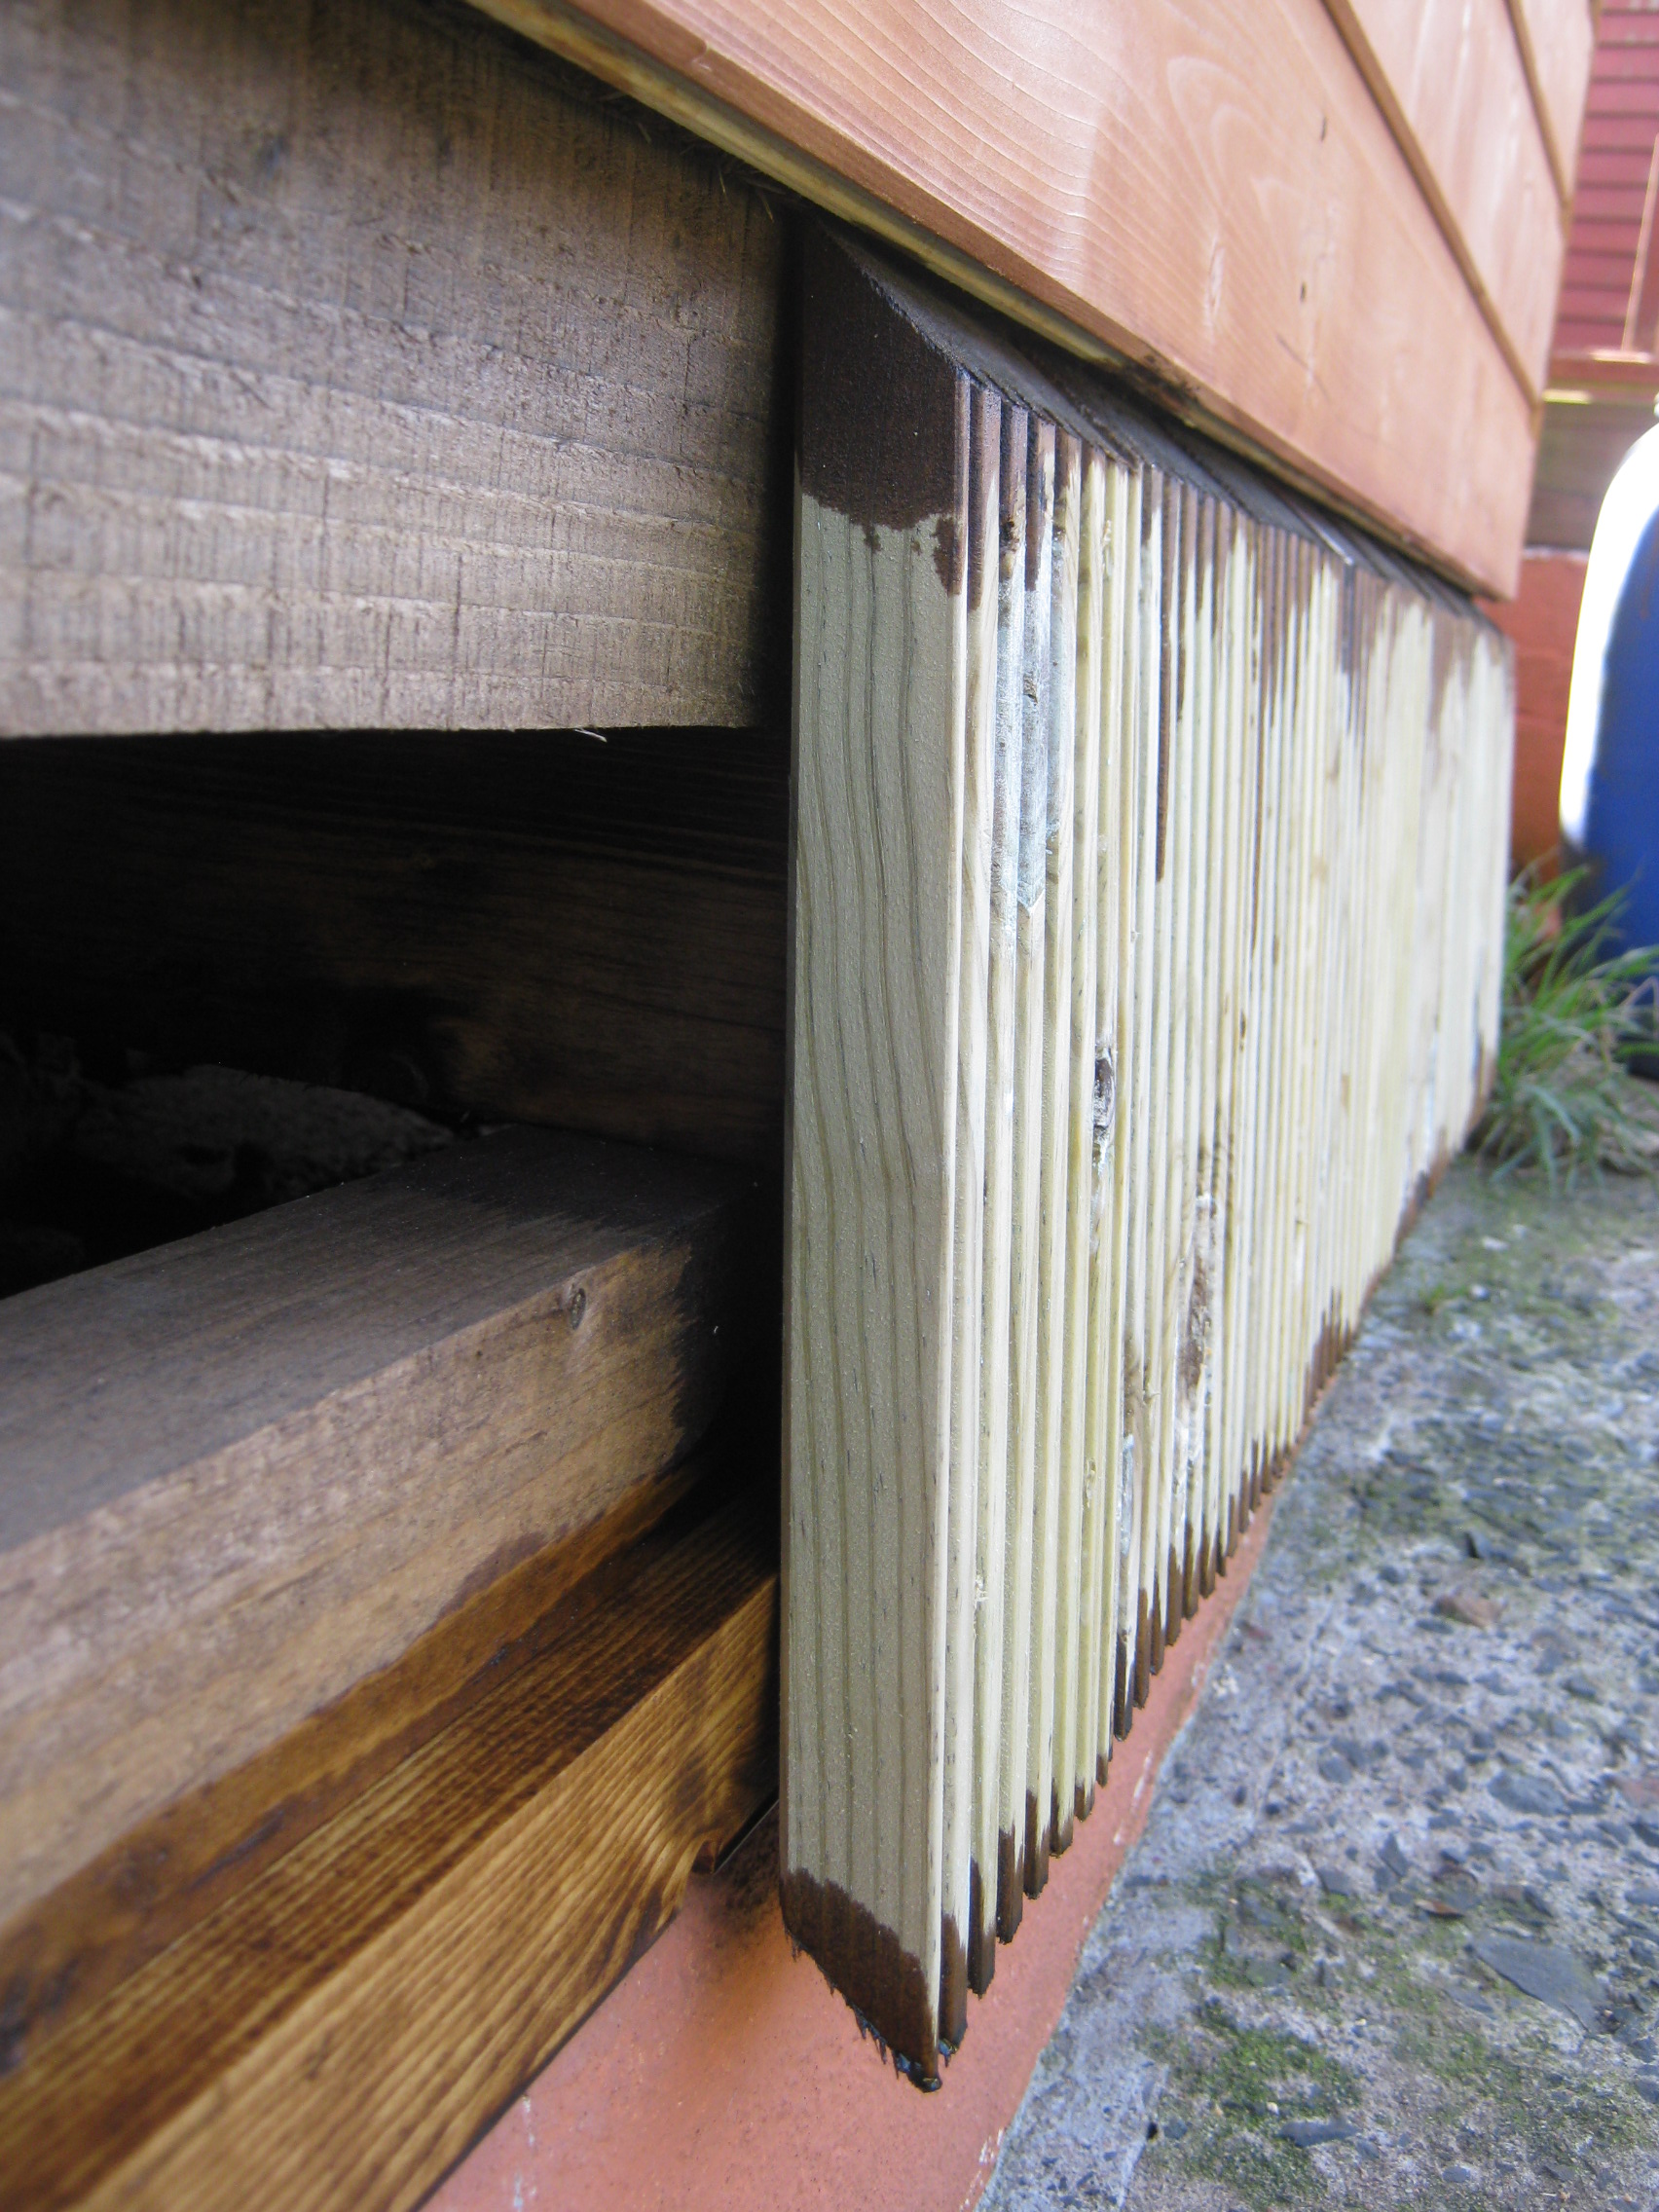
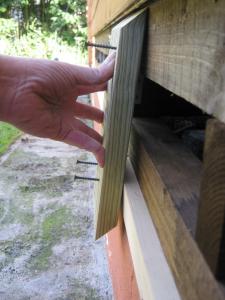
Continued thanks for all your positive comments. On the worksheet for yesterday and to-day was skirting. As can be seen from earlier pics, there was a bit of an annoying gap in the subfloor frames, so I had earlier decided to put 'skirting' on 3 sides of both lofts to tidy things up a bit. I used decking planks and cut them to the correct lengths with both ends being opposite end cut at 45degrees. The top end of each piece of decking would then fit nicely behind the bottom lip of the tongue & groove, the bottom end would also be a rain drip. I also fitted timber battens on the bottom rafter to give the 'skirt' the ability to drip further away from the bottom rafters. All skirts were creosoted. More to come....tomorrow's another day !!


-
Many thanks Andy & Alex for the recommendation. Was talking to Bill tonight. Cheers boys
-
Did you try B.Leefe & Sons ?
-
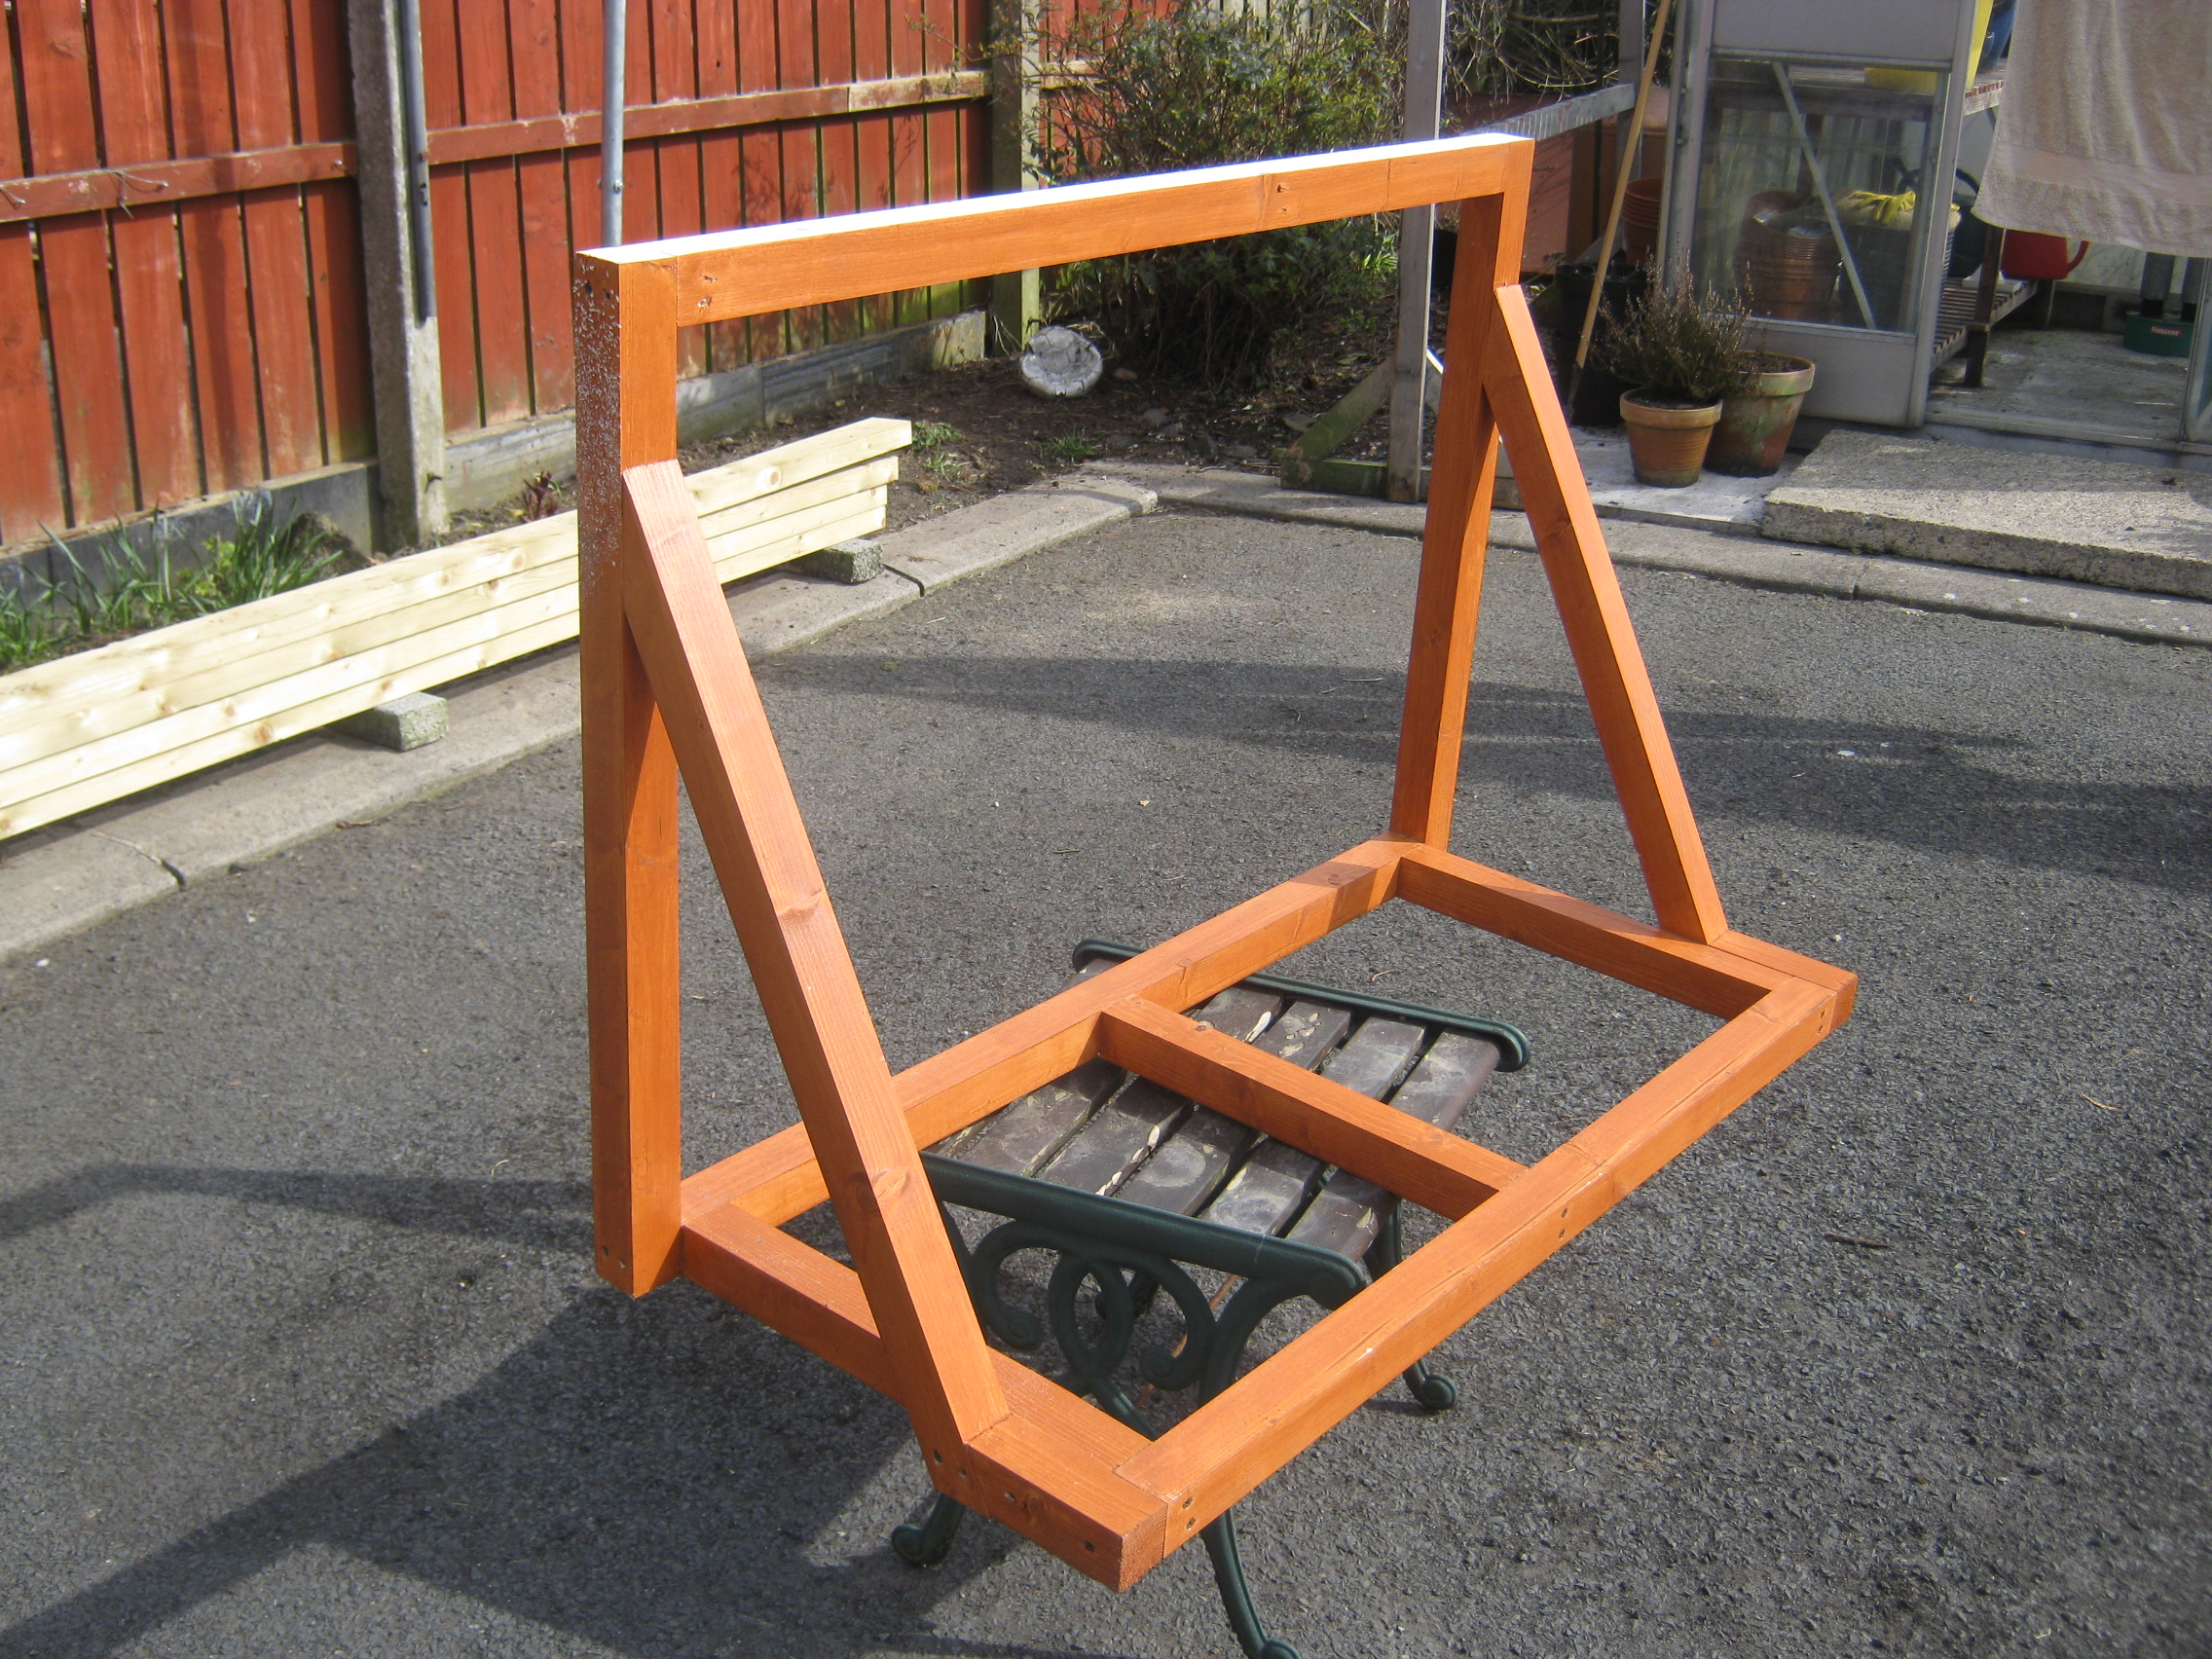
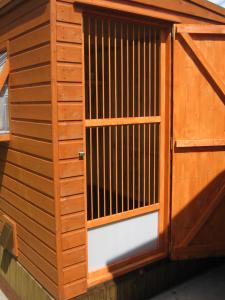
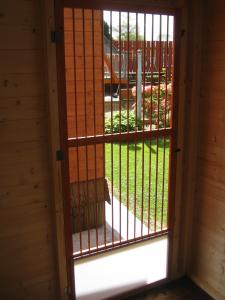
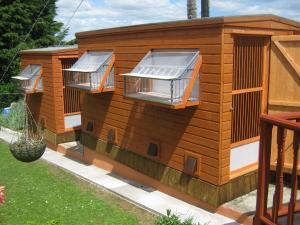
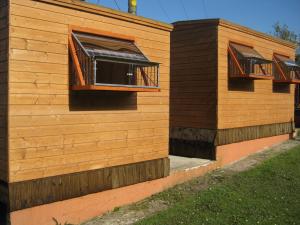
Today was Sputnik day. I wasn't quite happy with just fixing the traps to the loft. I don't think they're the strongest of things, so I wanted to strengthen them a bit, so I made 3 frames to add extra support. These were screwed inside the frames I had supplied to the maker of the sheds. Some adjustment had to be made to the sputniks i.e trimming a few of the plastic 'spuds', which then allowed the traps to slide into the strengthener frame. Anyhow, everything turned out to be a real snug fit, and I enjoyed to-day immensely. Enjoy the pics.


-
Sorry mate, close but no cigar !! I'll give you a cryptic clue........Think inside the box, not outside
-
'Mornin everyone. Hope the day goes well for you all.
-
Thanks for all the comments guys, much appreciated. On the worksheet today......get traps fitted !! When I ordered the sheds, I supplied them with 3 frames made from 3"x1.5". This would ensure the spaces left to locate the traps would be exact. Hopefully, you can make out from the photo, that the frames I gave them are thicker than the framework they use, and so the frames on the inside are not flush. Why I did this will hopefully become clear as we progress.

-
The sheds were made by Martin Jamiesons' , Banbridge. Really nice chap & a great bunch of lads.
-
Well, the two boys arrived at 10.00am and were done and dusted by 11.30am (tea break included)


-
Well, that was part of the reasoning for getting garden sheds and doing my own conversion.....keeps the cost down !! I would have the ability to make my own, but unfortunately don't have the space for storing. Turned out a lovely morning and am anxiously waiting the boys coming with the sheds. Feel a bit like a child at Christmas !
-
Thanks Andy, and also many congrats on last weekends result
-
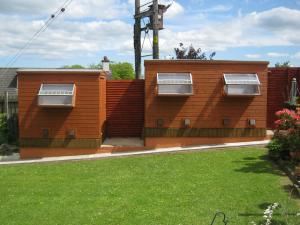
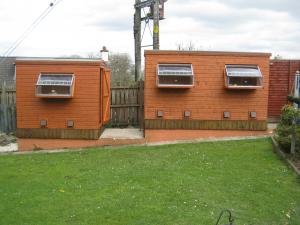
Hi folks, As some of you will know, I am about to make a return to the pigeon fancy. The old show racer lofts were a bit beyond their best, so 3 of them were removed some years ago, with the 4th taken down and given to a young local lad this past Winter. Recently I purchased 2 garden sheds, knowing I can do any alterations & additions myself. One is 8'x6', the other 12'x6'. I have attached a few pics. so you can follow the project through, step by step, hoping it will give some interest, especially to those who may be thinking of a similar venture. Having carried out a restoration of the old loft piers, I was able to sort the framework for the sheds to stand on. The company making the sheds really helped at this stage, by delivering the floors only first, thus allowing me to match their measurements exactly. The first rafters laid are 4" x 2" and pressure treated. Second row are 3" x 1.5". The shed floors (as supplied are also on 3" x 1.5" timbers. All timbers are creosote treated top and bottom before being laid. All being well & weather permitting, the sheds are to be delivered and erected tomorrow, and more pics. will follow. I'll cut the grass for them !! Cheers, Paul PS Click on pics to enlarge


-
Mornin' all. Not a bad day here, so hopefully will get the rest of the wooden framing made and stained for the new lofts. Hopefully, will get the lofts erected next week sometime (weather permitting).